Monday, July 30, 2012

Cocoa Glazed Banana Bundt Cake

Et voila, the first cake I baked in our new apartment!

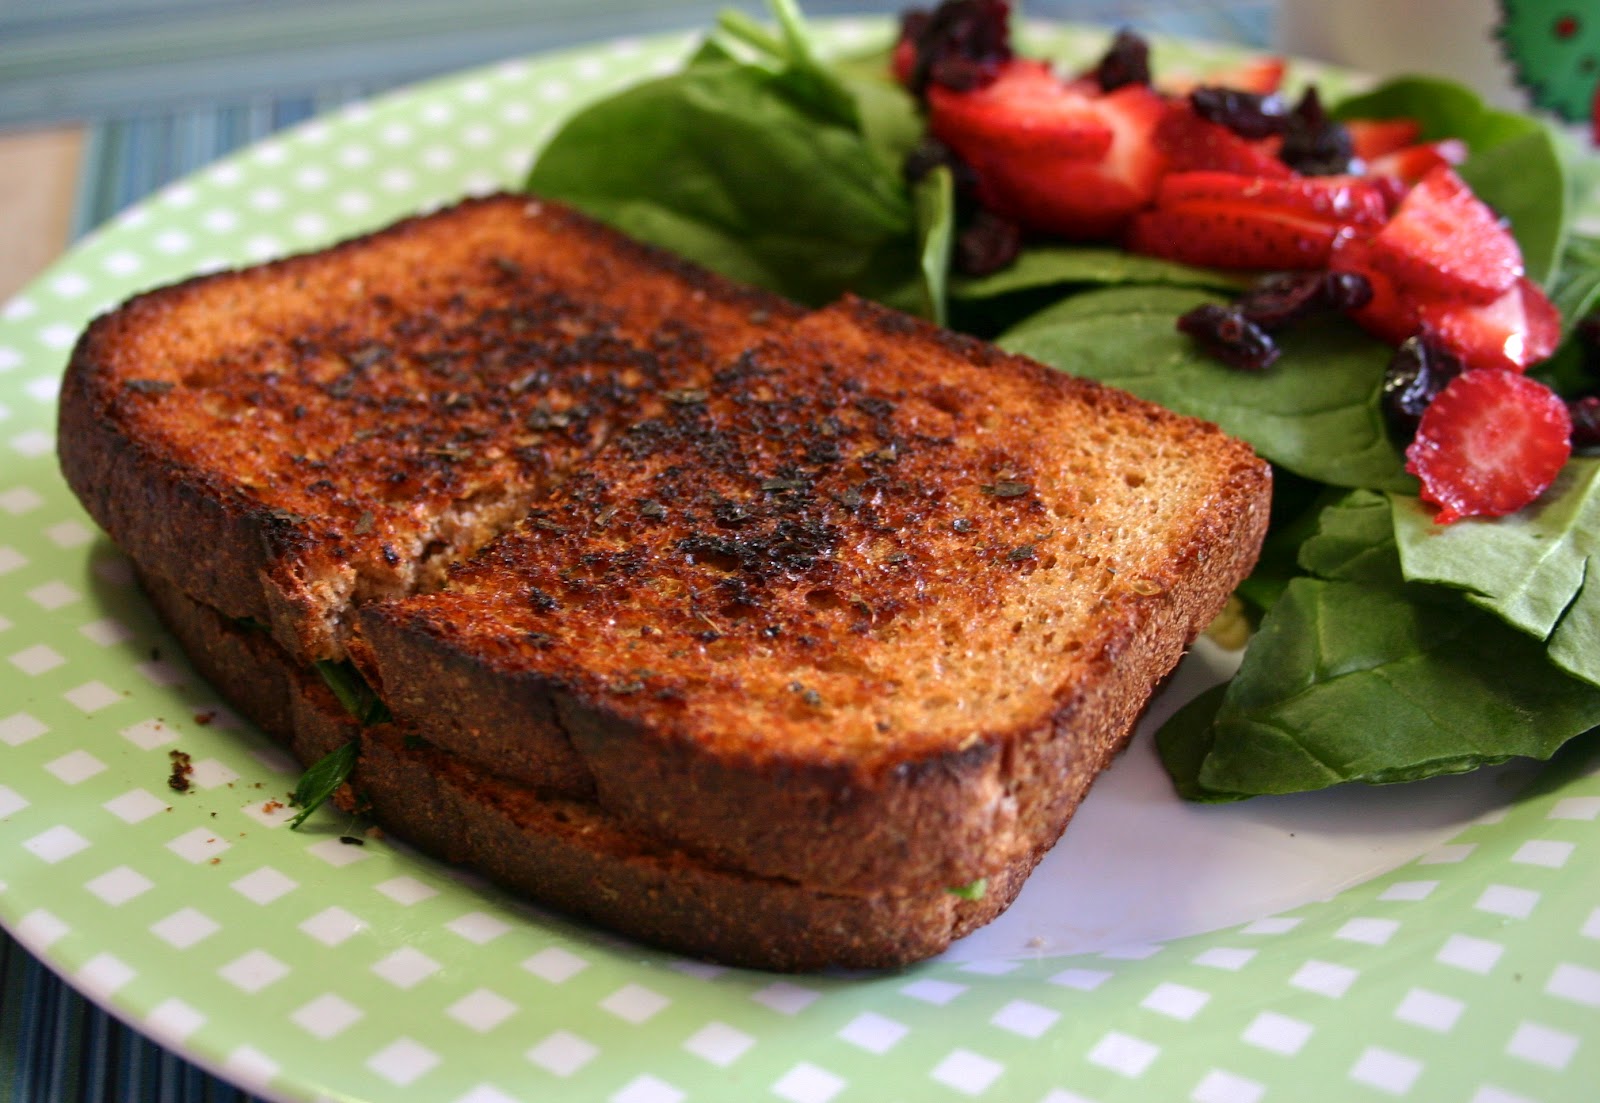
This gorgeous thing was the product of a very domestic day alone - my wonderful husband was at work for two days straight in Pittsburgh, so my kitchen and I got reacquainted in a very intense way.  After the cake came out of the oven, those insane sprinkly pancakes found themselves on the stovetop, and broccoli fritters made it to the dinner table a few hours later.

First of all: SO. MANY. DISHES.
Second of all: SO. MUCH. DELICIOUS.

This cake is chock full of scrumptious, moist, banana flavor and the quick-and-easy glaze tastes like hot fudge.  The baking method for the cake is easily one of the most interesting I've ever encountered: the cake stays in the oven for nearly two hours at a low temperature, then immediately makes its way into the freezer for an additional hour.  The resulting cake is insanely moist and flavorful, and the outside doesn't get super dark like many banana cakes are wont to do in a hot oven.  Though it took time to bake, I was absolutely thrilled with the quick prep (especially with my new KitchenAid 6-quart pro!!) and the delectable result.  Thank goodness I found some people to help me consume it, or this delicious cake would have become 10 new delicious pounds around my waist!

I highly recommend this recipe.  If muffins or banana bread sound boring the next time you have overripe bananas, go for cake!

Banana Bundt Cake
Source: adapted slightly from My Baking Addiction

Ingredients:
1 1/2 cups mashed ripe bananas
2 cups white whole wheat flour

1 cup all-purpose flour
1-1/2 teaspoons baking soda
1/4 teaspoon salt
3/4 cup unsalted butter, at room temperature
2 cups granulated sugar
3 large eggs
2 teaspoons pure vanilla extract
1 1/2 cups buttermilk


Directions:
Place a rack at the center of the oven and preheat to 275˚F.  Thoroughly grease and flour a 12-cup nonstick bundt pan, or use a baking spray with flour to coat it.

In a small bowl, mash the bananas.
In a medium bowl, mix together the flours, baking soda, and salt.


In the bowl of a stand mixer fitted with the paddle attachment, or in a large bowl with a hand mixer, cream together the butter and the sugar until pale, light and fluffy, about 3 minutes.  Add the eggs one at a time, beating well until fully incorporated, then stir in the vanilla.  Alternately add the buttermilk and the flour mixtures to the bowl of the mixer, mixing until combined and smooth.  Stir in the mashed bananas.


Transfer the batter to the prepared bundt pan.  Bake in the preheated oven for about 1 hour 40 minutes, until a toothpick inserted into the middle comes out clean.  
Immediately transfer the pan to the freezer for about 1 hour.  Remove the pan from the freezer to a rack for at least 3 hours.


When ready to serve, invert the cake onto a serving plate or cake stand and prepare the glaze.


Simple Cocoa Glaze

Ingredients:
1/2 cup powdered sugar
3 tbsp unsweetened cocoa powder
1 tsp pure vanilla extract (I used Mexican vanilla)
2-3 tbsp half and half or whole milk


Directions:
Combine powdered sugar and cocoa powder in a bowl and whisk together thoroughly.  Switch to a spoon and add vanilla.  Gradually add the milk or half and half until a thick but pourable glaze is formed.  Spoon over the top of the cake and allow the glaze to drip down the sides.  Give it an hour or so to set slightly, then slice and serve.  Enjoy!

Monday, July 23, 2012

Birthday Cake Pancakes with Adults-Only Vanilla Cake Glaze

 My birthday was a week ago.

There was no cake.
Which was totally my own fault - my layer cake pans were in storage and I totally ran out of time to make myself a cake anyway.
And don't get me wrong, my birthday was incredible!

That morning, I had to wake up super early to drive half an hour to a class I was assisting with.  Before I woke up, Jon had left the apartment, and he came back with my favorite pancakes as a surprise.  When I got back from work that night, a dinner of pan-seared salmon with pesto and parmesan-crusted baked zucchini was almost ready - I'm blessed with a husband who can cook really well!  And then, before the night was over, he took me downtown to The Chocolate Bar for drinks and dessert.  The day was not extravagant or big or blown-up, but because I got to spend so much time with my new husband, it was perfect.

BUT.
Birthday with no cake?  Weird!
So this weekend, I made up for it.

I present to you: Birthday Cake Pancakes.
Also known as the best pancakes EVER.

It's Funfetti in pancake form!
Could anything BE more perfect??

Um, yes.

Birthday Cake Pancakes with a boozy Vanilla Cake Glaze.
SWOON.

Cake mix.  Vanilla.  Sprinkles.  Topped with powdered sugar, more vanilla, half and half, and CAKE VODKA.

Please, for the love of all that is good, invite some girlfriends over and chow down on these suckers.
And depending on how much glaze you use, you might wanna pick a chick flick and stay put for a while ;)

Birthday Cake Pancakes
Source: barely adapted from My Life as a Mrs. via Rachel Cooks' pancake party
Serves: 4-6

Ingredients:
1 cup cake flour
1/2 cup all-purpose flour
1 cup yellow cake mix
1 tbsp sugar
1 tsp baking powder
1/2 tsp baking soda
1/4 tsp salt
2 eggs, beaten
1-1/2 cups buttermilk
1/2 cup milk
2 tbsp butter or coconut oil, melted
1 tsp vanilla extract
1/2 cup rainbow sprinkles
Butter, for the griddle
Adults-Only Vanilla Cake Glaze, for serving (recipe below)

Directions:
In a large bowl, whisk together the flours, cake mix, sugar, baking powder, baking soda, and salt.  In a medium bowl, beat together the eggs, milks, butter or coconut oil, and vanilla.  Add the wet ingredients to the dry and mix together until combined.  Fold in the sprinkles.
Heat a skillet or griddle over medium-low to medium heat.  Preheat the oven to its lowest temperature setting and have an oven-safe plate ready.  Add a bit of butter, allow it to melt, and spread it out.  Using a 1/4-cup measure, add the batter in rounds and allow them to cook until the edges are set and the tops are covered in popped bubbles.  Flip and continue to cook until the pancakes spring back when pressed with a spatula.  Remove pancakes to the plate and place in the preheated oven while you cook the remaining batches of pancakes, adding a little bit more butter to the pan or griddle before each batch.  Serve with syrup or glaze and ENJOY!

Adults-Only Vanilla Cake Glaze

Ingredients:
1 cup powdered sugar
1 tsp vanilla extract
1-1/2 to 2 tbsp cake flavored vodka
1-2 tbsp half and half

Directions:
Using a spoon, stir together the ingredients, starting with the lowest recommended amount of liquid and adding more if necessary, until a smooth and slightly thick glaze is formed.  Spoon liberally over Birthday Cake pancakes and enjoy!

Friday, July 13, 2012

Cherry Vanilla Cake with Almond Streusel

What do you do when you have fresh cherries in the fridge?

Snack on them.  Endlessly.

At least, that's my husband's philosophy.  He's a snacker by nature - he will walk by the fridge about 15 times a day just to grab a handful of strawberries or a couple cherries.  If I look in the refrigerator at the end of that day, I'll be shocked by the depleted store of fruit!

See, I buy food with a purpose.  I try to only shop once a week, buying exactly what I think we'll need for meals and structured snacks for the week.  Fruit, for me, goes into cereal, salads, or baked goods, and I try to have the amount in the fridge that I'll need for whatever project I have in mind.
So you can imagine that having a snacker for a husband...complicates things sometimes.

It has, however, alerted me to the kinds of things that he really likes.
It works like this: if it disappears under my nose, it's a favorite.  So based on that criteria, I try to use the supply that's left to make little treats that he'll like.

Like this cake, for example.

I felt the urge to bake, saw this gorgeous cake pop up on Two Peas and Their Pod, and decided to adapt the recipe to what I had on hand.  The cherry supply - which started at close to three pounds - had been drastically depleted by snacking, but I had exactly enough left for the cake!

I changed the recipe up a bit to include only what I had in stock, but whether you use the original recipe or my adaptation, I can pretty much guarantee you'll be happy.  The original recipe uses almond extract in the cake, almond paste in the streusel, and an almond glaze.  I left off the glaze entirely, swapped out the almond extract for an extra dose of Tahitian vanilla extract - which is heavenly when combined with fruit - and used slivered almonds to add a crunch to the streusel topping.

The day I made this, I left it on the counter to cool while I went to work.  Jon got home before I did, and let's just say I'm lucky I came home to a whole cake!  He told me it took all his willpower to keep his hands off of it, but I don't think he regretted the wait when we cut into it after dinner: it was soft, moist, and bursting with flavor.  Neither one of us was displeased with the idea of having a piece every night after :)

I don't have a cherry pitter, so pitting and halving the cherries was thus a lengthy and messy process.  It was totally worth it for such a delicious and versatile cake, but I'd definitely suggest investing in one!  It takes the cake from a special occasion cake to something you could make and eat any night!

Or any morning.
Say, a lazy Friday morning while watching Boy Meets World in your pajamas.

Not like I actually do that...or anything...

Cherry Vanilla Cake with Almond Streusel
Adapted from Two Peas and Their Pod

Ingredients:
For the cake:
6 tbsp unsalted butter, at room temperature
1 cup granulated sugar
1 large egg
1 tsp Tahitian vanilla extract
1/2 cup buttermilk
1-1/2 cups unbleached all-purpose flour
1-1/2 tsp baking powder
1/2 tsp salt
1-1/2 cups sweet cherries, pitted and halved

For the streusel:
2 tbsp cold unsalted butter, cut into small pieces
1/4 cup unbleached all-purpose flour
1/4 cup light brown sugar
1/4 cup blanched slivered almonds


Directions:

To make the cake, preheat the oven to 350˚F with a rack placed in the center.  Butter the bottom and sides of a 9" springform pan and set aside.
In the bowl of an electric mixer, cream together the softened butter and sugar until pale yellow and very fluffy.  Add the egg, vanilla extract, and buttermilk and mix until combined.
In a separate bowl, sift together the flour, baking powder, and salt.  Gradually mix the dry ingredients into the wet until just combined.
Transfer the batter into the prepared pan.  Smooth the top and arrange the cherries on top of the batter.
To make the streusel, crumble together the butter, flour, and brown sugar with clean hands.  Add the almonds and toss together, then cover the top of the unbaked cake with streusel.
Bake at 350˚ for 10 minutes.  Then, lower the oven temperature to 325˚ and bake for another 40-45 minutes, until the top is golden brown and firm to the touch.  Allow to cool completely in the pan.  Slice and serve as desired, for breakfast, brunch, or dessert.  Enjoy!

Tuesday, July 10, 2012

Last-Minute Meals: Southwestern Frittata


You know those days when five o'clock rolls around...and you have nothing planned for dinner?

Or those days when you have a dinner planned...and it's just not going to happen?

I had a day like that last week.
When days like that roll around, I look into my fridge and freezer and hope that whatever is in there will yield something remotely tasty and nutritious.

Lucky for me, I came up with eggs, spinach, salsa, cheese, leftover brown rice, and frozen peppers and onions.  Add some olive oil, heat and a few spices, and there was dinner: a southwestern frittata!

For those of you who have never had a frittata (and seriously, you are missing out), it's an Italian-style flat omelette that gets cut into wedges and served; it's made from eggs and anything else you want to throw in.  It's also the fastest meal in the history of meals!  It's a great weeknight option and a very well-rounded vegetarian meal - and don't forget that eggs are involved, so it can be a quick brunch too!  In case you couldn't tell, I'm a total frittata convert!

The next time you're in a crunch for any meal, preheat your broiler, heat up a skillet and pull out that carton of eggs!  Let the leftovers in your fridge inspire you :)

Southwestern Frittata
Serves 6

Ingredients:
1-1/2 tbsp olive oil
6 large eggs
4 large egg whites (I used 1/2 cup of egg whites from a carton - they're awful convenient!)
1-1/2 tbsp milk
1/2 tsp salt 
1/4 tsp black pepper
1/2 tsp hot chili powder
1 large handful baby spinach leaves, torn
1/2 package frozen bell pepper and onion blend
2-3 oz cheddar, jack, or pepperjack cheese, shredded
Salsa, for serving

Directions:
Preheat the broiler on low.  Heat the olive oil in a large, oven-safe, nonstick skillet over medium-high heat.  Add the frozen peppers and onions and cook until hot and soft, stirring occasionally.
As the mixture on the stove cooks, whisk together the eggs, egg whites, milk, and seasonings until smooth.
Move back to the stove.  Add the spinach to the skillet and stir briefly, then pour the egg mixture over the vegetables.  Cook, lifting the edges to allow uncooked egg to flow underneath, until the bottom of the frittata is golden brown - about 3 minutes.  Sprinkle the cheese over the top and transfer the pan to the preheated broiler for 3-5 minutes, checking frequently, until the cheese is melted and the top of the frittata is golden and puffy.  Take out of the oven and allow to rest for about 3 minutes.  Slice, top with salsa, and serve - enjoy!

Friday, July 6, 2012

Just Because...

I haven't stopped looking at these since the day I saw the first one.


All these beautiful photos of the best day of my entire life ©Ayres Photography, Hamburg, NY

Monday, July 2, 2012

Oatmeal Raisin Pecan Cookies

I was not raised to be a cookie baker.

Strange, right?  Usually that's the first thing a kid will learn how to make.  But I grew up in a house with a mom who only made cookies once a year: at Christmas.  And those were cut-out sugar cookies.  Never (or at least hardly ever) was a homemade chocolate chip cookie seen emerging from our oven.

Instead, we made chocolate chip bars: from-scratch Toll House recipe cookie dough was pressed into a 9x13 pan and baked until still slightly gooey in the middle, then cut into squares or rectangles for consumption.

We were famous for those suckers.  With a hint of extra vanilla, two heaping cups of semisweet chocolate chips, and the precise right baking time that left them super soft and anything but dry for days and days, they were the perfect bake sale or party treat, and every friend I ever had in high school knew to be on the lookout for Angela's Chocolate Chip Bars.

But there's just something about cookies that you can't really replace.
As a form of baking therapy, the constant rotation of pans in the oven and the intoxicating scent of warm butter and sugar makes cookie baking immensely satisfying - when you have the time, that is.  And after visiting Levain Bakery in NYC, I knew I'd never be satisfied until I could make cookies anywhere close to that delicious on my own.

Now, the trouble for me is not in the dough - I've got cookie dough making down to a veritable science, complete with...um...quality control sampling :)  The trouble is in the baking time.  For someone who's used to sticking things in the oven and leaving them there for 20+ minutes at a time, short baking times and constant attention at the oven is, well, weird.  And a major guessing game.

It took me ages to photograph these cookies - not because I wanted to tweak the recipe at all, because I'm pretty sure what changes I made to an already excellent recipe made these the most addictive cookies of all time, but because I wanted to get the baking time exactly right for perfectly photogenic cookies.  I'm still not sure I've nailed it yet, but this third batch was by far the best - light golden brown and still super soft, so I have hope.  If you're experienced in the cookie world, feel free to leave me some advice!

Baking time correct or not, these cookies are definitely worth trying.  They're my husband's favorite kind - oatmeal raisin - from an excellent recipe that I found on David Lebovitz's blog, doctored up with a little whole wheat flour, molasses, sea salt, and pecans.  And my lord, are they tasty!!  Enjoy warm or at room temperature (or in a sundae? hmmm...).  If you don't want to risk consuming them all at once, bake a small batch, then roll the rest of the dough into balls and flash-freeze them, then store them in a freezer bag till a cookie craving hits!  A little self-imposed portion control never hurt anyone ;)

Oatmeal Raisin Pecan Cookies
Source: adapted from David Lebovitz, originally from Flour by Joanne Chang

Ingredients:
1 cup (2 sticks) unsalted butter, at room temperature 
2/3 cup granulated sugar 
1 cup packed light brown sugar 
2 large eggs, at room temperature
1 tsp vanilla extract
1 tsp unsulphured molasses
1 cup all-purpose flour
1/2 cup whole wheat flour
1 tsp baking soda
1 tsp sea salt
1 tsp ground cinnamon
2 cups old-fashioned rolled oats (not instant or quick)
1-1/2 cups raisins
scant 1 cup coarsely chopped pecans

Directions:
In the bowl of a stand mixer, or in a large bowl with a very sturdy hand mixer, cream together the butter and sugars until very light and fluffy - about 5 minutes.
In a separate bowl, combine the flours, baking soda, salt, and cinnamon, whisking together thoroughly until no clumps of baking soda remain.  Stir in the oats, raisins, and pecans.
Returning to the mixer, add the eggs to the butter and sugars one at a time, beating well after each addition.  Stir in the vanilla extract and the molasses.  Gradually add the flour and oat mixture on a low speed to the creamed butter mixture until well combined.
Chill the dough, covered, for a few hours or overnight - optional, but recommended.
To bake the cookies, preheat the oven to 350˚F.  Line a baking sheet with parchment paper, a silicone baking mat, or (in a pinch) foil sprayed lightly with cooking spray.  For giant cookies, (cause who doesn't like a giant cookie??) drop the dough in 1/4-cup sized* balls spaced evenly on the baking sheet.  Place in the preheated oven on a rack centered in the oven.  Midway through the baking time, rotate the baking sheet so the cookies bake evenly.  If necessary, flatten the domes of the cookies with a spatula.  Bake the cookies for 20-22 minutes, or until the tops are just starting to brown - don't overbake them!  You'll be sad.  Remove from the oven, cool completely on a wire rack, and enjoy!

*If you make smaller cookies, you'll need to drop the total baking time.  Rotate them after about 7 minutes and check on their doneness starting at 15 minutes.

Friday, June 29, 2012

The Dancer Bakes Fancy Grilled Cheese

 It's your regular, unsuspecting grilled cheese, right?
Golden brown and crispy, promising gooey melted comforting goodness inside?

But, see, I can never just let something be.  It's a compulsion of sorts -  I just have to keep playing!

Which is why, when the sandwich gets opened up, you get this:
Gooey melted comforting goodness PLUS sauteed spinach, sundried tomatoes, and herbs, toasted with olive oil instead of butter on whole grain bread.

So...basically, if I want to eat grilled cheese, I have to load it up with veggies.  It's just how I roll.  It's comfort food "light" (if you were next to me, you'd see me doing air quotes on that one): lower in saturated fats since there's no butter, and plenty of vegetable and whole grain nutrition.  Since there's cheese, it's not totally light, but...grilled cheese kinda relies on that bit...

And did I mention yet that it's DELICIOUS??

...I haven't?

My bad.  For the record, it's DELICIOUS.

For this particular sandwich, I also used fancy cheese.
Specifically, Cabot Tomato Basil Cheddar.  Now, would this work with something different - like a Havarti, Mozzarella, even White Cheddar?  Sure!  But in my mind, this cheese took the flavors I added to the mix and enhanced them in the best way possible.  So if Cabot cheeses go on sale at your neighborhood grocery store, snatch this one up - it's well worth it!  If you have pesto on hand, by all that's holy, PLEASE add it - my mouth is watering thinking about it... And while grilled cheese is typically seen as lunch food, this one makes a sensationally tasty quick dinner alongside a salad or a cup of tomato soup!

The Dancer Bakes' Fancy Grilled Cheese
A Dancer Bakes original
Serves one
 
Ingredients:
1-1/2 tbsp olive oil, divided use
1 large handful fresh spinach leaves
Salt and pepper, to taste
2 slices whole grain bread of choice - regular sandwich or artisan
2 oz Cabot tomato basil cheddar cheese
6-7 sundried tomatoes, drained
Pinch each of:
Dried Parsley leaves
Dried Basil leaves
Dried Oregano
Dried Rosemary

Directions:
Heat a small skillet over medium heat and add 1/2 tablespoon of olive oil.  Add your spinach leaves, salt, and pepper, and saute until wilted.  Remove to a plate and set aside, briefly setting the hot skillet onto a cool burner.
While spinach is wilting, mix together the remaining olive oil and the dried herbs in a small bowl.  Using a pastry brush, brush one side of each slice of bread with the olive oil and herb mixture.  Layer the cheese, sundried tomatoes, and wilted spinach evenly on the un-oiled side of one of the pieces of bread.  Put the skillet back on the heat, place the bread oil side down in it, and top with the other slice of bread.  Cover and let cook for about 2 minutes, until the cheese starts to melt and the bottom piece of bread is crispy and golden.  Flip the sandwich, cover, and cook for another 1-2 minutes, until the whole concoction is melty, crispy, and aromatic.  Remove to a plate, allow to sit for 1-2 minutes, then slice and enjoy!

Wednesday, June 27, 2012

So...

I logged on and realized...

It's been almost a month and a half since I posted.

WHOA.  Time has been flying - in some good ways and some not-so-good.  We got back from the honeymoon and life hit us with a resounding kaTHUD.  I started work as a ballroom teacher shortly before the wedding and my hours have been climbing, and Jon's summer concert season is in full swing!

On top of that, there's been some of this:
Parsons Dance Master Choreography Workshop Photo Shoot 2012

(I did the LehrerDance Summer Intensive on scholarship, which was truly awesome, and then sped off to New York City for a week of Parsons Dance Company's Master Choreography Workshop - also on scholarship! - which is what the photo is from!)
And a whooooole lot of this:

Which means my kitchen looks like this:

It's just...not quite ready for prime time yet. 
I have a grilled cheese from the archives to share soon, and a cookie recipe that's only missing a picture, and hopefully once we get our new place (OUR new place!!...sorry, it's still really exciting for me to say that...) all set up and settled into, some awesome new recipes will come out of the deal!

After all, weddings mean gifts...and gifts mean fun new kitchen toys... :-D

What about YOU?  Has life been nuts for you, too?  Or does summer mean time to relax?

Tuesday, May 15, 2012

Here It Comes...

Guys...

I'm getting married.

On FRIDAY.

WHAT.


Which means that things are INSANE.

First of all, Sunday was my graduation from college.  I had an alarm set for 6:35 so I could shower beforehand.  Now anyone who knows me will tell you that getting a functional, speaking version of me out of bed before 7am is nigh impossible, but I was psychologically set and determined that 6:35 would be okay.

Apparently, life had other plans for me.

6AM: I wake up to the sound of rap music bouncing into my room from the living room of my shared apartment.  I roll over and try to breathe loudly enough to drown it out.  I fail.
6:15AM: The music is STILL playing.  And it's THE SAME SONG.  I have no clue who is playing it but I certainly can't sleep through it, so I get up to shower much earlier than intended.  Meanwhile, my usually soft-spoken roommate marches into the living room, shakes awake the random boy sleeping through 15 minutes of his obnoxiously loud looping R&B alarm, and makes him turn it off.  We still do not know who the boy is, but hoist our tired selves into the routine of the morning.

RUDE, Universe.  Rude.

By 12:30, after listening to a poem pretending to be a prayer, a pandering politician's perennial postulations on graduation, and a poetry slam of a student speech (sorry, but I was having WAY too much fun with that alliteration), I was a college graduate.

That's me and my pretty friends, all graduated and stuff.  And HUNGRY - loooong ceremony.

From that second on, my brain activity switched to weddingweddingweddingmovingweddingmovingmovingmovingweddingmovingweddingwedding...

Yeah.  I left myself five days to finish planning a wedding and move.
And the Poor Planner of the Year Award goes to...

Though, thinking about it, we didn't have much of an option.  Jon's busy season of work gets absolutely insane from June through most of September, and my lease ends at the end of May, which would mean moving back to my parents' place in DC.  I love my parents, but no. 
If we wanted to get married, it pretty much had to be this weekend.

The last two and a half days have consisted of seating charts, suitcases, garbage bags, cardboard boxes, multiple trips to the mall, phone calls from vendors, frantic emails with my wedding coordinator (a.k.a. my amazingly-organized sister-in-law...I swear, she probably wants to strangle me for how disorganized I am!), and the occasional nervous breakdown.

Party planning is officially off the list of potential careers.

BUT.
But.

By Friday night at 5:30, I will be married to the love of my life.  And that's not something a whole lot of people my age can say, nor is it something I could even imagine living without.
So no matter how many details I space on or how many decisions I can't make without crying, I'm going to be okay.

I've cooked a surprising amount, considering the hectic nature of my life at the moment.  Friday night, I made a quick and delicious frittata out of random things in my fridge, which made me SUPER proud of myself for being all innovative and stuff.  And Sunday afternoon after the graduation ceremony, I baked up a pan of Maple Apple French Toast Bread Pudding.  I also have a grilled cheese to post and possibly the best oatmeal raisin cookies ever to share with y'all eventually.  But photos are just...nonexistent, and for that I apologize.  Tasty treats will find their way into your homes (and hopefully your bellies) from my little kitchen soon!

Just gimme about a week and a half :)
In the meantime, if you need to find me, I'll be bejeweling place cards and practicing writing a different last name.
Cursive B's are HARD.

Friday, May 4, 2012

Cornmeal-Crusted Haddock and Black Bean Corn Saute

I don't know if I shared this before, but I was an extremely picky eater growing up.

My go-to meal at every restaurant was chicken tenders and fries.  I judged restaurants solely on the quality of their chicken tenders.  I lived off of the same six or seven meals for over a decade, because that was what I liked and was what I would eat.  Chocolate, my first love, was always allowed.  As were pancakes.

As for the list of things I wouldn't eat?  It was much longer.

Condiments?  Evil.  Most vegetables?  Disgusting.  Exceptions: corn, carrots, green beans, peas, mushrooms, and lima beans.  I know, the lima beans thing is totally weird, but whatever.  Cheese on anything but pizza or grilled cheese?  Gross!  Eggs any other way than scrambled?  No way.  I ate exactly three kinds of nuts, and they were never allowed in my brownies, or without M&Ms breaking them up.  Beans?  Looked like poop.  And I did not eat poop.  And?  I ate all my food in separate parts.  Sauces didn't touch anything I ate for years, nor were different food groups allowed to touch on a plate, much less be consumed together!  Thus, sandwiches, other than grilled cheese, were not to be touched, and burgers were eaten completely naked with a fork and knife.  I'd only eat the bun at Fuddrucker's.

And fish?  The penultimate "EWWW!"
I ate fish sticks until I was 4.  Then I decided they were gross and refused to touch seafood until college.

Yeah.  That long.

But when I got to school, I no longer had the option of those same seven meals.  I had to find new things to eat.  And the dining hall at my college didn't serve meat on Fridays: every Friday was Fish Fry-day.  Eventually, I decided to give it a try again.  After all, I kept hearing that fish was good for you.  And nothing deep-fried could be that bad, right?

Right.  It was delicious!  After that, I was way more adventurous with food, seafood in particular.  And, to my shock, I discovered that I loved so many foods that I had turned up my nose at for years!

The meal I'm about to share with you is something I never would have eaten four years ago, but am SO glad that I can cook and enjoy for myself now.  Fresh haddock fillets are dredged in milk and a spiced cornmeal crust, then baked, and served with a saute of black beans (yep, "poop" no more), corn, peppers, and zucchini.  The combination is absolutely delicious, and it makes fabulous leftovers!  Two words: fish tacos.  Add some cubes of avocado, fresh spinach leaves, and warm corn tortillas, and life is wonderful.  Cinco de Mayo, anyone?

Whether or not you're a reformed picky eater like me, give this a shot!  It's nutrient rich, comes together super quickly, and makes a truly delicious weeknight meal!

Quick recipe note: This recipe was...well, completely eyeballed.  I'm guessing at approximate amounts here, so feel free to adjust seasonings and proportions at will!

Cornmeal Crusted Haddock
Ingredients:
1.5 lbs fresh haddock fillets (or another firm white fish) - 4-6 pieces
1 cup coarse yellow cornmeal 
1 tsp chili powder 
1/2 tsp ground cumin
1/2 tsp dried oregano leaves
salt & black pepper to taste
3/4 cup milk
Olive oil cooking spray

Directions:
Preheat the oven to 500˚F.  Lightly grease a 9x13" glass baking dish and set aside.
Pour the milk into a wide, shallow bowl.  On a piece of wax paper, combine cornmeal, chili powder, cumin, oregano, salt, and pepper.  (Word of advice - don't go too easy on the salt!) Toss together gently with your hands until the spices appear evenly distributed in the mixture.
Dredge each piece of fish in the milk, then coat thoroughly with the cornmeal mixture.  Place the fillets in the prepared baking dish and spray lightly with cooking spray.  Bake on the top rack of the oven for about 15 minutes, until the fish flakes easily.  Serve immediately as is or flake over warmed tortillas for tacos.  Enjoy!

Black Bean Corn Saute
Source: inspired by Melissa D'Arabian

Ingredients:
1 tbsp olive oil
1 medium zucchini, cut into quartered rounds
1-1/2 cups frozen corn kernels
1-1/2 cups frozen diced red & green bell peppers
1 can black beans, drained & rinsed
salt & black pepper, to taste

Directions:
 Heat the olive oil in a large skillet over medium-high heat.  Add the zucchini and saute until it starts to become tender, 3-5 minutes.  Add the frozen corn and diced peppers and saute for another 5 minutes.  Add the black beans and stir in until the whole mixture is heated through.  Season with salt and pepper as desired, and serve with the fish on its own or in tacos.  Enjoy!

Monday, April 23, 2012

Carrot Cake Granola

I have a bit of an...oh, what's the word...

Obsession.

With carrot cake.

In a major way.

For the last month - at least - every time the words "carrot cake" appeared in a menu or a recipe title, my only reaction was "YESPLEASENOW."

I've been eating actual carrot cake and cupcakes every time I can get my hands on them.  In between, I've made carrot cake oatmeal, carrot cake pancakes, and I've bookmarked recipes for carrot cake muffins and waffles.

The chocoholic has fallen and my inner rabbit has taken over!  It's madness, I tell you! 

But hey - at least the madness is delicious!

This granola is easily one of the best things I've made.  And eaten.  On multiple occasions.  With a spoon.
Sometimes just with my hands, though.  I'm not too picky.

It involves oats, brown sugar, spices, shredded carrots, raisins, and pecans all baked together in a way that makes your kitchen smell amazing and your stomach lose all impressions that it could be anything but hungry.  And another bonus: it makes a ton, and I mean a TON, of granola!  I still have two containers full of it, and that's after consuming most of a third!

Whether you've fallen prey to the same frosting-loving-bunny urges that I have, or you just happen to enjoy granola and happen to like making it too, please please please make this stuff!  Your wallet and your stomach will thank you.

Now read the recipe and get crackin'.
I've got granola to eat.

Carrot Cake Granola
Source: Chocolate and Carrots

Ingredients:
2-1/2 cups old fashioned oats
2-1/2 cups quick-cooking oats (I used all old-fashioned and it worked just fine)
2 cups puffed brown rice cereal
2 tbsp ground cinnamon
pinch of salt
1 cup natural unsweetened applesauce (I used homemade)
1/4 cup honey
1/4 cup molasses
1/2 cup light brown sugar
2 tbsp canola oil
2 tsp vanilla extract
1 cup grated carrots
2 cups chopped pecans
1 cup raisins

Directions:
Preheat the oven to 300˚F, with racks in the top and bottom third of the oven.  Line two baking sheets with parchment paper, foil, or silpat mats and set them aside.
In a large mixing bowl, combine the oats, puffed rice, cinnamon, and salt.  In a separate bowl, combine the applesauce, honey, molasses, brown sugar, oil, vanilla, and carrots (yes, almost all the rest of the ingredients).  Stir the wet mixture into the dry mixture, folding thoroughly to combine until all the oats and cereal are moistened.
Pour the granola onto the prepared baking sheets, spreading it out evenly across the surface and pushing it down with the back of a spatula to flatten it.  Place the baking sheets in the oven for 20 minutes - one on the top rack and one on the bottom.  While the granola is baking, chop the pecans.
Remove the granola from the oven and, using a large spatula, flip it over and break up any large clumps.  Add the nuts to the baking sheets and return them to the oven for another 20 minutes, rotating the sheets between the racks.
Stir the granola, breaking up any clumps that are too large for a spoon, and return it to the oven for another 20-30 minutes, or until dry and golden brown.  Let the granola cool completely on the baking sheets.  Stir in the raisins.  Store leftovers in an airtight container in a cool, dry cabinet.  Serve with yogurt, milk, soy milk, ice cream, or your fingers - enjoy!!

Friday, April 6, 2012

Banana Bread French Toast


Remember this?

And how I told you to stick around because I'd do something fun with it?
Well...voila!


Banana. Bread. French. Toast.

I have to confess...half the reason I made the bread was to turn it into French Toast after seeing Jessica's recipe.  I was a woman obsessed!  The whole wheat blueberry banana goodness was left virtually untouched (except for a teeny tiny bit that I tasted by itself) for two days after I baked it because I was saving it for its higher purpose.

And oh.my.Lord.

The next time you're having a craving for an over-the-top breakfast, make this.  Plus, if you use the blueberry oat banana bread, you'll be packing yourself with tons of fiber and fruit at the same time!  I don't want to think about the overall calorie count in that plate...especially since I ate it all...but hey, that's what exercise is for!  Just keep thinking about all that whole-wheat-fruit-and-protein goodness while you're at Zumba ;)

Banana Bread French Toast
Source: barely adapted from How Sweet It Is

Ingredients:
6 slices banana bread (such as this)
3 large eggs
1/2 cup milk or heavy cream (I used soy milk)
1/4 tsp ground cinnamon
butter for the pan

Directions:
Slice the banana bread to your desired thickness (we went super thick, but you can be as conservative as you want).  In a wide bowl, combine the eggs, milk or cream, and cinnamon, whisking until smooth.  Heat a griddle or skillet over medium heat and brush with butter.  Soak each piece of bread for about 30 seconds per side, then transfer to the heated griddle.  Cook for about two or three minutes on each side until golden and a bit crispy on the outside, then transfer to an oven-safe plate in the oven, warmed to 150-200˚ to keep the French toast warm as you finish the rest of the slices.  Serve with toppings of choice - I recommend sliced bananas and pure maple syrup, but seriously?  Go crazy.  And most importantly, ENJOY!

Thursday, April 5, 2012

Super Moist Turkey Burgers


It was all a tease.

That one glorious week of upper-70s sunshine, cool breezes, and vitamin D absorption?
TEASE.

It's officially spring in Buffalo, which means weather in the 30s and 40s with grey skies and drizzly business.  Not the most conducive to happiness or productivity.  Or desire to exercise...woof.

When the happy weather was here, so was my summer appetite.  Which means I was totally craving burgers.  I managed to find some frozen lean ground turkey and I got super excited, because that meant turkey burgers!

Now, you might find this odd, but 95% of the time I'm hit with a burger craving, it's for a turkey or veggie patty.  I know, I know...those aren't "real" burgers.  But I save my "real" burger indulgences for one meal after a hardcore performance season, and when those come around nothing but a huge bacon cheeseburger will cut it! 
This time, though, I was feeling the turkey burger.

Between the ground turkey, my favorite tried and true burger add-ins in the pantry, and some awesome produce deals, I managed to come up with a turkey burger that exceeded my expectations of deliciousness: no bun, no toppings, and I still couldn't stop digging my fork into that patty!  Served with a side salad or mixed veggies and roasted sweet potatoes, it satisfied all my most ardent summer food cravings in a low-fat, nutrient-packed and delicious meal.

Not a tease in sight!  If only the weather would be so cooperative...


Super Moist Turkey Burgers

Ingredients:
1 lb lean ground turkey
1 tbsp olive or canola oil, divided (more if needed)
1 medium zucchini, grated
8 oz cremini mushrooms, diced
1 tbsp Worcestershire sauce
1/2-1 tsp salt (to your taste)
2 tbsp-1/4 cup whole-wheat breadcrumbs
Mrs. Dash Original Seasoning Blend

Directions:
Heat 1/2 tbsp of the oil in a skillet over medium-high heat.  Add the diced mushrooms and cook until the excess moisture begins to evaporate and the mushrooms are browned, breaking up any larger pieces as much as possible.  Add the grated zucchini to the skillet, cover, and allow to cook until all the excess liquid in the pan has evaporated - about 3-4 more minutes.  Remove the skillet from the heat.
Place the ground turkey in a medium mixing bowl and break up.  Add the Worcestershire, salt, Mrs. Dash, breadcrumbs, and the vegetable mixture, and blend well using a wooden spoon or your hands.  Form into desired size patties, making an indentation in the center of each with your thumb so that the burgers will cook up flat.  My mixture made five substantial patties.
Brush a grill pan with the remaining oil or add it to a skillet over medium heat.  Add as many burgers as will comfortably fit in the pan and allow to cook, untouched, for 6 minutes.  Flip the burgers and cook for another 6 minutes, or until a crust has formed and the internal temperature has reached 165˚F.  Remove to a plate and cook any remaining burgers in the same manner.
Serve burgers on their own or with toppings of choice - as toppings go, I recommend Havarti cheese, baby spinach, fresh tomato, basil or sundried tomato pesto, and a whole wheat bun.  Enjoy!
 

Tuesday, March 27, 2012

Blueberry Oat Banana Bread


The wedding is coming up SO SOON!!

We're talking less than two months now.  And I couldn't be more excited to finally call Jon my husband!

Of course, this means that I have less than two months to get everything done, which is a bit intimidating.  Now don't get me wrong - we're almost there!  But those last few things that remain unfinished are killers.  Like...planning the ceremony with my pastor.  And doing premarital counseling.  And making sure I have someone to do my hair.  And seating charts...oh Lord, seating charts...

SO FUN.


I also have to get dress alterations done because (feel free to hate me for this next part) I lost too much weight for the wedding gown I ordered!  I focused on eating right and toning up for shows and auditions, and in the process I dropped a dress size - woohoo!  So when I went to what I hoped would be my final gown fitting, I discovered it needed to be taken in quite a bit.  What complicates this even more?  The gown is in Virginia...and I'm in Buffalo.  So I have to fly back home in April to make sure everything's perfect.  An added expense and an added stress, but worth it!

And everything will get done!  It will.  Eventually.

Oy.


Two months till the wedding also means that I am down to my last two months to bake with bananas whenever I want, since the future husband is allergic to them.  I'm not going to give them up - uh, I kinda live off of them - but I will have to be very careful about when and where I eat and bake with them.

One day, I just wanted banana bread, a craving that was spurred by the three very ripe bananas I had sitting on the counter.  I was blog browsing, found this recipe on The Picky Eater, realized that I had every necessary ingredient on hand, got SUPER excited, and made it!  After I made the kitchen smell incredible and tortured myself by waiting till the next day to taste it, I was very happy that I gave into my craving!

This banana bread is about as guiltless as banana bread can get.  It's loaded with nutty whole wheat flour, hearty rolled oats, and tons of fruit in the form of banana puree and blueberries.  It also happens to be delicious.  I will recommend that you err on the side of too much mashed banana, though - I think I'd increase the amount I used for the future just for added flavor.  But if you're in the mood for banana bread that won't kill your calorie count for the day, bake this one up - you won't be disappointed!

Whole Wheat Blueberry Oat Banana Bread
Source: The Picky Eater

Ingredients:
1 cup buttermilk (I used buttermilk powder and water)
2 large eggs
1 cup mashed ripe banana - about 2-3 medium bananas (I say aim for 3)
2/3 cup packed brown sugar
1/3 cup canola oil
2 cups whole wheat flour
1 cup old-fashioned rolled oats
2 tsp baking powder
1 tsp ground cinnamon
1/2 tsp salt
1/4 tsp baking soda
1-1/2 cups blueberries, fresh or frozen

Directions:
Preheat the oven to 375˚F with a rack positioned in the middle.  Coat a 9x5 loaf pan with cooking spray and lightly flour.  Or use Baker's Joy and do it all at once! 
Whisk together the buttermilk, eggs, mashed banana, brown sugar, and oil in a large bowl until uniform and smooth.    In a separate bowl, combine the flour, oats, baking powder, cinnamon, salt and baking soda.  Stir the dry ingredients into the wet ingredients until just combined.  Gently fold in the blueberries.
Transfer the batter into the prepared loaf pan, smoothing out the top.  Bake for approximately one hour, until browned and a toothpick inserted into the center comes out clean.  Transfer pan to a wire rack to cool for 15 minutes, then remove the bread from the pan to the rack to cool the rest of the way.  Enjoy!


**And stay tuned - I had fun with this bread that I'll share soon :)

Friday, March 23, 2012

Shrimp and Vegetable Fried Quinoa


We've been through the whole "if you crave Chinese food in Buffalo" issue before.  So I won't bore you by repeating it with this make-your-own-fake-Asian-food-that's-better-than-Buffalo-takeout post :)

This recipe was born of a need for a quick, easy, clean pantry meal that would last me for several days of leftovers and, well, wouldn't make me look bloated in a costume with no stomach.  Gotta love tech week!

I got the idea for a fried rice-style quinoa dish here and thought it would be a great solution.  Plus, I had some fully cooked shrimp and some peas in the freezer; carrots, mushrooms, eggs, and low-sodium soy sauce in the fridge; and quinoa in the pantry that could be ready in twenty minutes.  Sold.  I cooked the quinoa during a fortuitously extended lunch break, then came back and cooked it all up in a jiff before rehearsal.

This dish packs a major protein punch with very little fat, thanks to the combination of shrimp, egg, and quinoa.  It was filling without being heavy and it definitely gave me the energy to get through rehearsals after a long day of classes.

Plus, it was really tasty.  This one will definitely come back to mind the next time I want Asian food that will make me feel good about myself :)

Shrimp and Vegetable Fried Quinoa
Source: Methods and amounts taken and/or modified from Cheeky Kitchen and Annie's Eats


Ingredients:
2-3 tbsp olive or vegetable oil, divided
1 cup diced carrots
8 oz sliced cremini or white button mushrooms
About 1 lb pre-cooked tails-off frozen shrimp
1 cup frozen peas
3 eggs, lightly beaten
3 cups cold cooked quinoa
3 tbsp low-sodium soy sauce
Garlic powder, salt, and pepper, to taste

Directions:
Place the frozen shrimp in a colander and run under cold water until thawed.
Heat one tablespoon of oil over medium-high heat in a large frying pan or wok.   Add the eggs to the pan, cooking and stirring till they are lightly scrambled, but not dry.  Remove from the pan onto a plate and set aside.
Add the remaining 1-2 tablespoons of oil to the pan.  Once the oil is hot, add the carrots and mushrooms, stir-frying until slightly tender - about 5 minutes.  Add the shrimp and peas and cook for about one minute more.  Add the quinoa to the pan, stirring to break up any clumps and combine the mixture thoroughly.  Stir in the soy sauce and seasonings to taste and continue to cook, stirring every so often, until the mixture is hot throughout.  Add the eggs back into the mixture, stir to combine, and serve immediately.  Enjoy!

Tuesday, February 21, 2012

Coconut Basmati Rice Pudding

 Usually, when I decide to make a dessert, I go all-out.  Sugar, butter, eggs, chocolate, layers, filling, frosting, glaze... it's go big or go home!  My original plan for Valentine's Day was mini layer cakes à la Sprinkle Bakes (which I still want to attempt!), but once I found out that V-Day was out and a time-limited homemade anniversary dinner was in, the game plan had to change to something simpler.

Enter rice pudding.  Which just happens to be one of Jon's favorite desserts :)

I might be the world's biggest fan of brown basmati rice.  It's just so nutty and delicious, and it's got all those great health benefits since it's a whole grain!  Score.  It also makes a killer rice pudding.

Pre-cooked brown basmati rice gets a long bath in coconut milk, maple syrup, cinnamon, and vanilla.  When it comes out, its natural nuttiness combines with a smooth creaminess that essentially becomes heaven on a spoon.  And bonus?  If you have leftover rice in the fridge, you've got dessert in half an hour!

Additional bonus: this recipe, especially if served with dried fruit and nuts, is healthy and filling enough to serve as breakfast!  Pudding for breakfast for the win!!

But for dessert, if you really want to take it to the next level, layer it into a parfait with sweetened angel flake coconut and some mini chocolate chips while it's still warm.  Magic.

Coconut Basmati Rice Pudding
Source:  Kale and Cardamom

Ingredients:
2 cups cooked brown basmati rice
1 14-oz can coconut milk (I used lite)
1/8 tsp sea salt (if you did not use salt when cooking the rice)
1/4 tsp ground cinnamon
2 tbsp maple syrup
1/4 tsp pure vanilla extract
Toppings of choice (Suggested: shredded coconut, chocolate chips, chopped toasted nuts, and/or dried fruit)

Directions:
Combine rice and coconut milk in a medium saucepan and bring to a boil, stirring occasionally.  Lower the heat and add the salt (if using it), cinnamon, and maple syrup.  Allow the mixture to simmer, stirring it often, until it's thick, creamy, and pudding-like - about 20 minutes, give or take.  Remove from heat and stir in the vanilla - I suggest you use something high-quality if you have it, since the gorgeous flavor won't get cooked out :)  Serve immediately, or chill until cold, and eat with toppings of choice.  Enjoy!

Thursday, February 16, 2012

Roasted Hazelnut Brussels Sprouts

Can I let you in on something?

I've never celebrated Valentine's Day.


Ever.  In the history of ever.
Even though I've been in a relationship for the last three years.

Why, you ask?
Because our schedules never line up.

See, I was super excited the first year we were together because my single girl dream was coming true: I would finally have a date for Valentine's Day.  BUT then I got my company schedule and realized...umm...kidding.  We had a 10-out-of-12 (all-day tech) on February 14th.  The following year, I had class all day, followed by tech rehearsal for several hours.  I finally got home at 9:45, a gross sweaty mess.  That night, Jon and I split a red velvet cupcake from Starbucks and watched TV.

This year?
Well, this year, my schedule was finally clear on the 14th - after classes ended early in the afternoon, I was free!
Jon was not.  He had bowling after work.  So by the time he got to my apartment at 11:30...I was falling asleep.

Can I tell you something else?

It could be worse.
Because the last two years running, we've both had the day off on our anniversary... February 12th.
And this year, that day was perfect.

I woke up to a warm plate of homemade French toast with pure maple syrup next to my bed.  We went to church, went boot shopping, did some things for the wedding, and went grocery shopping - nothing monumental, but what truly made a difference was that we did those things together, which is a luxury we rarely have.  Later that night, we retreated from the snow under warm fuzzy blankets and watched Netflix, just quietly celebrating the wonderful three years we've had together and all the years to come.
And then there was dinner.


Ohhh, dinner...

Instead of going out, we cooked a gourmet meal together:

Filet Mignon, simply seasoned and cooked to absolute juicy perfection
Mashed Redskin Potatoes with Roasted Garlic and Mascarpone Cheese
and these Roasted Hazelnut Brussels Sprouts.
(For dessert, there was rice pudding...I'll be sharing that soon :)

Now, historically, I have not been a huge fan of brussels.  They're kinda bitter, and the only way I'd liked them before was when they were doused in butter and bacon grease...which is not something I could really afford to do with a show coming up.  But I found this gloriously simple recipe on Cheeky Kitchen and was struck hard with the urge to try it!  I am, after all, on an eternal quest to find more vegetables I lurrrve.

SUCCESS!  These suckers were chock full of flavor, texture, and overall deliciousness, without being drowned in fat!  A simple short roast at a high temperature with some olive oil, salt, and pepper, with chopped hazelnuts thrown in just at the end to toast up to perfection, and vegetable bliss was attained! It was the perfect side dish, served as part of a perfect dinner, to cap off a perfect anniversary.

Roasted Hazelnut Brussels Sprouts
Source: barely adapted from Cheeky Kitchen

Ingredients:
3 cups brussels sprouts
2 tablespoons olive oil
Salt & pepper, to taste
1/4 cup chopped hazelnuts


Directions:
Preheat the oven to 500˚.  Yes, this sucker's gotta be HOT.

Line a baking sheet with parchment paper.  In a medium bowl, drizzle sprouts with olive oil and sprinkle with salt and pepper as desired, tossing to coat.
Spread the sprouts out on the baking sheet and roast on the middle rack for 15-20 minutes, until the edges of the sprouts begin to char.  Toss the chopped hazelnuts on top and return to the oven for another 5 minutes, until toasty and aromatic.  Serve with essentially any meal you want, though I highly recommend meat and potatoes.  Enjoy!

Friday, February 3, 2012

Cashew Chicken with Broccoli & Mushrooms

I've learned a lot during my four years in Buffalo.
- Never expect a snow day.  Expect snow.  Every day from December through March, maybe even April or May.  But don't expect a snow day.
- Wind is evil.  And everywhere.
- Taking food photos in the winter when you can't afford studio lighting gets...complicated.
- "Buffalo wings" = wrong.  "Wings" = right.
- Tim Hortons' Roll Up the Rim month will make you spend waaaay more money than you mean to spend.  But hey, you could win a car!!  Or a free donut.
- If you live in the Buffalo area, you're a Bills and Sabres fan.  Even if you hate either football or hockey.
- Paula's Donuts are heaven.  HEAVEN, I tell you.

And this one I find particularly important to anyone who grew up in DC or NY:

- Thai food in Buffalo is brilliant.
Japanese food in Buffalo is awesome.
Chinese food in Buffalo SUCKS.  With a capital SUCKS.

I love Chinese food.  But I have not even tasted a single truly good batch of Chicken Fried Rice since I got to UB - the flavors are off and all you get is egg, bamboo shoots, a few chunks of chicken, and HUGE pieces of virtually raw onion.  I'm sorry, but if the Chinese place you're ordering from also delivers pizza and wings...don't order from them.  I beg you.  Save yourself.

If I ever get a craving for Asian flavors, I stick with Thai, hibachi, or I just make my own mock Chinese food.   I always have a bottle of low-sodium soy sauce in the fridge for those nights when dangit, nothing but stir fry will cut it!

And this recipe has officially cut the line to the top of my list of favorite weeknight recipes.

Not just Asian-style weeknight recipes.  Weeknight recipes, period.

It's that good.

The combination of flavors and textures is just such a win.  Don't bother letting me explain in detail - make it for yourself the next time you want takeout!  It'll be ready just as fast, and your wallet and tummy will thank you :)

Cashew Chicken with Broccoli and Mushrooms
Source: adapted slightly from Cheeky Kitchen
Serves at least 4

Ingredients:
1 pound boneless skinless chicken breast, cut into bite-sized chunks
1 tbsp olive oil
8 oz cremini mushrooms, sliced
1 tsp garlic powder, or to taste
1/2 tsp crushed red pepper, or to taste
4-6 tbsp low-sodium soy sauce
2 tbsp cornstarch
1/3-1/2 cup water (use less for a thicker sauce, more for a thinner sauce)
2-3 cups bite-sized broccoli florets
1/2 cup salted cashews
Rice or noodles, for serving

Directions:
In a wok or large sauté pan, heat the olive oil over medium-high heat.  Toss in the chicken pieces and stir fry until cooked through.  Add the mushrooms and allow to cook briefly.  Sprinkle the mixture with the garlic powder, crushed red pepper, and desired amount of soy sauce.  Whisk together the water and cornstarch in a measuring cup and pour over the chicken and mushrooms, stirring to coat.  Add the broccoli florets, cover the pan, and allow to cook until the broccoli is bright green.  Toss in the cashews and serve over rice or noodles.  Enjoy!

Sunday, January 29, 2012

Banana Nut Steel Cut Oats

This, ladies and gents, is by far my favorite winter morning breakfast.

Unless you include pancakes or waffles or french toast.  So by "favorite" I mean "the best possible thing I can afford to eat all the time."  Which this definitely is.

If you're an oatmeal fan, then chances are you've tried steel-cut oats.  If you're not an oatmeal fan, then by all means TRY STEEL CUT OATS!

Sorry.  Didn't mean to get scary on you for a second.  But seriously - if you hate regular rolled-oats oatmeal, these could change your mind.  The oats, instead of being steamed and rolled, are steamed and then cut into small pieces with a steel blade.  Hence steel-cut oats - oh hey!  As a result, they retain more of the oat husk and have even more of those great whole-grain properties.  For those of you who aren't health nuts and don't give a rat's patoot about health values, they maintain a chewy texture - no mush here!  More good news: most steel-cut oats, especially Irish oats, are gluten-free!  Just check whatever brand you find to make sure they are, if that's a concern.  They do take a bit longer to cook, but there's a quick version of steel-cut oats too.  Which is what I use.

I have several variations of my Friday morning oatmeal, and this one is definitely my favorite so far.  I cook the oats with a combination of water, vanilla soy or almond milk, and Stevia, and I add sliced bananas, crushed or chopped walnuts, a nice sprinkle of cinnamon, and just a touch of light brown sugar to finish.  They're creamy, wholesome, sweet, and chewy with highlights of rich banana and crunchy nut - exactly what I want to eat when I see snow out my window in the morning :)

Banana Nut Steel-Cut Oats
A Dancer Bakes original!
Serves 1

Ingredients:
3/4 cup water
1/4 cup quick-cooking steel-cut oats (such as McCann's)
1 packet stevia (I use Stevia in the Raw)
1/4 cup vanilla soy or almond milk, with more as needed or desired
1 medium to large banana at desired ripeness, sliced
1/4 cup walnut pieces
1/2 tsp cinnamon
1 tbsp light brown sugar

Directions:
On the stove:
Heat the water in a small (2-3 cup) saucepan over medium-high heat till it reaches a rolling boil.  Add the oats and stevia.  Allow to cook uncovered for 5-7 minutes, stirring often, until the water has been mostly absorbed by the oats and the oatmeal has thickened.  Stir in the soy or almond milk and continue to cook until the milk is absorbed and the oatmeal is creamy.  Add the cinnamon, walnuts, and banana slices, stirring well to incorporate.  If the oats are too thick for your taste, add more of the milk and cook until your desired texture is reached.  Allow to sit for 1 minute.  Pour the oats into a bowl, sprinkle with brown sugar, and serve.

In the microwave:
Pour the oats, stevia, and water into a deep, microwave-safe bowl.  Cook on high for 2.5-3 minutes, stir, and return to the microwave for another 1-2 minutes, checking and stirring frequently.  Remove from the microwave and stir in the almond or soy milk, followed by the cinnamon, walnuts, and banana slices.  Add more milk and return to the microwave if necessary until desired consistency is reached.  Allow to sit for 1 minute.  Sprinkle with brown sugar and serve.
Microwave note: if your microwave runs hot and tends to make things boil over, consider adding 1/4 cup raisins to the oats and water before cooking them.  The dried fruit will absorb some of the excess moisture, which will keep the oats from boiling over - just remember you'll probably need more milk than the recipe calls for later!  And the oatmeal's just as delicious with raisins in the mix :)

Saturday, January 28, 2012

Gluten-Free Kahlua Almond Brownies


So I'm not really into the whole gluten-free-living thing.  I love bread and cake.  As in LOVE.  And anyone who has Celiac will tell you that the GF alternatives to the real thing are just...not the same.

That being said.

This recipe is now my go-to for brownies.

I baked up a pan of these for a gluten intolerant friend's birthday.  The first sign of success: the batter was un-freakin-believable.  They made the kitchen smell like chocolate heaven as they baked and cooled (the cooling part took WAY too long for me.  I'm impatient).  After cutting the brownies, I gave scraps to my roommates and I shared another scrap with Jon.

The roommates declared them the best things I've ever baked.  Jon made deeply satisfied yummy noises.

I declared them too dangerous to keep in the house - never have I been more grateful that something I baked was a birthday treat!

So of course, I baked another pan to photograph and blog.  Really, everything I do is for you.

These brownies are fudge with flour.  For real.  They are fall-apart tender and gooey all at once.  The Kahlua and sea salt add little surprise top notes to the deep dark chocolate base, with the almonds (or any nut really - I want to try hazelnuts as the original recipe suggested) adding a mild crunch.  They're so rich that a small square, enjoyed slowly, doesn't make you feel deprived at all.

That doesn't, of course, stop you from wanting to eat the.whole.pan.  All at once.

I think these could easily be made with regular all-purpose flour instead of almond or brown rice without sacrificing the awesomeness of the recipe, so if you don't want to spend the money on the fancy flours, don't - give them a try and tell me how it goes!  I still have the remains of a bag of brown rice flour on my shelf, so I'll be content with this one gluten free treat for a while :)

Gluten Free Kahlua Almond Brownies
Source: lightly adapted from She's Becoming Doughmesstic

Ingredients:
10 tbsp salted butter, melted
1 cup granulated sugar
2 tbsp brown sugar
3/4 cup high quality unsweetened cocoa powder
1/4 tsp sea salt
1 tbsp Kahlua
1 tbsp vanilla (preferably Mexican - it pairs beautifully with chocolate)
2 large eggs
1/2 cup almond or brown rice flour
1/2 cup chocolate chips (I used semisweet)
1/3 cup slivered almonds (or nut of choice - give hazelnuts a shot!)


Directions:
Preheat the oven to 325˚F (I had more success at 350˚).  Line an 8x8" pan with foil or parchment, leaving an overhang on two sides, and spray the lining well with nonstick spray.


Melt the butter in the microwave or in a saucepan on the stove. As the butter melts, mix the sugars, cocoa powder, sea salt, Kahlua, and vanilla together in the bowl of a mixer.  Add the hot melted butter immediately and mix well to combine.  Allow the mixture to cool for approximately 5 minutes - you don't want the eggs to cook when you add them!


After 5 minutes, add the eggs one at a time, beating well to combine after each addition.  Add the flour and beat the mixture vigorously for 2 minutes - the batter should be thick and fluffy.  Stir in the chocolate chips and almonds.


Pour the batter into the prepared pan and bake for 30-32 minutes - they'll still be a bit gooey, but they'll firm up as they cool.  Leave them in the pan on a rack to cool for about 30-60 minutes, then place in the refrigerator for another 30-60 minutes - this will facilitate cutting.  Lift the brownies out of the pan using the foil or parchment overhang, cut into squares, and enjoy!

Saturday, January 21, 2012

Some Stories

So as you may or may not have noticed, I've been off the air...again...it's been a bit crazy around here!

On a super fun note...less than FOUR MONTHS till my wedding!!  Planning is in full swing and we've actually been insanely productive lately on that front!  Our engagement photos also came in - an absolutely brilliant set of pictures thanks to Jenn and Ben of the Buffalo-based Ayres Photography!  Here's one of our favorites:


Then the next part of life: dance!  At the beginning of every spring semester, the university's dance company comes back to school a week early to rehearse for our concert in February.  This year, the trip to Buffalo was preceded by a gorgeous weekend in NYC for a company audition!
I took the train up to the city the day before - with temperatures in the 50s! - met up with Jon, and spent a lovely afternoon and evening together doing things like catching a Parsons Dance APAP showing at Ailey (brilliant...every member of the company is incredible) and...buying new ballet shoes because...I forgot mine at home before the audition...yep.

The next day, I was up bright and early to get put together and warmed up for my audition.  I went to the studios, prepared for slippery floor conditions thanks to my Parsons friends, met up with a bunch of friends from my school, and next thing I knew, I was dancing for the director and rehearsal director of the company!

And summarily getting cut.

First professional rejection: CHECK.

But I feel like I danced well, so I didn't feel bad about getting cut.  In fact, I laughed about it, went and got doughnuts at The Doughnut Plant at Chelsea Hotel - a must visit for foodies in NYC: the doughnuts were so.good... - and drove home to Buffalo with the love of my life, ready to get back into the swing of all things dance.

I spent the next week sweaty, bruised, and sore beyond belief from rehearsing three different pieces for about 10 hours a day.  Just when I thought I was on my way to recovery, a choreographer would throw a new combination at us, and by the time we finished polishing that phrase I was right back where I started!

If I ever hear anyone say that dance is for sissies again, I might punch them.  After learning proper boxing technique so I don't hurt myself.

But overall, the week was fantastic!  I had a great time, successfully tested my snow tires in a blizzard, lost about three pounds, gained two of them back at a progressive dinner party (for which I made a double recipe of Hot Fudge Pudding Cake - it's a crowd pleaser!) and got some of the best sleep of my life thanks to exhaustion.

Then came MLK Day.

It's the only three-day weekend of spring semester.  I haven't had that day off in three years thanks to rehearsals, and this year was no different.

Except that it was.

Because this happened:
That, dear friends, is what happens when a school bus backs up onto the hood of your car while you're sitting on a campus road on your way to rehearsal with absolutely no idea that the bus full of children is going to suddenly back up after it has already opened its doors and you can't back up because there's an SUV behind you and you're so panicked that you forget you have a lovely contraption called a car horn that is meant for these exact times until you're watching your hood crumple while you curse, pray, and cry your eyes out in terror.

So that was my holiday!

Please, do not follow my example and get crushed by a yellow school bus.  It wasn't fun.
A little bit funny now...but not fun.

You are now caught up on my life, whether you wanted to be or not!
Coming up next: my first gluten-free baking adventure!

Monday, January 2, 2012

The Oddest Cupcakes I've Ever Made

This post is not going to come with a recipe.

Why, you ask?

Well, cause I haven't quite done with it what I want to yet!  But...these things were just too interesting to keep to myself.

First, a little background:
My friend Jenni and I have been close since she moved into the house on the corner when we were six years old.  Now, we go to college in different states, so we don't get to see a whole lot of each other.  When we do get together, though, we have a blast!  And it almost always involves food.

Last time, we made cupcake lasagnas - miniature lasagnas made with wonton wrappers, which were super cute! - and Annie's cookies and cream cupcakes, which are now some of my favorites.  So this time, when Jen suggested a hang-out geared around cupcake making, I enthusiastically agreed.

She showed me the recipe as soon as we entered her kitchen, and I don't think I've ever been so intrigued:

These were Cardamom Apple White Cheddar Cupcakes with Butter Frosting.

I'll let you contemplate that for a bit.


Yes, there are both apples and cheese in these cupcakes.  They're entirely sweetened with Lyle's Golden Syrup - for those who've never had it, it's like a caramel version of corn syrup.  And the frosting?  It's not your typical frosting - it's essentially sweetened whipped butter!  The original recipe called for an entire pound of butter in the "frosting" and showed it piled up like ice cream on top of the cupcakes.  Yikes!!

We cut the amount of butter in half...we're nowhere near that decadent.
As much as we do loooove butter.

But despite my teensy lingering doubts, I tried one.
And died a little inside.
It was sweet, moist, and didn't taste like a cheese cupcake - which I was a bit worried about.  It had good flavor balance and spice, like the most interesting spice cake ever.  But to me, it was less of a cupcake and a bit more of a muffin, so I came up with a list of things to try for next time.

I want to reduce the oil in them - the original amount called for was a bit excessive and left the cakes a bit greasy.  I'd try reducing the amount of golden syrup in the cake itself too - that stuff is really sweet, so for muffin purposes it'd be a bit much.  More importantly, though, I want to make them as muffins, so I want to try a crumble.  Since the frosting is more of a compound butter than a buttercream, I want to mix it up as I did this time, then reshape it into sticks, wrap it up, and chill it.  Later, I'd cut that golden syrup butter into some flour, brown sugar, and cardamom to make a crumb topping that gets sprinkled over the tops of the muffins before they're baked.

So, thanks to Jenni's rather brilliant idea for a baking experiment, I leave you today with no recipe, but hopefully some curiosity!  I hope to be back later with the muffin version, and I promise I'll tell you how to make those ;)