Showing posts with label weeknight meal. Show all posts
Tuesday, July 10, 2012
Last-Minute Meals: Southwestern Frittata
You know those days when five o'clock rolls around...and you have nothing planned for dinner?
Or those days when you have a dinner planned...and it's just not going to happen?
I had a day like that last week.
When days like that roll around, I look into my fridge and freezer and hope that whatever is in there will yield something remotely tasty and nutritious.
Lucky for me, I came up with eggs, spinach, salsa, cheese, leftover brown rice, and frozen peppers and onions. Add some olive oil, heat and a few spices, and there was dinner: a southwestern frittata!
For those of you who have never had a frittata (and seriously, you are missing out), it's an Italian-style flat omelette that gets cut into wedges and served; it's made from eggs and anything else you want to throw in. It's also the fastest meal in the history of meals! It's a great weeknight option and a very well-rounded vegetarian meal - and don't forget that eggs are involved, so it can be a quick brunch too! In case you couldn't tell, I'm a total frittata convert!
The next time you're in a crunch for any meal, preheat your broiler, heat up a skillet and pull out that carton of eggs! Let the leftovers in your fridge inspire you :)
Southwestern Frittata
Serves 6
Ingredients:
1-1/2 tbsp olive oil
6 large eggs
4 large egg whites (I used 1/2 cup of egg whites from a carton - they're awful convenient!)
1-1/2 tbsp milk
1/2 tsp salt
1/4 tsp black pepper
1/2 tsp hot chili powder
1 large handful baby spinach leaves, torn
1/2 package frozen bell pepper and onion blend
2-3 oz cheddar, jack, or pepperjack cheese, shredded
Salsa, for serving
Directions:
Preheat the broiler on low. Heat the olive oil in a large, oven-safe, nonstick skillet over medium-high heat. Add the frozen peppers and onions and cook until hot and soft, stirring occasionally.
As the mixture on the stove cooks, whisk together the eggs, egg whites, milk, and seasonings until smooth.
Move back to the stove. Add the spinach to the skillet and stir briefly, then pour the egg mixture over the vegetables. Cook, lifting the edges to allow uncooked egg to flow underneath, until the bottom of the frittata is golden brown - about 3 minutes. Sprinkle the cheese over the top and transfer the pan to the preheated broiler for 3-5 minutes, checking frequently, until the cheese is melted and the top of the frittata is golden and puffy. Take out of the oven and allow to rest for about 3 minutes. Slice, top with salsa, and serve - enjoy!
Friday, June 29, 2012
The Dancer Bakes Fancy Grilled Cheese
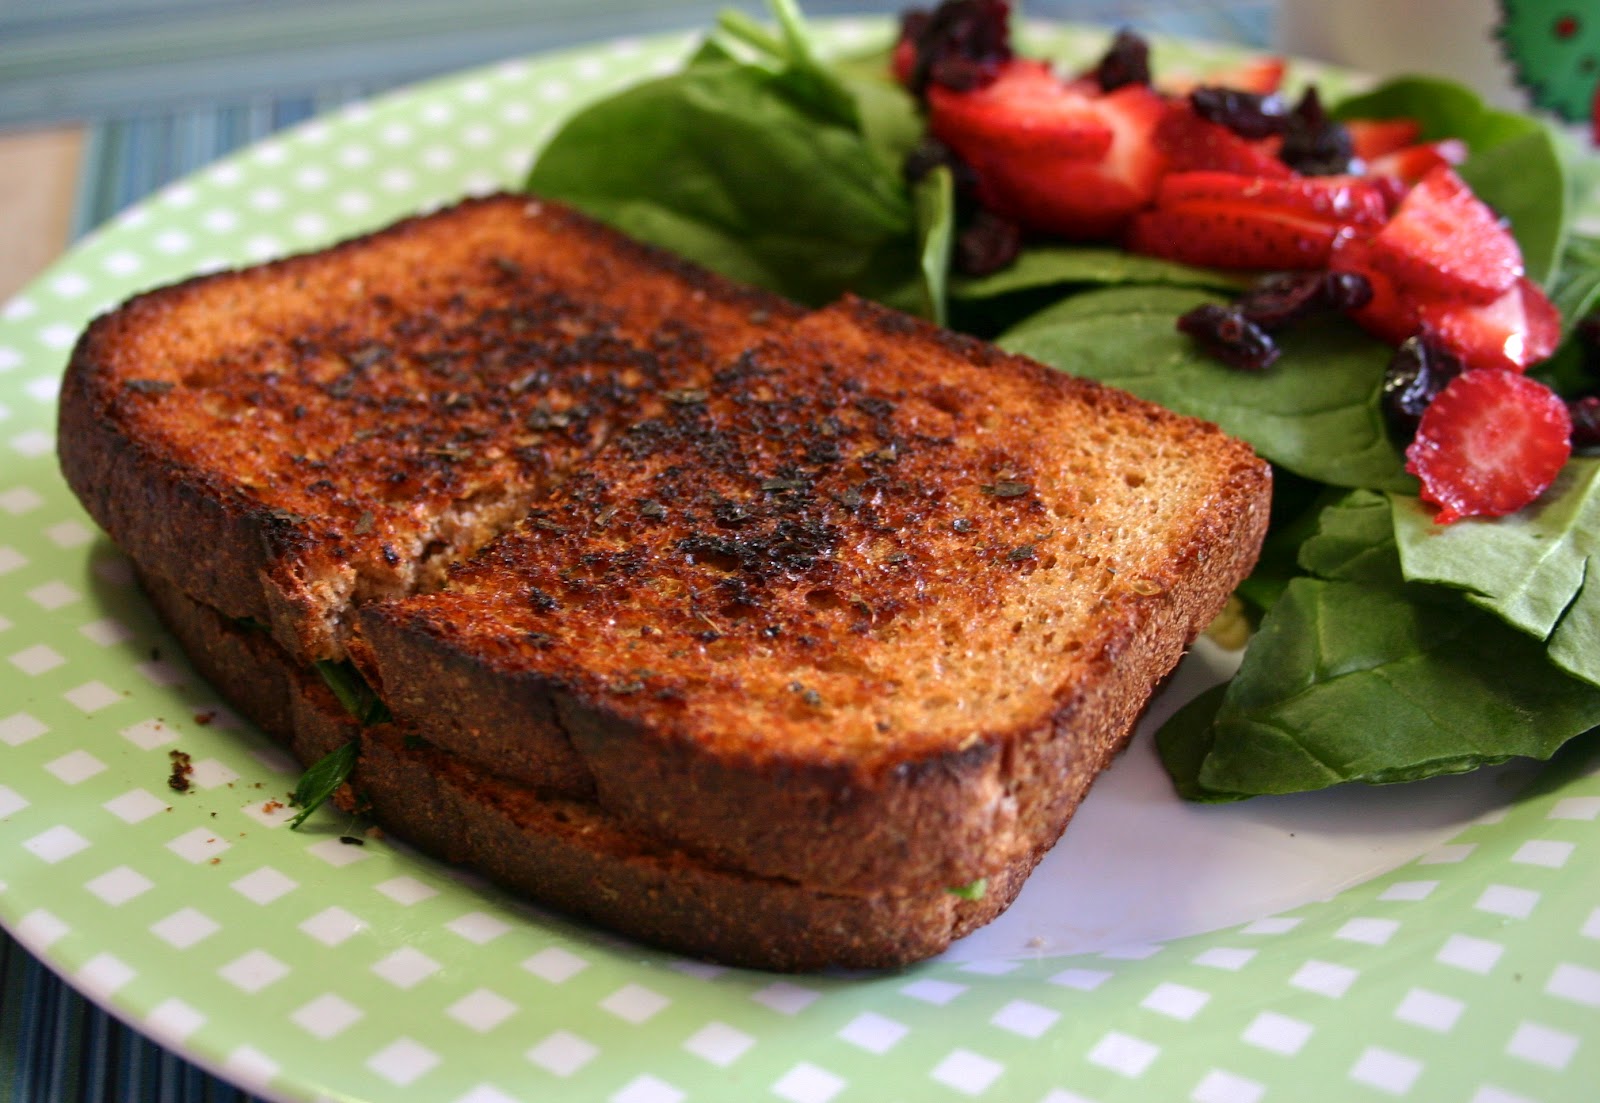
It's your regular, unsuspecting grilled cheese, right?
Golden brown and crispy, promising gooey melted comforting goodness inside?
But, see, I can never just let something be. It's a compulsion of sorts - I just have to keep playing!
Which is why, when the sandwich gets opened up, you get this:
Gooey melted comforting goodness PLUS sauteed spinach, sundried tomatoes, and herbs, toasted with olive oil instead of butter on whole grain bread.
So...basically, if I want to eat grilled cheese, I have to load it up with veggies. It's just how I roll. It's comfort food "light" (if you were next to me, you'd see me doing air quotes on that one): lower in saturated fats since there's no butter, and plenty of vegetable and whole grain nutrition. Since there's cheese, it's not totally light, but...grilled cheese kinda relies on that bit...
And did I mention yet that it's DELICIOUS??
...I haven't?
My bad. For the record, it's DELICIOUS.
For this particular sandwich, I also used fancy cheese.
Specifically, Cabot Tomato Basil Cheddar. Now, would this work with something different - like a Havarti, Mozzarella, even White Cheddar? Sure! But in my mind, this cheese took the flavors I added to the mix and enhanced them in the best way possible. So if Cabot cheeses go on sale at your neighborhood grocery store, snatch this one up - it's well worth it! If you have pesto on hand, by all that's holy, PLEASE add it - my mouth is watering thinking about it... And while grilled cheese is typically seen as lunch food, this one makes a sensationally tasty quick dinner alongside a salad or a cup of tomato soup!
The Dancer Bakes' Fancy Grilled Cheese
A Dancer Bakes original
Serves one
Ingredients:
1-1/2 tbsp olive oil, divided use
1 large handful fresh spinach leaves
Salt and pepper, to taste
2 slices whole grain bread of choice - regular sandwich or artisan
2 oz Cabot tomato basil cheddar cheese
6-7 sundried tomatoes, drained
Pinch each of:
Dried Parsley leaves
Dried Basil leaves
Dried Oregano
Dried Rosemary
Directions:
Heat a small skillet over medium heat and add 1/2 tablespoon of olive oil. Add your spinach leaves, salt, and pepper, and saute until wilted. Remove to a plate and set aside, briefly setting the hot skillet onto a cool burner.
While spinach is wilting, mix together the remaining olive oil and the dried herbs in a small bowl. Using a pastry brush, brush one side of each slice of bread with the olive oil and herb mixture. Layer the cheese, sundried tomatoes, and wilted spinach evenly on the un-oiled side of one of the pieces of bread. Put the skillet back on the heat, place the bread oil side down in it, and top with the other slice of bread. Cover and let cook for about 2 minutes, until the cheese starts to melt and the bottom piece of bread is crispy and golden. Flip the sandwich, cover, and cook for another 1-2 minutes, until the whole concoction is melty, crispy, and aromatic. Remove to a plate, allow to sit for 1-2 minutes, then slice and enjoy!
Golden brown and crispy, promising gooey melted comforting goodness inside?
But, see, I can never just let something be. It's a compulsion of sorts - I just have to keep playing!
Which is why, when the sandwich gets opened up, you get this:
Gooey melted comforting goodness PLUS sauteed spinach, sundried tomatoes, and herbs, toasted with olive oil instead of butter on whole grain bread.
So...basically, if I want to eat grilled cheese, I have to load it up with veggies. It's just how I roll. It's comfort food "light" (if you were next to me, you'd see me doing air quotes on that one): lower in saturated fats since there's no butter, and plenty of vegetable and whole grain nutrition. Since there's cheese, it's not totally light, but...grilled cheese kinda relies on that bit...
And did I mention yet that it's DELICIOUS??
...I haven't?
My bad. For the record, it's DELICIOUS.
For this particular sandwich, I also used fancy cheese.
Specifically, Cabot Tomato Basil Cheddar. Now, would this work with something different - like a Havarti, Mozzarella, even White Cheddar? Sure! But in my mind, this cheese took the flavors I added to the mix and enhanced them in the best way possible. So if Cabot cheeses go on sale at your neighborhood grocery store, snatch this one up - it's well worth it! If you have pesto on hand, by all that's holy, PLEASE add it - my mouth is watering thinking about it... And while grilled cheese is typically seen as lunch food, this one makes a sensationally tasty quick dinner alongside a salad or a cup of tomato soup!
The Dancer Bakes' Fancy Grilled Cheese
A Dancer Bakes original
Serves one
Ingredients:
1-1/2 tbsp olive oil, divided use
1 large handful fresh spinach leaves
Salt and pepper, to taste
2 slices whole grain bread of choice - regular sandwich or artisan
2 oz Cabot tomato basil cheddar cheese
6-7 sundried tomatoes, drained
Pinch each of:
Dried Parsley leaves
Dried Basil leaves
Dried Oregano
Dried Rosemary
Directions:
Heat a small skillet over medium heat and add 1/2 tablespoon of olive oil. Add your spinach leaves, salt, and pepper, and saute until wilted. Remove to a plate and set aside, briefly setting the hot skillet onto a cool burner.
While spinach is wilting, mix together the remaining olive oil and the dried herbs in a small bowl. Using a pastry brush, brush one side of each slice of bread with the olive oil and herb mixture. Layer the cheese, sundried tomatoes, and wilted spinach evenly on the un-oiled side of one of the pieces of bread. Put the skillet back on the heat, place the bread oil side down in it, and top with the other slice of bread. Cover and let cook for about 2 minutes, until the cheese starts to melt and the bottom piece of bread is crispy and golden. Flip the sandwich, cover, and cook for another 1-2 minutes, until the whole concoction is melty, crispy, and aromatic. Remove to a plate, allow to sit for 1-2 minutes, then slice and enjoy!
Friday, May 4, 2012
Cornmeal-Crusted Haddock and Black Bean Corn Saute
I don't know if I shared this before, but I was an extremely picky eater growing up.
My go-to meal at every restaurant was chicken tenders and fries. I judged restaurants solely on the quality of their chicken tenders. I lived off of the same six or seven meals for over a decade, because that was what I liked and was what I would eat. Chocolate, my first love, was always allowed. As were pancakes.
As for the list of things I wouldn't eat? It was much longer.
Condiments? Evil. Most vegetables? Disgusting. Exceptions: corn, carrots, green beans, peas, mushrooms, and lima beans. I know, the lima beans thing is totally weird, but whatever. Cheese on anything but pizza or grilled cheese? Gross! Eggs any other way than scrambled? No way. I ate exactly three kinds of nuts, and they were never allowed in my brownies, or without M&Ms breaking them up. Beans? Looked like poop. And I did not eat poop. And? I ate all my food in separate parts. Sauces didn't touch anything I ate for years, nor were different food groups allowed to touch on a plate, much less be consumed together! Thus, sandwiches, other than grilled cheese, were not to be touched, and burgers were eaten completely naked with a fork and knife. I'd only eat the bun at Fuddrucker's.
And fish? The penultimate "EWWW!"
I ate fish sticks until I was 4. Then I decided they were gross and refused to touch seafood until college.
Yeah. That long.
But when I got to school, I no longer had the option of those same seven meals. I had to find new things to eat. And the dining hall at my college didn't serve meat on Fridays: every Friday was Fish Fry-day. Eventually, I decided to give it a try again. After all, I kept hearing that fish was good for you. And nothing deep-fried could be that bad, right?
Right. It was delicious! After that, I was way more adventurous with food, seafood in particular. And, to my shock, I discovered that I loved so many foods that I had turned up my nose at for years!
The meal I'm about to share with you is something I never would have eaten four years ago, but am SO glad that I can cook and enjoy for myself now. Fresh haddock fillets are dredged in milk and a spiced cornmeal crust, then baked, and served with a saute of black beans (yep, "poop" no more), corn, peppers, and zucchini. The combination is absolutely delicious, and it makes fabulous leftovers! Two words: fish tacos. Add some cubes of avocado, fresh spinach leaves, and warm corn tortillas, and life is wonderful. Cinco de Mayo, anyone?
Whether or not you're a reformed picky eater like me, give this a shot! It's nutrient rich, comes together super quickly, and makes a truly delicious weeknight meal!
Quick recipe note: This recipe was...well, completely eyeballed. I'm guessing at approximate amounts here, so feel free to adjust seasonings and proportions at will!
Cornmeal Crusted Haddock
Ingredients:
1.5 lbs fresh haddock fillets (or another firm white fish) - 4-6 pieces
1 cup coarse yellow cornmeal
1 tsp chili powder
1/2 tsp ground cumin
1/2 tsp dried oregano leaves
salt & black pepper to taste
3/4 cup milk
Olive oil cooking spray
Directions:
Preheat the oven to 500˚F. Lightly grease a 9x13" glass baking dish and set aside.
Pour the milk into a wide, shallow bowl. On a piece of wax paper, combine cornmeal, chili powder, cumin, oregano, salt, and pepper. (Word of advice - don't go too easy on the salt!) Toss together gently with your hands until the spices appear evenly distributed in the mixture.
Dredge each piece of fish in the milk, then coat thoroughly with the cornmeal mixture. Place the fillets in the prepared baking dish and spray lightly with cooking spray. Bake on the top rack of the oven for about 15 minutes, until the fish flakes easily. Serve immediately as is or flake over warmed tortillas for tacos. Enjoy!
Black Bean Corn Saute
Source: inspired by Melissa D'Arabian
Ingredients:
1 tbsp olive oil
1 medium zucchini, cut into quartered rounds
1-1/2 cups frozen corn kernels
1-1/2 cups frozen diced red & green bell peppers
1 can black beans, drained & rinsed
salt & black pepper, to taste
Directions:
Heat the olive oil in a large skillet over medium-high heat. Add the zucchini and saute until it starts to become tender, 3-5 minutes. Add the frozen corn and diced peppers and saute for another 5 minutes. Add the black beans and stir in until the whole mixture is heated through. Season with salt and pepper as desired, and serve with the fish on its own or in tacos. Enjoy!
My go-to meal at every restaurant was chicken tenders and fries. I judged restaurants solely on the quality of their chicken tenders. I lived off of the same six or seven meals for over a decade, because that was what I liked and was what I would eat. Chocolate, my first love, was always allowed. As were pancakes.
As for the list of things I wouldn't eat? It was much longer.
Condiments? Evil. Most vegetables? Disgusting. Exceptions: corn, carrots, green beans, peas, mushrooms, and lima beans. I know, the lima beans thing is totally weird, but whatever. Cheese on anything but pizza or grilled cheese? Gross! Eggs any other way than scrambled? No way. I ate exactly three kinds of nuts, and they were never allowed in my brownies, or without M&Ms breaking them up. Beans? Looked like poop. And I did not eat poop. And? I ate all my food in separate parts. Sauces didn't touch anything I ate for years, nor were different food groups allowed to touch on a plate, much less be consumed together! Thus, sandwiches, other than grilled cheese, were not to be touched, and burgers were eaten completely naked with a fork and knife. I'd only eat the bun at Fuddrucker's.
And fish? The penultimate "EWWW!"
I ate fish sticks until I was 4. Then I decided they were gross and refused to touch seafood until college.
Yeah. That long.
But when I got to school, I no longer had the option of those same seven meals. I had to find new things to eat. And the dining hall at my college didn't serve meat on Fridays: every Friday was Fish Fry-day. Eventually, I decided to give it a try again. After all, I kept hearing that fish was good for you. And nothing deep-fried could be that bad, right?
Right. It was delicious! After that, I was way more adventurous with food, seafood in particular. And, to my shock, I discovered that I loved so many foods that I had turned up my nose at for years!
The meal I'm about to share with you is something I never would have eaten four years ago, but am SO glad that I can cook and enjoy for myself now. Fresh haddock fillets are dredged in milk and a spiced cornmeal crust, then baked, and served with a saute of black beans (yep, "poop" no more), corn, peppers, and zucchini. The combination is absolutely delicious, and it makes fabulous leftovers! Two words: fish tacos. Add some cubes of avocado, fresh spinach leaves, and warm corn tortillas, and life is wonderful. Cinco de Mayo, anyone?
Whether or not you're a reformed picky eater like me, give this a shot! It's nutrient rich, comes together super quickly, and makes a truly delicious weeknight meal!
Quick recipe note: This recipe was...well, completely eyeballed. I'm guessing at approximate amounts here, so feel free to adjust seasonings and proportions at will!
Cornmeal Crusted Haddock
Ingredients:
1.5 lbs fresh haddock fillets (or another firm white fish) - 4-6 pieces
1 cup coarse yellow cornmeal
1 tsp chili powder
1/2 tsp ground cumin
1/2 tsp dried oregano leaves
salt & black pepper to taste
3/4 cup milk
Olive oil cooking spray
Directions:
Preheat the oven to 500˚F. Lightly grease a 9x13" glass baking dish and set aside.
Pour the milk into a wide, shallow bowl. On a piece of wax paper, combine cornmeal, chili powder, cumin, oregano, salt, and pepper. (Word of advice - don't go too easy on the salt!) Toss together gently with your hands until the spices appear evenly distributed in the mixture.
Dredge each piece of fish in the milk, then coat thoroughly with the cornmeal mixture. Place the fillets in the prepared baking dish and spray lightly with cooking spray. Bake on the top rack of the oven for about 15 minutes, until the fish flakes easily. Serve immediately as is or flake over warmed tortillas for tacos. Enjoy!
Black Bean Corn Saute
Source: inspired by Melissa D'Arabian
Ingredients:
1 tbsp olive oil
1 medium zucchini, cut into quartered rounds
1-1/2 cups frozen corn kernels
1-1/2 cups frozen diced red & green bell peppers
1 can black beans, drained & rinsed
salt & black pepper, to taste
Directions:
Heat the olive oil in a large skillet over medium-high heat. Add the zucchini and saute until it starts to become tender, 3-5 minutes. Add the frozen corn and diced peppers and saute for another 5 minutes. Add the black beans and stir in until the whole mixture is heated through. Season with salt and pepper as desired, and serve with the fish on its own or in tacos. Enjoy!
Thursday, April 5, 2012
Super Moist Turkey Burgers
It was all a tease.
That one glorious week of upper-70s sunshine, cool breezes, and vitamin D absorption?
TEASE.
It's officially spring in Buffalo, which means weather in the 30s and 40s with grey skies and drizzly business. Not the most conducive to happiness or productivity. Or desire to exercise...woof.
When the happy weather was here, so was my summer appetite. Which means I was totally craving burgers. I managed to find some frozen lean ground turkey and I got super excited, because that meant turkey burgers!
Now, you might find this odd, but 95% of the time I'm hit with a burger craving, it's for a turkey or veggie patty. I know, I know...those aren't "real" burgers. But I save my "real" burger indulgences for one meal after a hardcore performance season, and when those come around nothing but a huge bacon cheeseburger will cut it!
This time, though, I was feeling the turkey burger.
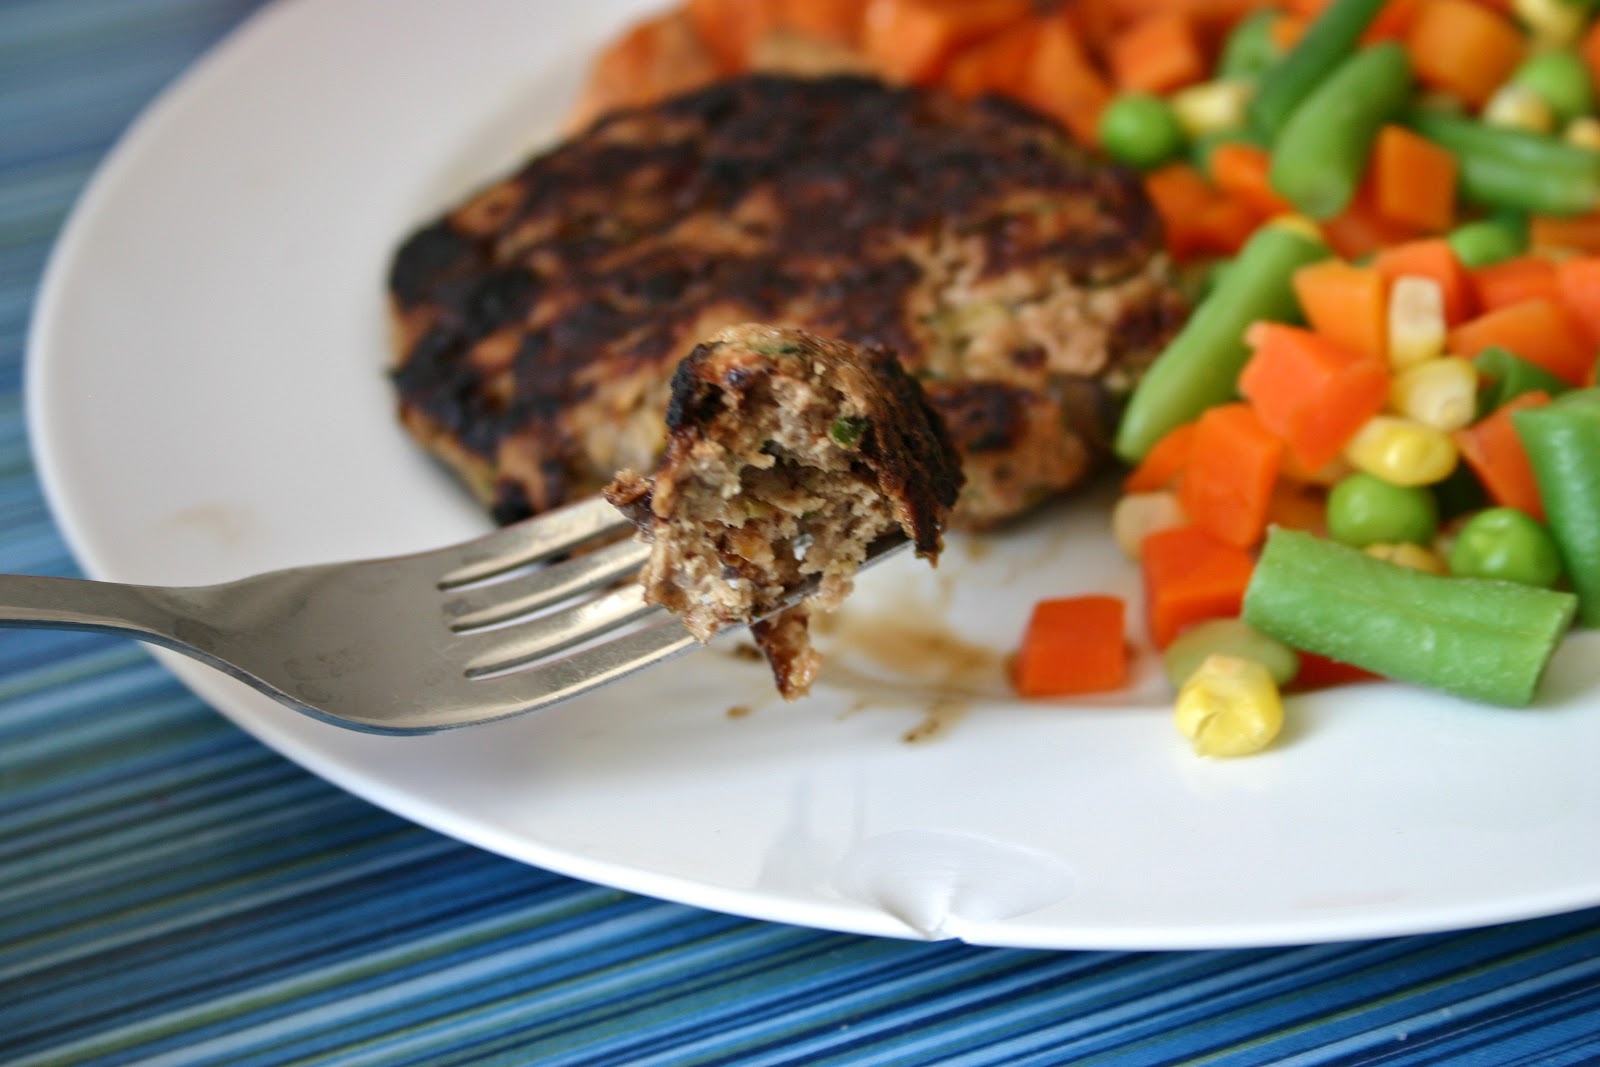
Between the ground turkey, my favorite tried and true burger add-ins in the pantry, and some awesome produce deals, I managed to come up with a turkey burger that exceeded my expectations of deliciousness: no bun, no toppings, and I still couldn't stop digging my fork into that patty! Served with a side salad or mixed veggies and roasted sweet potatoes, it satisfied all my most ardent summer food cravings in a low-fat, nutrient-packed and delicious meal.
Not a tease in sight! If only the weather would be so cooperative...
Super Moist Turkey Burgers
Ingredients:
1 lb lean ground turkey
1 tbsp olive or canola oil, divided (more if needed)
1 medium zucchini, grated
8 oz cremini mushrooms, diced
1 tbsp Worcestershire sauce
1/2-1 tsp salt (to your taste)
2 tbsp-1/4 cup whole-wheat breadcrumbs
Mrs. Dash Original Seasoning Blend
Directions:
Heat 1/2 tbsp of the oil in a skillet over medium-high heat. Add the diced mushrooms and cook until the excess moisture begins to evaporate and the mushrooms are browned, breaking up any larger pieces as much as possible. Add the grated zucchini to the skillet, cover, and allow to cook until all the excess liquid in the pan has evaporated - about 3-4 more minutes. Remove the skillet from the heat.
Place the ground turkey in a medium mixing bowl and break up. Add the Worcestershire, salt, Mrs. Dash, breadcrumbs, and the vegetable mixture, and blend well using a wooden spoon or your hands. Form into desired size patties, making an indentation in the center of each with your thumb so that the burgers will cook up flat. My mixture made five substantial patties.
Brush a grill pan with the remaining oil or add it to a skillet over medium heat. Add as many burgers as will comfortably fit in the pan and allow to cook, untouched, for 6 minutes. Flip the burgers and cook for another 6 minutes, or until a crust has formed and the internal temperature has reached 165˚F. Remove to a plate and cook any remaining burgers in the same manner.
Serve burgers on their own or with toppings of choice - as toppings go, I recommend Havarti cheese, baby spinach, fresh tomato, basil or sundried tomato pesto, and a whole wheat bun. Enjoy!
Friday, March 23, 2012
Shrimp and Vegetable Fried Quinoa
We've been through the whole "if you crave Chinese food in Buffalo" issue before. So I won't bore you by repeating it with this make-your-own-fake-Asian-food-that's-better-than-Buffalo-takeout post :)
This recipe was born of a need for a quick, easy, clean pantry meal that would last me for several days of leftovers and, well, wouldn't make me look bloated in a costume with no stomach. Gotta love tech week!
I got the idea for a fried rice-style quinoa dish here and thought it would be a great solution. Plus, I had some fully cooked shrimp and some peas in the freezer; carrots, mushrooms, eggs, and low-sodium soy sauce in the fridge; and quinoa in the pantry that could be ready in twenty minutes. Sold. I cooked the quinoa during a fortuitously extended lunch break, then came back and cooked it all up in a jiff before rehearsal.
This dish packs a major protein punch with very little fat, thanks to the combination of shrimp, egg, and quinoa. It was filling without being heavy and it definitely gave me the energy to get through rehearsals after a long day of classes.
Plus, it was really tasty. This one will definitely come back to mind the next time I want Asian food that will make me feel good about myself :)
Shrimp and Vegetable Fried Quinoa
Source: Methods and amounts taken and/or modified from Cheeky Kitchen and Annie's Eats
Ingredients:
2-3 tbsp olive or vegetable oil, divided
1 cup diced carrots
8 oz sliced cremini or white button mushrooms
About 1 lb pre-cooked tails-off frozen shrimp
1 cup frozen peas
3 eggs, lightly beaten
3 cups cold cooked quinoa
3 tbsp low-sodium soy sauce
Garlic powder, salt, and pepper, to taste
Directions:
Place the frozen shrimp in a colander and run under cold water until thawed.
Heat one tablespoon of oil over medium-high heat in a large frying pan or wok. Add the eggs to the pan, cooking and stirring till they are lightly scrambled, but not dry. Remove from the pan onto a plate and set aside.
Add the remaining 1-2 tablespoons of oil to the pan. Once the oil is hot, add the carrots and mushrooms, stir-frying until slightly tender - about 5 minutes. Add the shrimp and peas and cook for about one minute more. Add the quinoa to the pan, stirring to break up any clumps and combine the mixture thoroughly. Stir in the soy sauce and seasonings to taste and continue to cook, stirring every so often, until the mixture is hot throughout. Add the eggs back into the mixture, stir to combine, and serve immediately. Enjoy!
Friday, February 3, 2012
Cashew Chicken with Broccoli & Mushrooms
I've learned a lot during my four years in Buffalo.
- Never expect a snow day. Expect snow. Every day from December through March, maybe even April or May. But don't expect a snow day.
- Wind is evil. And everywhere.
- Taking food photos in the winter when you can't afford studio lighting gets...complicated.
- "Buffalo wings" = wrong. "Wings" = right.
- Tim Hortons' Roll Up the Rim month will make you spend waaaay more money than you mean to spend. But hey, you could win a car!! Or a free donut.
- If you live in the Buffalo area, you're a Bills and Sabres fan. Even if you hate either football or hockey.
- Paula's Donuts are heaven. HEAVEN, I tell you.
And this one I find particularly important to anyone who grew up in DC or NY:
- Thai food in Buffalo is brilliant.
Japanese food in Buffalo is awesome.
Chinese food in Buffalo SUCKS. With a capital SUCKS.
I love Chinese food. But I have not even tasted a single truly good batch of Chicken Fried Rice since I got to UB - the flavors are off and all you get is egg, bamboo shoots, a few chunks of chicken, and HUGE pieces of virtually raw onion. I'm sorry, but if the Chinese place you're ordering from also delivers pizza and wings...don't order from them. I beg you. Save yourself.
If I ever get a craving for Asian flavors, I stick with Thai, hibachi, or I just make my own mock Chinese food. I always have a bottle of low-sodium soy sauce in the fridge for those nights when dangit, nothing but stir fry will cut it!
And this recipe has officially cut the line to the top of my list of favorite weeknight recipes.
Not just Asian-style weeknight recipes. Weeknight recipes, period.
It's that good.
The combination of flavors and textures is just such a win. Don't bother letting me explain in detail - make it for yourself the next time you want takeout! It'll be ready just as fast, and your wallet and tummy will thank you :)
Cashew Chicken with Broccoli and Mushrooms
Source: adapted slightly from Cheeky Kitchen
Serves at least 4
Ingredients:
1 pound boneless skinless chicken breast, cut into bite-sized chunks
1 tbsp olive oil
8 oz cremini mushrooms, sliced
1 tsp garlic powder, or to taste
1/2 tsp crushed red pepper, or to taste
4-6 tbsp low-sodium soy sauce
2 tbsp cornstarch
1/3-1/2 cup water (use less for a thicker sauce, more for a thinner sauce)
2-3 cups bite-sized broccoli florets
1/2 cup salted cashews
Rice or noodles, for serving
Directions:
In a wok or large sauté pan, heat the olive oil over medium-high heat. Toss in the chicken pieces and stir fry until cooked through. Add the mushrooms and allow to cook briefly. Sprinkle the mixture with the garlic powder, crushed red pepper, and desired amount of soy sauce. Whisk together the water and cornstarch in a measuring cup and pour over the chicken and mushrooms, stirring to coat. Add the broccoli florets, cover the pan, and allow to cook until the broccoli is bright green. Toss in the cashews and serve over rice or noodles. Enjoy!
- Never expect a snow day. Expect snow. Every day from December through March, maybe even April or May. But don't expect a snow day.
- Wind is evil. And everywhere.
- Taking food photos in the winter when you can't afford studio lighting gets...complicated.
- "Buffalo wings" = wrong. "Wings" = right.
- Tim Hortons' Roll Up the Rim month will make you spend waaaay more money than you mean to spend. But hey, you could win a car!! Or a free donut.
- If you live in the Buffalo area, you're a Bills and Sabres fan. Even if you hate either football or hockey.
- Paula's Donuts are heaven. HEAVEN, I tell you.
And this one I find particularly important to anyone who grew up in DC or NY:
- Thai food in Buffalo is brilliant.
Japanese food in Buffalo is awesome.
Chinese food in Buffalo SUCKS. With a capital SUCKS.
I love Chinese food. But I have not even tasted a single truly good batch of Chicken Fried Rice since I got to UB - the flavors are off and all you get is egg, bamboo shoots, a few chunks of chicken, and HUGE pieces of virtually raw onion. I'm sorry, but if the Chinese place you're ordering from also delivers pizza and wings...don't order from them. I beg you. Save yourself.
If I ever get a craving for Asian flavors, I stick with Thai, hibachi, or I just make my own mock Chinese food. I always have a bottle of low-sodium soy sauce in the fridge for those nights when dangit, nothing but stir fry will cut it!
And this recipe has officially cut the line to the top of my list of favorite weeknight recipes.
Not just Asian-style weeknight recipes. Weeknight recipes, period.
It's that good.
The combination of flavors and textures is just such a win. Don't bother letting me explain in detail - make it for yourself the next time you want takeout! It'll be ready just as fast, and your wallet and tummy will thank you :)
Cashew Chicken with Broccoli and Mushrooms
Source: adapted slightly from Cheeky Kitchen
Serves at least 4
Ingredients:
1 pound boneless skinless chicken breast, cut into bite-sized chunks
1 tbsp olive oil
8 oz cremini mushrooms, sliced
1 tsp garlic powder, or to taste
1/2 tsp crushed red pepper, or to taste
4-6 tbsp low-sodium soy sauce
2 tbsp cornstarch
1/3-1/2 cup water (use less for a thicker sauce, more for a thinner sauce)
2-3 cups bite-sized broccoli florets
1/2 cup salted cashews
Rice or noodles, for serving
Directions:
In a wok or large sauté pan, heat the olive oil over medium-high heat. Toss in the chicken pieces and stir fry until cooked through. Add the mushrooms and allow to cook briefly. Sprinkle the mixture with the garlic powder, crushed red pepper, and desired amount of soy sauce. Whisk together the water and cornstarch in a measuring cup and pour over the chicken and mushrooms, stirring to coat. Add the broccoli florets, cover the pan, and allow to cook until the broccoli is bright green. Toss in the cashews and serve over rice or noodles. Enjoy!
Sunday, January 1, 2012
Company Rice Casserole
First of all, Happy New Year! Though my New Year's Eve wasn't spent the way I wanted, or the way I spent the last two, it was a happy time with family and I have nothing but hope for 2012 :)
Secondly,
You know how there are some foods that are really tasty but photograph really badly?
Well, this is one of them.
This is a variation on a casserole I grew up eating. It was a basic combination of white rice, cream of mushroom soup and turkey sausage covered with melty cheese. My mom had long since swapped out the cream of salt soup for a medium-thick white sauce, and this time around my dad and I decided to healthify (spellcheck is telling me that's not a word...I don't care) it even further. I changed the white rice for brown, thawed some peas, sauteed up some mushrooms with the turkey sausage, and voilĂ !
The method of assembly had to change with the ingredients, though. The white rice would usually cook in the oven with the white sauce and some extra water. Swapping in brown rice would've made that process longer and considerably more interesting, so my dad suggested just pre-cooking the rice. Sold! Once all the separate parts were done, we stirred them all together, topped them with some cheese, and stuck the dish in the oven to warm up.
The results of our health experiment: delicious.
Next time I want to try a variation on a theme: sub in some Italian spiced turkey sausage and use mozzarella on the top! Maybe even some parmesan in the white sauce...hmmm...food for thought!
If you need a relatively quick and healthy meal, give this a shot. Bonus: plenty of leftovers! Just...forgive it for not being pretty...
Company Rice Casserole
Source: modified from a family recipe
Ingredients:
1 cup uncooked long-grain brown rice, such as basmati
_ oz turkey sausage
1 tbsp salted butter
4 oz cremini or white button mushrooms, cut into small pieces
1 cup frozen petite peas, run under cold water to thaw
3 tbsp margarine (preferably trans-fat free)
3 tbsp all-purpose flour
1/2 tsp salt
1 cup milk
4 oz shredded cheddar cheese
Directions:
Cook the brown rice according to package directions. Set aside.
In a large skillet coated with cooking spray, brown the turkey sausage, breaking it up into pieces. Remove it and set aside. Add the butter to the skillet, allow it to melt, then add the mushrooms and saute until browned and reduced in size - cook as much liquid off as possible. Take the skillet off the heat and set aside.
To make the white sauce, melt the margarine in a medium saucepan over medium heat. Add the flour and salt and stir together quickly till yellowish clumps form (appetizing, I know). Add the milk, whisking vigorously to combine and break up any lumps. Switch to a wooden spoon and stir constantly until the sauce has thickened quite a bit.
Preheat the oven to 350˚. Pour the rice, sausage, mushrooms, and thawed peas into a medium-large casserole dish. Pour the white sauce over the top and stir to combine thoroughly. You may need to add another splash of milk to coat everything. Place the casserole in the oven for 20-30 minutes, until heated through. Pull the dish out of the oven and sprinkle the cheese evenly over the top. Put the casserole back in the oven for another 10-15 minutes, until the cheese is melted and bubbly. Serve and enjoy!
Secondly,
You know how there are some foods that are really tasty but photograph really badly?
Well, this is one of them.
This is a variation on a casserole I grew up eating. It was a basic combination of white rice, cream of mushroom soup and turkey sausage covered with melty cheese. My mom had long since swapped out the cream of salt soup for a medium-thick white sauce, and this time around my dad and I decided to healthify (spellcheck is telling me that's not a word...I don't care) it even further. I changed the white rice for brown, thawed some peas, sauteed up some mushrooms with the turkey sausage, and voilĂ !
The method of assembly had to change with the ingredients, though. The white rice would usually cook in the oven with the white sauce and some extra water. Swapping in brown rice would've made that process longer and considerably more interesting, so my dad suggested just pre-cooking the rice. Sold! Once all the separate parts were done, we stirred them all together, topped them with some cheese, and stuck the dish in the oven to warm up.
The results of our health experiment: delicious.
Next time I want to try a variation on a theme: sub in some Italian spiced turkey sausage and use mozzarella on the top! Maybe even some parmesan in the white sauce...hmmm...food for thought!
If you need a relatively quick and healthy meal, give this a shot. Bonus: plenty of leftovers! Just...forgive it for not being pretty...
Company Rice Casserole
Source: modified from a family recipe
Ingredients:
1 cup uncooked long-grain brown rice, such as basmati
_ oz turkey sausage
1 tbsp salted butter
4 oz cremini or white button mushrooms, cut into small pieces
1 cup frozen petite peas, run under cold water to thaw
3 tbsp margarine (preferably trans-fat free)
3 tbsp all-purpose flour
1/2 tsp salt
1 cup milk
4 oz shredded cheddar cheese
Directions:
Cook the brown rice according to package directions. Set aside.
In a large skillet coated with cooking spray, brown the turkey sausage, breaking it up into pieces. Remove it and set aside. Add the butter to the skillet, allow it to melt, then add the mushrooms and saute until browned and reduced in size - cook as much liquid off as possible. Take the skillet off the heat and set aside.
To make the white sauce, melt the margarine in a medium saucepan over medium heat. Add the flour and salt and stir together quickly till yellowish clumps form (appetizing, I know). Add the milk, whisking vigorously to combine and break up any lumps. Switch to a wooden spoon and stir constantly until the sauce has thickened quite a bit.
Preheat the oven to 350˚. Pour the rice, sausage, mushrooms, and thawed peas into a medium-large casserole dish. Pour the white sauce over the top and stir to combine thoroughly. You may need to add another splash of milk to coat everything. Place the casserole in the oven for 20-30 minutes, until heated through. Pull the dish out of the oven and sprinkle the cheese evenly over the top. Put the casserole back in the oven for another 10-15 minutes, until the cheese is melted and bubbly. Serve and enjoy!
Friday, November 25, 2011
Sweet Potato Harvest Salad
I'm sitting on the couch at our house in the West Virginia mountains, watching Sing Off videos on YouTube with my dad, and nursing a food baby of epic proportions inside my fleecy penguin footie pajamas. Based on this description of myself, it occurs to me that now might be a good time to post a salad...
It's holiday detox time, folks. Starting tomorrow morning, it's back to exercise and healthy eating.
With pie still involved, though. Can't say no to pie...
If you find yourself in a sugar coma but still hungering after fall flavors, give this salad a try. Roasted sweet potatoes, Gala apple chunks, dried dates, and pecans combine to lend a sense of comfort to the low-calorie dish. Add some grilled chicken - or better yet, leftover turkey! - and you've got a balanced and complete meal!
Sweet Potato Harvest Salad
Source: a Dancer Bakes original
Serves one
Ingredients:
1 1/2 cups Romaine lettuce, washed and torn
1 cup baby spinach leaves
1/3 recipe roasted sweet potatoes (below)
1/2 small or medium Gala apple, coarsely chopped
1/4 cup dried dates
1/4 cup pecans, coarsely chopped
1 tbsp extra virgin olive oil
Black pepper, to taste
1/2 cup shredded chicken or turkey (optional)
Directions:
Toss first six ingredients together. Drizzle with olive oil and sprinkle with black pepper to taste. Top with the chicken or turkey, if desired. Serving with a leftover roll from Thanksgiving dinner is highly encouraged :) Enjoy!
Roasted Sweet Potatoes
Ingredients:
1 medium sweet potato, peeled and cut into 1/2-inch cubes
1 tbsp olive oil
Ground cinnamon
Ground ginger
Salt
Black pepper
Directions:
Preheat the oven to 400˚F with a rack on the middle position.
Place cubed sweet potatoes into a bowl. Drizzle with olive oil and sprinkle with desired amounts of salt, pepper, cinnamon, and ginger; toss together to combine. Spread into an even layer on a nonstick baking sheet lined with foil and sprayed lightly with cooking spray. Roast in the oven for 20-30 minutes, until the potatoes are tender and your kitchen smells divine. Enjoy hot or allow to cool before using them in the Harvest Salad.
Monday, October 17, 2011
Pasta with Pumpkin Cream Sauce
And now, Part 2 of my pumpkin obsession: Pumpkin Pasta!
This may sound as weird to you as it did to me. Because the idea of it majorly intrigued me in the "will it or won't it be good?" sense.
I can tell you now: it will be good.
At least, it was for me and the hubby-to-be.
Pumpkin is a vegetable. And I think we forget that when we dig into a pumpkin donut or devour another slice of pumpkin pie (which I will leave up to you lovely folks - pumpkin pie is not my thing.) So using it in a savory context does actually make sense.
Delicious, creamy sense.
The sauce is a lightened-up cream sauce, with plenty of pumpkin and some sage to complement it. Not to mention Parmesan cheese, which makes everything in the world better. It is delightfully creamy and a gorgeous orange color; when tossed with whole-wheat pasta and served with a salad, it makes a light yet hearty and delicious meal! This will definitely get made again in my kitchen...as soon as I find more pumpkin. Which could be a while.
Pasta with Pumpkin Cream Sauce
Source: Runs with Spatulas
Ingredients:
1 pound whole wheat pasta, such as spaghetti, fettuccine, or linguine
1 medium vidalia onion, minced
3 medium cloves garlic, minced
2 sprigs fresh sage leaves, finely chopped
1 tbsp olive oil
3/4 cup pumpkin puree
3/4 cup low-sodium chicken or vegetable broth
1/2 cup fat-free half and half
Kosher salt and freshly cracked black pepper
1/4 cup grated Parmesan cheese
Directions:
Bring a large pot of water to a boil over medium-high heat. Add salt, pour in the pasta and cook according to the directions on the box.
Heat the olive oil in a large saucepan over medium heat. Add the onion and garlic; cook for about 3 minutes, stirring, until they have softened. Stir in the pumpkin puree, broth, half & half, and half of the fresh sage. Reduce the heat to medium-low and cook for about 10 minutes, stirring frequently, until the sauce is slightly thickened. If you chopped your onion into bigger pieces (like I did...oops), now would be the time to blend it smooth in a blender, food processor, or with an immersion blender. The smoother the sauce, the happier you will be! If you blended it, transfer it back to the saucepan. Season with salt and pepper to taste; keep warm on the lowest heat setting.
Drain the pasta and add to the sauce, then add 2 tablespoons of the cheese and mix well. Serve and sprinkle with the remaining 2 tablespoons of cheese and the remaining sage. This pairs excellently with a Caesar salad and a glass of white wine :) Enjoy!
Friday, September 30, 2011
Tilapia with Tomato-Herb Pan Sauce
Thanks to my nutrition class, I was forced to acknowledge some wince-inducing nutrient imbalances, so I've been trying lately to really vary my diet and experiment with more in the kitchen. So, onto my grocery list went fish and cherry tomatoes.
Now, the cherry tomatoes bit may seem odd to you, but here's the thing: I don't particularly love tomatoes. Tomato sauce, yes - give me a great basil marinara and I will grin from ear to ear. But tomatoes?
Raw ones kinda give me the skeeves.
And get cherry tomatoes out of my sight. Pretty much completely. They're so much worse than regular tomatoes, especially raw. Gag me.
But for the sake of my nutrition, cherry tomatoes were purchased. And cooked.
And consumed with delight.
I had seen Chicken with Tomato-Herb Pan Sauce all over the place - like here and here and here - and I was really intrigued despite my loathing for all things tomato. But I looked at how they were cooked and thought, blackened and juicy with herbs and wine is good... so I faced my skeevy feelings and made the dish, just substituting tilapia filets for the chicken.
Lord Almighty, was that a fantastic idea.
The tilapia was light and flaky, complimented beautifully by the richness of the tomato pan sauce. And herb butter may be the best culinary invention ever. Besides frosting.
Even better, this meal came together in pretty much record time. For something that looks, smells, and tastes this fancy, it was nothing short of magical! And now I fully understand the blogosphere's obsession with this dish, since I'm obsessed with it too. I'll have to try it with the original chicken sometime :)
Tilapia with Tomato-Herb Pan Sauce
Source: slightly adapted from Bon Appetit, July 2011 via Cook Like a Champion
Ingredients:
2 tbsp unsalted butter, at room temperature
1 garlic clove, minced
1/2 tsp dried oregano (or 1 1/2 tsp fresh)
1/2 tsp sweet paprika
Salt and freshly ground black pepper
3 tilapia filets
1/4 cup all-purpose flour
2 tsp olive oil
2 cups (11-12 oz) cherry tomatoes
1/4 cup vegetable broth
splash of dry wine (white is preferable but I used red and it turned out just fine)
Directions:
In a small bowl, mix together the butter, garlic, oregano, and paprika. Season to taste with salt and pepper and set aside.
Preheat the oven to its lowest possible temperature and measure out flour onto a plate or a sheet of wax paper. Season the fish filets liberally with salt and pepper on both sides, then dredge lightly in flour, shaking off the excess.
Melt one tablespoon of the seasoned butter with the olive oil in a skillet over high heat. Reduce the heat to medium-high when the butter stops foaming. Place the fish filets in the skillet and cook for about 4 minutes on each side, until the fish is browned on the outside and white and flaky on the inside. Transfer the fish to a clean oven-safe pan or plate and place in the oven while you make the pan sauce.
Increase the heat under the skillet to high and add the tomatoes to the pan, stirring occasionally until they begin to char and burst. Add the remaining tablespoon of herb butter to the pan. Crush the tomatoes slightly with your wooden spoon to help them release their juices, scraping the bottom of the pan to release the flavorful brown bits on the bottom. Stir in the broth and wine and allow to cook down for a couple minutes. Remove the fish from the oven, adding any juices that accumulated on the dish to the skillet. Plate the tilapia filets and top with the tomato sauce - the combination is particularly tasty with rice and a green vegetable. Enjoy!
Thursday, September 29, 2011
Skillet Cornbread
Cornbread is one of those things that people totally disagree on.
People up north think that cornbread ought to be sweet and fluffy, almost like unfrosted yellow cake that happens to, well, taste like corn.
That's called Yankee Cornbread.
Southern-style cornbread is denser and crumblier, living more up to the title of cornbread. It's also much more savory and goes beautifully with beans, soups, stews, and chili.
And here's the part where I show my bias:
Southern cornbread is real cornbread.
Not to say that Yankee cornbread isn't delicious. Because it is. It's wonderful.
But it's not what I grew up on. And therefore it must always include Yankee in its title.
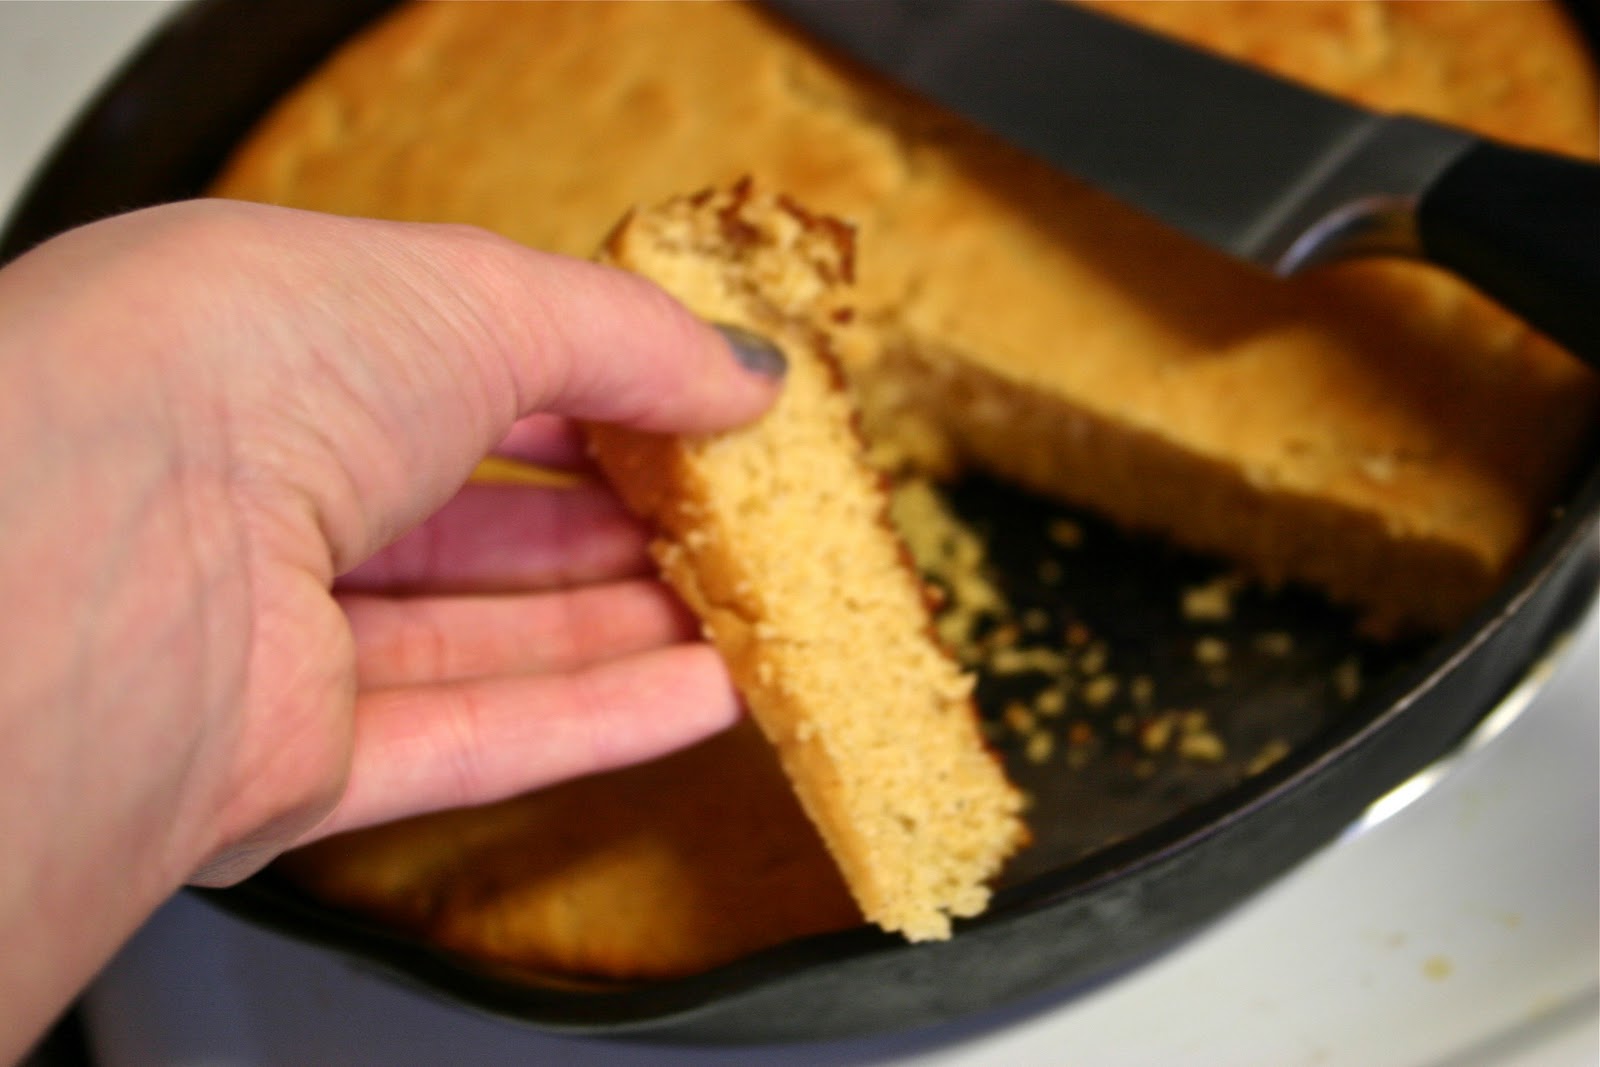
My mom always sweetens her cornbread lightly with honey, bakes it up in a cast-iron skillet, and serves it with savory and spicy meals. Skillet cornbread for me is a little taste of home, which is exactly what I wanted when I made this.
Now, this isn't the recipe I grew up with, but I altered the recipe I had to more resemble my childhood treat - I swapped out the white sugar for honey and baked it in a skillet, then served it with the super-easy-yet-super-tasty Black Bean and Salsa Soup. It just...made me happy :)
As real cornbread always does.
Golden Yellow Skillet Cornbread
Source: adapted from the recipe on the Indian Head Cornmeal package
Ingredients:
1 cup yellow cornmeal
1 cup white whole wheat flour
3 tbsp honey
3 tsp baking powder
1 tsp salt
1/4 cup canola oil
1 cup milk
2 egg whites, beaten
Directions:
Preheat the oven to 425˚F. Grease a 10-10.5 inch cast iron skillet and set aside.
Combine the dry ingredients in a large bowl. Mix oil, honey, egg whites, and milk together and add to the dry ingredients, mixing just until the batter is uniform.
Pour into the prepared skillet and smooth out the top. Bake for 20-25 minutes - the cornbread should be lightly browned and a toothpick inserted into the center will come out clean.
Serve with beans, soup, stew, or chili, or even just with butter and honey. Enjoy!
Friday, September 23, 2011
Black Bean and Salsa Soup
This, my friends, is my go-to I-have-zero-time-to-cook-this-week recipe.
Bonus? It's totally healthy.
Extra huge bonus? It's really tasty.
Thanks to my first week of rehearsals every night, I needed a quick and easy meal that would take a short time to put together, would fill me up enough to make it through long rehearsals, and would last as leftovers for a few days. When I first found this soup over on Annie's Eats I immediately added it to my menu plan for that week.
When it only took 15 minutes to get it on the table, it became a standby.
This was the perfect dinner for my crazy week - healthy, hearty, spicy, and comforting. Served with steamed cauliflower and Southern-style skillet cornbread (recipe coming soon!), it made for a delicious well-rounded meal.
Black Bean and Salsa Soup
Source: Annie's Eats
Ingredients:
2 15-oz cans black beans, drained and rinsed
1.5 cups vegetable broth
1 cup salsa
1 tsp cumin
Mexican cheese (for topping)
Directions:
Place the beans, broth, salsa, and cumin in the bowl of a food processor. Pulse until the mixture is fairly smooth - I like my soup to have quite a bit of texture, so I don't process it very long, but do it according to your tastes. Transfer the soup to a saucepan and heat over medium heat until it is hot through. Serve immediately in bowls topped with Mexican cheese - whole grain tortillas or cornbread are also fantastic additions. Enjoy the meal - and how quickly you made it!
Sunday, August 28, 2011
Pecan Crusted Chicken
So, remember how I told you that I was a scatterbrain and left my camera-to-computer cable in VA?
And remember how I was waiting for the package with said cable inside to arrive at my apartment?
And remember how I posted two recipes sans pretty pretty pictures? And how that made me sad? And led to profuse apologies?
Turns out my package could've been in the mailroom at my apartment complex for days. I finally nabbed someone who works in the office and they had to scour the back room for it...only to find that it was there, but had never been recorded. No sign-out slot. No package slip. Nuthin'.
Long story short: rawwrrrrrrr. But we have photos again!
...but I apologize for the less-than-great photo for this. It makes me sad, cause this was delicious.
And now, back to our regularly scheduled blog post.
I created a recipe! With amounts and everything!
Pardon me while I take this moment to do a proud-of-myself happy dance.
Okay done. Anyway, I'm always trying to find new ways of making chicken. I eat it so often that I really can't afford to get bored with it! A few days earlier, my parents and I ate dinner at Carabba's, where I had the best piece of fish I've ever had. One of the things that made this tilapia so spectacular was the hazelnut breading, so I was inspired to try some nut-based breading solutions of my own. This particular day, I also reeeally did not want to go grocery shopping. For anything. A grocery store run sounded like the exact opposite of fun to me. Thus, the obvious choice was a pantry meal.
This was the result, and it was the best pantry meal I've ever made. Finely chopped pecans are mixed with whole-wheat breadcrumbs to form the breading for the tender breast pieces, which are then baked quickly in a searing hot oven to seal in all the moisture. This chicken is perfect to serve with virtually anything: with sauteed vegetables and quinoa, with pasta alfredo, or sliced over a salad - or figure out your own accompaniments! Regardless, I hope you make this and enjoy it as much as I did!
Pecan Crusted Chicken
Source: a Dancer Bakes original!
Ingredients:
4 boneless skinless chicken breasts, butterflied and cut in half
2 cups pecans, finely chopped or coarsely ground
1-1/2 cups whole wheat bread crumbs
1 large egg
2 large egg whites
3/4 cup flour (all-purpose or whole wheat)
1-1/2 tsp kosher salt
1 tsp ground black pepper
1/2 tsp cinnamon
1/2 tsp ground ginger
Directions:
Preheat the oven to 475˚F. Cover a baking sheet with aluminum foil and coat the foil with cooking spray.
Place the flour in a shallow dish. Mix in salt, pepper, cinnamon, and ginger. Set aside.
Combine egg and egg whites in a wide bowl and beat together with about 1 tbsp of water. Set aside.
Mix together breadcrumbs and pecans in a shallow dish or on a sheet of wax paper. Set aside.
With each piece of chicken, dredge first in the flour mixture, then dip to cover in the egg, then finally coat with the pecan breading. Lay flat on the baking sheet and repeat till each piece of chicken has been breaded.
Bake the chicken for 15-20 minutes, or until no pink remains and each piece is firm to the touch. Serve as desired. Enjoy!
And remember how I was waiting for the package with said cable inside to arrive at my apartment?
And remember how I posted two recipes sans pretty pretty pictures? And how that made me sad? And led to profuse apologies?
Turns out my package could've been in the mailroom at my apartment complex for days. I finally nabbed someone who works in the office and they had to scour the back room for it...only to find that it was there, but had never been recorded. No sign-out slot. No package slip. Nuthin'.
Long story short: rawwrrrrrrr. But we have photos again!
...but I apologize for the less-than-great photo for this. It makes me sad, cause this was delicious.
And now, back to our regularly scheduled blog post.
I created a recipe! With amounts and everything!
Pardon me while I take this moment to do a proud-of-myself happy dance.
Okay done. Anyway, I'm always trying to find new ways of making chicken. I eat it so often that I really can't afford to get bored with it! A few days earlier, my parents and I ate dinner at Carabba's, where I had the best piece of fish I've ever had. One of the things that made this tilapia so spectacular was the hazelnut breading, so I was inspired to try some nut-based breading solutions of my own. This particular day, I also reeeally did not want to go grocery shopping. For anything. A grocery store run sounded like the exact opposite of fun to me. Thus, the obvious choice was a pantry meal.
This was the result, and it was the best pantry meal I've ever made. Finely chopped pecans are mixed with whole-wheat breadcrumbs to form the breading for the tender breast pieces, which are then baked quickly in a searing hot oven to seal in all the moisture. This chicken is perfect to serve with virtually anything: with sauteed vegetables and quinoa, with pasta alfredo, or sliced over a salad - or figure out your own accompaniments! Regardless, I hope you make this and enjoy it as much as I did!
Pecan Crusted Chicken
Source: a Dancer Bakes original!
Ingredients:
4 boneless skinless chicken breasts, butterflied and cut in half
2 cups pecans, finely chopped or coarsely ground
1-1/2 cups whole wheat bread crumbs
1 large egg
2 large egg whites
3/4 cup flour (all-purpose or whole wheat)
1-1/2 tsp kosher salt
1 tsp ground black pepper
1/2 tsp cinnamon
1/2 tsp ground ginger
Directions:
Preheat the oven to 475˚F. Cover a baking sheet with aluminum foil and coat the foil with cooking spray.
Place the flour in a shallow dish. Mix in salt, pepper, cinnamon, and ginger. Set aside.
Combine egg and egg whites in a wide bowl and beat together with about 1 tbsp of water. Set aside.
Mix together breadcrumbs and pecans in a shallow dish or on a sheet of wax paper. Set aside.
With each piece of chicken, dredge first in the flour mixture, then dip to cover in the egg, then finally coat with the pecan breading. Lay flat on the baking sheet and repeat till each piece of chicken has been breaded.
Bake the chicken for 15-20 minutes, or until no pink remains and each piece is firm to the touch. Serve as desired. Enjoy!
Wednesday, July 13, 2011
3-Cheese Pizza with Quick and Easy Dough
We interrupt this slew of decadent desserts to bring you PIZZA!
I eat pizza very rarely, mostly because it's nearly impossible to find commercial pizza that can pass the napkin test.
You know, when you put the napkin on top of a slice of pizza and it instantly becomes saturated with grease? Massive FAIL of the napkin test. And definitely not helpful when it comes to having flat abs.
If regular pizza was like this stuff, though, I'd eat it all the time.
Which means I need a very large stock of yeast at school so I can eat it all the time.
See, this is homemade pizza. Otherwise known as the best thing ever.
I found the dough recipe on My Baking Addiction, which is one of my favorite blogs. Mostly for the cupcake recipes I drool over on a regular basis. However, I found Jamie's recipe for No-Knead Pizza Dough and instantly got excited. I will take quick easy recipes any day!
And this did not disappoint.
I slightly modified the recipe by substituting half of the all-purpose flour for white whole wheat - might as well get some whole grains, right? The light wheat flavor was hearty and delicious, and the white whole wheat flour didn't mess with the texture. YAY! But I'm sure the original version is insanely good too.
The last time I made this dough recipe, it got me three calzones, a large thin-crust pizza, and another pizza-sized ball of dough for the freezer. The thin crust pizza was delicious, flavorful and crispy - my roommates and Jon, my fiancé, loved it. But, I'm a sucker for thick crust, so I divided the dough into three equal-ish pieces and used two of the three to make two deliciously doughy pizzas. I topped them with tomato-basil sauce (store-bought - I ran out of time, but I got the good stuff!), Italian-seasoned turkey sausage, spinach, cremini mushrooms, and ricotta, parmesan, and mozzarella cheeses. And fresh basil.
And then I ate them and did my happy dance.
Whatever you top these pizzas with, they will be incredible. I highly suggest using multiple cheeses. Because cheese is awesome.
Simple No-Knead Whole Wheat Pizza Dough
Source: adapted from My Baking Addiction, originally from Artisan Bread in Five Minutes a Day
Ingredients:
3 1/4 cups unbleached all-purpose flour
3 1/4 cups white whole wheat flour (recommended: King Arthur)
1 1/2 tbsp granulated yeast (2 packets)
1 1/2 tablespoons Kosher salt
1 tablespoon sugar
1/4 cup extra virgin olive oil
2 3/4 cups lukewarm water
Directions:
In the bowl of your stand mixer fitted with the dough hook attachment or in a large bowl with a wooden spoon (I imagine a large food processor with a dough blade would work too) mix together the yeast, salt, sugar, oil, and water. Mix in the flour without kneading, mixing until the dough has formed a ball. If you're not using a mixer you may need to use your hands to incorporate the last bit of flour.
Transfer the dough into a large (5-quart) lightly-oiled bowl or lidded container. Cover it with a tea towel and set it aside at room temperature until the dough has risen and collapsed in the middle - about two hours.
The dough can be used immediately after the first rise, but it's easier to handle when cold. Refrigerate in a non-airtight lidded container for up to 12 days.
3-Cheese Pizza
Source: Dancer Bakes original. Assemble to taste.
1/3 recipe Simple No-Knead Pizza Dough
Cornmeal (for sprinkling)
Prepared tomato sauce
Chopped or torn baby spinach leaves, stems removed
Sliced cremini mushrooms
Turkey Italian sausage, cases removed and browned
Part-skim ricotta cheese
Low-moisture, part-skim mozzarella, shredded
Grated parmesan
Preheat oven to 450˚F.
Roll dough out to fit your pizza pan or baking sheet. Sprinkle the pan with cornmeal and transfer the dough to the pan. Roll the edges of the crust under to form puffy distinct edges. Spread sauce on top of the dough in a thin but even layer, stopping about 1/4 inch from the rolled-under edges. Top with crumbles of turkey sausage, spinach leaves, sliced mushrooms, and dollops of ricotta. Sprinkle liberally with mozzarella and parmesan.
Transfer to the bottom rack of the oven and bake for 10-15 minutes, until the crust is lightly browned and the cheese is all melted and gooey. Allow to set for 5 minutes before slicing and serving. Enjoy!
I eat pizza very rarely, mostly because it's nearly impossible to find commercial pizza that can pass the napkin test.
You know, when you put the napkin on top of a slice of pizza and it instantly becomes saturated with grease? Massive FAIL of the napkin test. And definitely not helpful when it comes to having flat abs.
If regular pizza was like this stuff, though, I'd eat it all the time.
Which means I need a very large stock of yeast at school so I can eat it all the time.
See, this is homemade pizza. Otherwise known as the best thing ever.
I found the dough recipe on My Baking Addiction, which is one of my favorite blogs. Mostly for the cupcake recipes I drool over on a regular basis. However, I found Jamie's recipe for No-Knead Pizza Dough and instantly got excited. I will take quick easy recipes any day!
And this did not disappoint.
I slightly modified the recipe by substituting half of the all-purpose flour for white whole wheat - might as well get some whole grains, right? The light wheat flavor was hearty and delicious, and the white whole wheat flour didn't mess with the texture. YAY! But I'm sure the original version is insanely good too.
The last time I made this dough recipe, it got me three calzones, a large thin-crust pizza, and another pizza-sized ball of dough for the freezer. The thin crust pizza was delicious, flavorful and crispy - my roommates and Jon, my fiancé, loved it. But, I'm a sucker for thick crust, so I divided the dough into three equal-ish pieces and used two of the three to make two deliciously doughy pizzas. I topped them with tomato-basil sauce (store-bought - I ran out of time, but I got the good stuff!), Italian-seasoned turkey sausage, spinach, cremini mushrooms, and ricotta, parmesan, and mozzarella cheeses. And fresh basil.
Whatever you top these pizzas with, they will be incredible. I highly suggest using multiple cheeses. Because cheese is awesome.
Simple No-Knead Whole Wheat Pizza Dough
Source: adapted from My Baking Addiction, originally from Artisan Bread in Five Minutes a Day
Ingredients:
3 1/4 cups unbleached all-purpose flour
3 1/4 cups white whole wheat flour (recommended: King Arthur)
1 1/2 tbsp granulated yeast (2 packets)
1 1/2 tablespoons Kosher salt
1 tablespoon sugar
1/4 cup extra virgin olive oil
2 3/4 cups lukewarm water
Directions:
In the bowl of your stand mixer fitted with the dough hook attachment or in a large bowl with a wooden spoon (I imagine a large food processor with a dough blade would work too) mix together the yeast, salt, sugar, oil, and water. Mix in the flour without kneading, mixing until the dough has formed a ball. If you're not using a mixer you may need to use your hands to incorporate the last bit of flour.
Transfer the dough into a large (5-quart) lightly-oiled bowl or lidded container. Cover it with a tea towel and set it aside at room temperature until the dough has risen and collapsed in the middle - about two hours.
The dough can be used immediately after the first rise, but it's easier to handle when cold. Refrigerate in a non-airtight lidded container for up to 12 days.
3-Cheese Pizza
Source: Dancer Bakes original. Assemble to taste.
1/3 recipe Simple No-Knead Pizza Dough
Cornmeal (for sprinkling)
Prepared tomato sauce
Chopped or torn baby spinach leaves, stems removed
Sliced cremini mushrooms
Turkey Italian sausage, cases removed and browned
Part-skim ricotta cheese
Low-moisture, part-skim mozzarella, shredded
Grated parmesan
Preheat oven to 450˚F.
Roll dough out to fit your pizza pan or baking sheet. Sprinkle the pan with cornmeal and transfer the dough to the pan. Roll the edges of the crust under to form puffy distinct edges. Spread sauce on top of the dough in a thin but even layer, stopping about 1/4 inch from the rolled-under edges. Top with crumbles of turkey sausage, spinach leaves, sliced mushrooms, and dollops of ricotta. Sprinkle liberally with mozzarella and parmesan.
Transfer to the bottom rack of the oven and bake for 10-15 minutes, until the crust is lightly browned and the cheese is all melted and gooey. Allow to set for 5 minutes before slicing and serving. Enjoy!
Subscribe to:
Posts (Atom)