Sunday, December 25, 2011

Merry Christmas!

The Christmas tree at Disney's Castaway Cay, Christmas 2010

Merry Christmas, everyone!
And Happy Chanukah!

I'm heading to Pennsylvania shortly to spend the day with family - it'll be a bit emptier than usual this year but happy nonetheless :)
Wishing you all a truly blessed holiday with your loved ones!  I'll be back soon with new treats :)

Much love,
Angela

Thursday, December 22, 2011

Oreo White Chocolate Cupcakes


I'm back!  For good this time, I hope :)

The last few weeks have been a whirlwind of atypical schedules.  Right after Thanksgiving, we entered tech for the last show of the semester, for which I choreographed a piece.  On top of that, my poor fiancé got food poisoning so he needed care.  After that, final practicals and exams began, so studying took top priority (yaaaaay...).  Only an hour after I picked up my last exam, a take-home test for my criticism class, I was in the car on the way to the airport.  After two hours of insanely fast typing, my semester was officially finished; another two hours later, I landed in Florida to reunite with Jon, meet his dad, and go to his best friend's wedding.  We spent a fantastic weekend at Universal Orlando together and had a great time hitting the parks and celebrating the marriage with everyone - it was honestly the best time I've had in months!  I wish we could've stayed there longer.
My parents came down and met us Sunday night, and the next morning I continued south with them to Vero Beach to visit my brother and his wife (and their new dog!) for the next week.

And that's where the cupcakes come in.

Thanks to crazy schedules and an insanely long distance between us, I missed my brother's birthday at the end of November, but I promised him a treat of choice while I visited.  I knew he loved white chocolate so I wanted to include that, and Oreos were a natural choice since he keeps them in the house all the time.  I had made the cupcake base before, but I decided to use a white chocolate frosting on them this time.

It was a good choice :)

The cupcakes are fluffy and full of vanilla flavor and huge chunks of Oreos - including an entire Oreo half on the bottom!  (I'd suggest finding someone totally ace at twisting apart Oreos to help with that part, or you can use a paring knife to separate the halves.) The white chocolate cream cheese frosting has fabulous flavor without an overpowering sweetness from the white chocolate - this is the stuff I could eat with a spoon.  Or a bunch of animal crackers.  Together, the combination is delectable!

If you're already all cookie'd out for Christmas or you're looking for something unique for the dessert spread, try these!  Maybe use the winter Oreos and some holiday sprinkles on top for a festive touch!  Regardless, I can tell you that they'll be enjoyed by everyone with tastebuds.

Oreo White Chocolate Cupcakes

Cookies and Cream Cupcakes
Source: slightly adapted from Annie's Eats
Yield: 12 cupcakes

Ingredients:
12 Oreo halves, with cream filling attached
1 heaping cup all-purpose flour
1/2 tsp baking powder
1/4 tsp salt
4 tbsp unsalted butter, at room temperature
1/2 + 1/3 cup granulated sugar
1 large egg, at room temperature
1 tsp vanilla extract
1/2 cup milk
10 Oreo cookies, coarsely chopped (quartered is a good place to start)

Directions:
Preheat the oven to 350˚F.  Line a 12-cup muffin tin with paper liners and place an Oreo half in the bottom of each cup, cream side up.
In a medium bowl, mix together the flour, baking powder, and salt with a fork.  Set aside.  In the bowl of a stand mixer, or in a large bowl with a hand mixer, cream together the butter and sugar on medium-high speed until pale and fluffy.  Add the egg, mixing until it's fully incorporated, then mix in the vanilla extract.  Add half the flour mixture, beating until just incorporated.  Beat in the milk until just combined, then the rest of the dry mixture.  Fold in the chopped cookie pieces with a spatula.
Scoop the batter by quarter cup-fulls into the prepared muffin cups.  Bake for 18-20 minutes, until a toothpick inserted in the middle comes out clean.  Allow to cool five minutes in the pan before removing to a cooling rack until ready to frost.

White Chocolate Cream Cheese Frosting
Source: adapted from Baking Bites

Ingredients:
4 oz cream cheese, softened
1/4 cup (half a stick) unsalted butter, softened
2 oz white chocolate, melted and slightly cooled
1 tsp vanilla extract
3 tsp heavy cream (more if needed)
2-3 cups confectioner's sugar
5 Oreo cookies, crushed (for topping)

Directions:
In the bowl of a stand mixer fitted with the paddle attachment, or in a large bowl with a hand mixer, cream together the cream cheese, butter, and melted white chocolate.  Mix in the cream, then gradually add powdered sugar until you reach your desired consistency - make it stiffer if you plan to pipe it onto the cupcakes.  Frost the cupcakes as desired and top with cookie crumbs.  Enjoy!

Friday, November 25, 2011

Sweet Potato Harvest Salad


I'm sitting on the couch at our house in the West Virginia mountains, watching Sing Off videos on YouTube with my dad, and nursing a food baby of epic proportions inside my fleecy penguin footie pajamas.  Based on this description of myself, it occurs to me that now might be a good time to post a salad...

It's holiday detox time, folks.  Starting tomorrow morning, it's back to exercise and healthy eating. 

With pie still involved, though.  Can't say no to pie...

If you find yourself in a sugar coma but still hungering after fall flavors, give this salad a try.  Roasted sweet potatoes, Gala apple chunks, dried dates, and pecans combine to lend a sense of comfort to the low-calorie dish.  Add some grilled chicken - or better yet, leftover turkey! - and you've got a balanced and complete meal!

Sweet Potato Harvest Salad
Source: a Dancer Bakes original
Serves one
 
Ingredients:
1 1/2 cups Romaine lettuce, washed and torn
1 cup baby spinach leaves
1/3 recipe roasted sweet potatoes (below)
1/2 small or medium Gala apple, coarsely chopped
1/4 cup dried dates
1/4 cup pecans, coarsely chopped
1 tbsp extra virgin olive oil
Black pepper, to taste
1/2 cup shredded chicken or turkey (optional)

Directions:
Toss first six ingredients together.  Drizzle with olive oil and sprinkle with black pepper to taste.  Top with the chicken or turkey, if desired.  Serving with a leftover roll from Thanksgiving dinner is highly encouraged :)  Enjoy!

Roasted Sweet Potatoes
 
Ingredients:
1 medium sweet potato, peeled and cut into 1/2-inch cubes
1 tbsp olive oil
Ground cinnamon
Ground ginger
Salt
Black pepper

Directions:
Preheat the oven to 400˚F with a rack on the middle position.
Place cubed sweet potatoes into a bowl.  Drizzle with olive oil and sprinkle with desired amounts of salt, pepper, cinnamon, and ginger; toss together to combine.  Spread into an even layer on a nonstick baking sheet lined with foil and sprayed lightly with cooking spray.  Roast in the oven for 20-30 minutes, until the potatoes are tender and your kitchen smells divine.  Enjoy hot or allow to cool before using them in the Harvest Salad.

Monday, November 21, 2011

Pumpkin Cake Squares

I'm back!

And it feels amazing.  I've missed this so much.

The second of this semester's three shows ran this past weekend, and what an experience that was.  After what seemed like the world's longest rehearsal process, we finally opened a world-premiere musical revue of David Shire's music to a packed house and enthusiastic praise.  Furthermore, David Shire and his wife Didi Conn, also known as Frenchie in the film version of Grease, came all the way from New York City to see the premiere!  Performing for and meeting them was unforgettable, especially seeing how touched David was to see what our directors did with his music.  The looks on their faces made the insanity of the last two and a half months worth it :)

And Didi is officially the cutest person alive.  Seriously.

If you feel so inclined, you can read more about the whole experience in Playbill.  And look at my picture.  Sorry, I'll stop now.

The hardest day of tech week is always Sunday: the "10-out-of-12".  As actors, we spend 10 hours of a 12-hour block working onstage.  I'd worked them as a technician before, and they're always rough.  So, since we had the previous day off from rehearsal (or at least from the musical - I was rehearsing for another show that morning), I decided to bake something for the cast to make the long day a little easier.

Let's just say they were grateful.

The cake squares are personal servings of fall flavor.  The cool, creamy, vanilla mascarpone frosting adds the perfect sweet contrast to the moist and spicy pumpkin cake.  If you don't keep mascarpone on hand like I do (yes, I'm crazy) then go ahead and substitute cream cheese, but I think the mascarpone is beyond worth it.  It's a fantastic fall snack, or it could be a great last-minute addition to your Thanksgiving dessert table - it only takes 15 minutes to get it into the oven!  I guarantee any friend or relative would be grateful to help you eat it.

Pumpkin Cake Squares with Mascarpone Frosting
Source: adapted from Brown Eyed Baker, originally from How To: Simplify
Yield: 1 9x13" pan

For the pumpkin cake squares:
Ingredients:
1 cup all-purpose flour
1 cup whole wheat flour
2 teaspoons ground cinnamon
1/2 teaspoon ground ginger
1/8 teaspoon ground cloves
2 teaspoons baking powder
1 teaspoon baking soda
1 teaspoon salt
1 15oz can pumpkin puree (not pumpkin pie filling)
1-2/3 cups granulated sugar
1 cup vegetable oil (I used canola)
2 eggs
1/2 cup egg whites (about 4 large, but I used the stuff from a carton!)

Directions:
Preheat the oven to 350˚F with a rack on the middle position.  Grease a 9x13" pan and set aside.
In a medium mixing bowl, whisk together the flours, baking powder, baking soda, salt, and spices.  Set aside.
In a large bowl, combine the pumpkin, sugar, oil, eggs, and egg whites until smooth and uniform.  Pour the dry ingredients on top of the pumpkin mixture and gently stir or whisk to combine until smooth.
Transfer the batter to the greased pan and smooth the top, making sure the batter is distributed evenly.  Bake in the preheated oven for 30-40 minutes, or until a thin knife inserted into the center of the cake comes out clean.  Transfer to a rack to cool completely before frosting.

For the Vanilla Mascarpone frosting:
Ingredients:
8 oz mascarpone cheese, softened
1/2 cup (1 stick) unsalted butter, softened
3 cups powdered sugar
1 teaspoon vanilla extract (I recommend Nielsen Massey Tahitian Pure Vanilla)
approximately 1 tbsp half-and-half (I used fat free)

Directions:
In the bowl of a stand mixer fitted with the paddle attachment, or in a large bowl with a hand mixer, cream together the butter and mascarpone on medium speed until smooth and fluffy.  Decrease the mixer speed to low and add the powdered sugar one cup at a time until fully incorporated and smooth.  Add the vanilla extract and the half-and-half.  Increase the speed of the mixer to medium and whip until desired consistency is reached, adding more half-and-half one teaspoon at a time if necessary.  Spread evenly onto the cooled cake.  Slice into squares and enjoy!

Wednesday, November 9, 2011

A Brief Hiatus.

Hey everyone,

As you may have noticed, I've been maintaining radio silence on the blog.  Why, you ask?

Well, you see, my schedule finally got the best of me.  I've had nonstop musical rehearsals for weeks now, and the show opens a week from today, which means the rehearsal hours are only getting longer.  As a result, I haven't cooked meals for myself in close to three weeks, and I've eaten the things that I have made too quickly to take pictures of them.  Gotta love being pressed for time.

This hiatus makes me sad.  Incredibly sad, because there are few things in this world that make me happier than making food and sharing it with others, including you!  Over Thanksgiving, I hope to have the chance to share some of our family feast with you, or at least write up the posts for the few recipes I've already photographed.  In the meantime, take a look around the blog, discover a recipe you haven't tried yet, and make it. 

Would you do that for me?
:)

Thursday, October 27, 2011

Vanilla Glazed Sugar Cookie Bars

Sometimes, life just needs sprinkles.

This was one of those times.  I had exactly one cup of butter left in my entire apartment, I had leftover glaze in my fridge from the Bundt cake I made a couple weeks earlier, and I just wanted to make something simple and sprinkle-y to share with the dancers before we went into tech for the concert.  I found this recipe and declared it a winner.


The original recipe calls for a frosting, which I ordinarily would've made without batting an eyelash...duh.  Of course, ordinarily I would've made cupcakes instead of cookies...I guess it wasn't an ordinary day.  Anyway, considering the complete lack of butter and the presence of tasty glaze, I gave up on the frosting.  And the glaze was perfect!  It added just enough sweetness to the bars to make them thoroughly addictive without being cloying.

Plus, glaze = perfect sprinkle adhesive.  Truth.

These sugar cookie bars came together so quickly, made my kitchen smell incredible...and I may or may not have had three of them while I was making a plate for the dancers.
Hey - I cut them small!  Three is...a totally justifiable number...

I'll just...give you the recipe now...

Vanilla Glazed Sugar Cookie Bars
Source: lightly adapted from Annie's Eats ; original recipe from The Repressed Pastry Chef

Ingredients:
1 cup (2 sticks) unsalted butter, at room temperature
2 cups sugar
4 large eggs
2 tsp vanilla extract
1 vanilla bean, split lengthwise
5 cups all-purpose flour
1 tsp salt
1/2 tsp baking soda
1 recipe vanilla glaze, found here
Multicolored sprinkles (optional but highly encouraged) 

Directions:
Preheat the oven to 350˚F with a rack placed at the center position.  Grease a 13x18" rimmed baking sheet and set aside. [Side note: I used the medium baking sheet from my set of three - I eyeballed it and it looked right.]
Whisk together the flour, salt, and baking soda in a medium bowl.  Set aside.
In a large bowl with a mixer, cream together the butter and sugar on medium speed till pale and fluffy, about 2 minutes.  Add the eggs one at a time, beating well after each addition and scraping down the sides of the bowl as needed.  Scrape the seeds from the vanilla bean and add the seeds and extract to the butter mixture, beating until well incorporated.  Switch to low speed and add the dry ingredients, mixing just until incorporated.
Transfer the cookie dough to the prepared baking sheet and press it into an even layer.  Bake in the preheated oven for 10-15 minutes, until light golden brown in color and a toothpick inserted into the center comes out clean.  Allow to cool to room temperature in the pan on a rack.
Once the bars are at room temperature, poke holes all over the surface with the tines of a fork or a toothpick.  Pour the vanilla glaze over the bars and spread as evenly as possible.  If using sprinkles (which you should!) add them to the top of the bars now so they set with the glaze.   Allow the glaze to set and harden before slicing into 1.5-2" square bars and serving.  Enjoy!

Tuesday, October 25, 2011

Vanilla Bean Bundt Cake

One show down, two to go!
My first show of the semester - the university company's dance concert - ran this weekend, and it was truly a fantastic run.  I'm so grateful to be in a company with the talented dancers I share the stage with.  And getting to do a CRAZY duet with my best friend was even better!  I am pretty glad the show's over, though - now that I'm in heavy rehearsals for the musical and I've started the choreographic process for the student showcase, it's nice to have one less thing on my mind!

As a general rule, during show season, I try to cut back on desserts.  Teeny tiny costumes don't mix well with food babies or love handles, so generally dessert is the first thing to go.

That effort was completely unsuccessful.
Completely.

This particular cake was one of many downfalls.  I took this to a potluck, hoping that I wouldn't come home with much leftover...and then had to bring a third of the cake back and set it alongside the rest of the batches of giant chocolate chip cookies and pumpkin scones.

I think I gained 3 pounds that weekend.  And I would not have gained said three pounds had every single recipe not been delicious.

This is the kind of cake that lends itself to very easy snacking.  It's a sturdy cake that you can hold in your hand while taking bite after delicious bite until it's all gone...and you feel the urge to grab another piece.  It's chock full of moisture, thanks to the yogurt, and every bite bursts with sweet vanilla.  And the glaze?  Oh, the glaze...it was the perfect saccharine compliment to the mildly sweet cake, adding little sparks of sugary goodness here and there.  I could not get enough of that glaze.

Neither could Jon, cause he kept taking huge bites with all the glaze on them when we split a piece.  Which led to splitting another piece.

Approach this cake with caution, folks.  It's almost too delicious.

Vanilla Bean Bundt Cake with Vanilla Glaze
Source: adapted from Epicurious and The Pioneer Woman via Sweetapolita

Ingredients:
For the cake:
3 cups all-purpose flour (preferably unbleached)
1 tsp baking powder
1/2 tsp baking soda
1/2 tsp salt
2-1/4 sticks unsalted butter, at room temperature
1-3/4 cups granulated sugar
1 vanilla bean, split lengthwise
1 tbsp high-quality vanilla extract
4 large eggs
1/2 cup low-fat vanilla yogurt
1/2 cup milk

For the glaze:
1/2 cup milk (use what you have on hand, but whole would be better)
1 tbsp pure vanilla extract
Approximately 1 cup powdered sugar, more as needed

Directions:
Place a rack in the middle of the oven and preheat to 350˚F.  Grease and flour a 10-15 cup Bundt pan and set aside.
Whisk together the flour, baking powder and soda, and salt.  Beat the butter and sugar together in a large bowl with a mixer at medium speed until pale, creamy, and fluffy.  And beautiful.  Scrape the seeds from the vanilla bean and add them, along with the vanilla extract, to the butter mixture, beating until well incorporated.  Add the eggs one at a time, beating well after each addition. 
Mix the yogurt and milk together, then add alternately with the flour to the butter mixture, beginning and ending with the flour.  Only mix until just combined. 
Pour the batter into the prepared pan and smooth the top.  Gently tap it on the counter to get rid of air bubbles.  Bake in the preheated oven for about 1 hour, until a toothpick or thin knife inserted into the center comes out clean.  Cool in the pan on a rack for an hour, then invert the cake onto the cooling rack and cool to room temperature.
To make the glaze, mix together the milk and the vanilla extract.  Measure out the powdered sugar and gradually add the vanilla milk until the desired consistency is reached - it should feel too thick at first, but still be pourable.  Pour over the top of the cooled cake and allow to set.  Don't be stingy - use as much glaze as you want!  It'll make you happy.  Enjoy!

Monday, October 17, 2011

Pasta with Pumpkin Cream Sauce


And now, Part 2 of my pumpkin obsession: Pumpkin Pasta!

This may sound as weird to you as it did to me.  Because the idea of it majorly intrigued me in the "will it or won't it be good?" sense.

I can tell you now: it will be good.
At least, it was for me and the hubby-to-be.

Pumpkin is a vegetable.  And I think we forget that when we dig into a pumpkin donut or devour another slice of pumpkin pie (which I will leave up to you lovely folks - pumpkin pie is not my thing.)  So using it in a savory context does actually make sense.
Delicious, creamy sense.

The sauce is a lightened-up cream sauce, with plenty of pumpkin and some sage to complement it.  Not to mention Parmesan cheese, which makes everything in the world better.  It is delightfully creamy and a gorgeous orange color; when tossed with whole-wheat pasta and served with a salad, it makes a light yet hearty and delicious meal!  This will definitely get made again in my kitchen...as soon as I find more pumpkin.  Which could be a while.

Pasta with Pumpkin Cream Sauce
Source:  Runs with Spatulas

Ingredients:
1 pound whole wheat pasta, such as spaghetti, fettuccine, or linguine
1 medium vidalia onion, minced
3 medium cloves garlic, minced
2 sprigs fresh sage leaves, finely chopped
1 tbsp olive oil
3/4 cup pumpkin puree
3/4 cup low-sodium chicken or vegetable broth
1/2 cup fat-free half and half
Kosher salt and freshly cracked black pepper
1/4 cup grated Parmesan cheese

Directions:
Bring a large pot of water to a boil over medium-high heat. Add salt, pour in the pasta and cook according to the directions on the box.

Heat the olive oil in a large saucepan over medium heat. Add the onion and garlic; cook for about 3 minutes, stirring, until they have softened. Stir in the pumpkin puree, broth, half & half, and half of the fresh sage. Reduce the heat to medium-low and cook for about 10 minutes, stirring frequently, until the sauce is slightly thickened. If you chopped your onion into bigger pieces (like I did...oops), now would be the time to blend it smooth in a blender, food processor, or with an immersion blender.  The smoother the sauce, the happier you will be!  If you blended it, transfer it back to the saucepan.  Season with salt and pepper to taste; keep warm on the lowest heat setting. 

Drain the pasta and add to the sauce, then add 2 tablespoons of the cheese and mix well. Serve and sprinkle with the remaining 2 tablespoons of cheese and the remaining sage.  This pairs excellently with a Caesar salad and a glass of white wine :) Enjoy!

Thursday, October 13, 2011

Black Bean and Sweet Potato Chili [Holiday Recipe Exchange]

 Since I may have helped you pack on a couple pounds with my last few recipes, here's one that should help take them off again: vegetarian chili!

Thanks to my insane schedule (school + three shows + wedding planning + attempts to eat and sleep), I'm always on the hunt for one-pot meals that keep me going off of leftovers for long periods of time.  I also love sweet potatoes (if you couldn't tell from the pancakes) and I'm always looking for new ways to use them.  The idea of combining black beans - another favorite - and sweet potatoes in a simple, healthy, long-lasting vegan chili sounded right up my alley!  Thus, this chili.

I started with a recipe and modified it as I went based on what I had in the apartment, then served it topped with a Mexican cheese blend.  Considering it was something I totally threw together, I was happy with how it turned out!  The only thing that would've made it better is corn...or cornbread :)
Come join the fun at the My Baking Addiction and GoodLife Eats Holiday Recipe Exchange sponsored by Le Creuset!  You could win a fantastic French Oven with which to make some chili of your own :)

Black Bean Sweet Potato Chili
Source: inspired by and heavily adapted from GoodLife {Eats}

Ingredients:
1 yellow onion, chopped
3 cloves garlic, minced
1 jalapeño pepper, diced and deseeded if desired
1 tbsp olive oil
1 1/4 tsp ground cumin
1 tbsp chili powder
2 tsp paprika
1/2 tsp dried oregano
1/2 tsp black pepper
1 29-oz can crushed tomatoes
8 oz vegetable broth
1 sweet potato, peeled and cut into 1/2-inch cubes
3 15.5-oz cans of black beans, drained but not rinsed
3/4 cup cooked brown rice
2 bay leaves
1 1/4 tsp cornstarch
Mexican cheese blend (for topping)


Directions:
Heat the olive oil in a large pot over medium high heat. Add the diced onion and saute for 5 minutes, until tender and golden. Add the garlic and the jalapeño pepper and saute for another minute, until fragrant. Add the cumin and chili powder and saute for about another 2 minutes.
Lower heat to medium-low and stir in the crushed tomatoes and broth, reserve 1/4 cup of broth for later use.  Scrape the bottom of the pot to remove any browned bits stuck there and add that tasty flavor back in. Add the remaining ingredients except the cornstarch and toppings.
In a small bowl whisk together the reserved 1/4 cup of broth and the cornstarch until smooth. Pour the cornstarch slurry into the chili pot. Stir until well mixed. Bring chili to a boil for about 2 minutes and then lower heat to low. Simmer over low heat uncovered (or covered with a splatter shield) for one hour, then cover the pot with a lid and simmer for another 30 minutes.
Ladle into bowls and serve topped with the Mexican cheese blend.  Enjoy!

Saturday, October 8, 2011

Pumpkin Scones


This post marks my first pumpkin recipe.  Ever.
Of all time.
Up until I made these, I had never even seen a can of pumpkin before, let alone baked with it.

And no, I didn't grow up under a rock...just with parents who aren't big pumpkin people.

And now, thanks, yet again, to Alice's Tea Cup, my life is forever changed.  A Saturday morning baking session with my wonderful fiancé led to a major pumpkin obsession!

These scones were soft, fluffy, spicy pillows of fall flavor.  While I didn't make the caramel glaze to top them (which would have depleted my entire supply of butter), I did discover that a bit of maple syrup takes these treats over the top!  It took all of my willpower not to eat the entire batch of scones right out of the oven, but since I was able to muster some self-control I've been enjoying them for days :)

If you, like me, have never baked with pumpkin before, or if you're already a die-hard pumpkin fanatic, give this recipe a try.  You'll get your hands messy, your kitchen will smell like autumn, and your tastebuds will be oh so happy.

Pumpkin Scones
Source: Alice's Tea Cup
Yield: 10-12 scones

Ingredients:
3 cups all-purpose flour
1/3 cup sugar
1/2 tsp baking soda
2 1/2 tsp baking powder
3/4 tsp kosher salt
1/4 cup ground ginger
1/4 cup ground cinnamon
1-1/2 sticks (12 tbsp) cold unsalted butter, cut into 1/2-inch pieces
1 1/4 cups buttermilk
1 cup canned pumpkin puree, such as Libby's (not pumpkin pie filling)
2 tbsp pure vanilla extract

Directions:
Preheat the oven to 425˚F.
In a large mixing bowl, combine the flour, sugar, baking soda, baking powder, salt, and spices.  With clean hands or a pastry blender (I use a combination of both), cut the butter into the dry ingredients until the mixture has the consistency of fine breadcrumbs.
Make a well in the center of the dry ingredients, and pour the buttermilk, pumpkin puree, and vanilla extract into the well.  Using your hands or a fork (hands are waaaay more fun), combine the ingredients until all the dry mixture is wet.  But don't knead!
Turn the dough out onto a floured surface and gather it together.  Gently pat it out to make a disk or rectangle about 1 to 1-1/2 inches thick.  Using a 3-3.5 inch biscuit cutter (or the rim of a glass or clean can), cut out as many scones as you can and lay them on a nonstick baking sheet.  Gather the remaining dough together lightly to cut out more scones - make sure you don't knead too much.
Bake the scones for 12-15 minutes, or until lightly browned.  Let them cool slightly on the baking sheet, then serve with toppings of choice - I recommend apple butter or maple syrup.  Enjoy!
 

Tuesday, October 4, 2011

The Chocolate Chip Cookie Experiment: Part 1

I am a cake girl all the way.  If it's soft, sweet, and frosted, chances are I'll devour it like there's no tomorrow.

However.

Most people who read blogs or, well, live in New York City know about Levain Bakery and their fresh, gooey, quarter-pound cookies.  I had heard so much tell of them that when I had a day off from the Parsons Dance Company summer intensive I had to venture up to 74th and Amsterdam and give those suckers a try for myself.

Two words: life changing.

Chocolate chip cookies are now on my craving radar.
But really only those chocolate chip cookies - huge, thick, craggy, crisp on the outside and gooey on the inside, with hunks of chocolate and walnut tucked into every buttery bite.

So, I've now begun a quest to make such cookies for myself and anyone who will help me devour them.

This, my first try, was not all too far off from the cookies I love so much.  Not quite there yet, but pretty darn close!!
These gargantuan cookies didn't bake up as thick and gooey as my beloved Levain goodies, but they're buttery, rich, and chock full of big bites of chocolate and nut - I was low on walnuts so I supplemented with pecans: no complaints here!  These spread quite a bit for me, so I'll have to see if I can manipulate the recipe to keep them together - suggestions are welcome - or if the crappy rack placements in my oven are to blame...I can't wait to have a nice stove... Regardless, these beauties stayed soft and chewy, and are officially friend, roommate, and fiancé approved!

I'm glad to have found a go-to cookie recipe for now - any suggestions regarding what I could do to make them even better are welcome!

"Call Me Le Vain" Copycat Cookies
Source: verrrry slightly adapted from Cheeky Kitchen
Yield: a baker's dozen of big-as-your-face cookies

Ingredients:
1 cup (2 sticks) unsalted butter, at room temperature
1-1/2 cups packed brown sugar
2 eggs
2-1/2 cups unbleached all-purpose flour
1 tbsp baking powder
1 tsp baking soda
pinch of salt
1-1/2 tsp vanilla extract
1 tbsp cornstarch
2 cups nearly crushed walnuts (or 1 cup walnuts and 1 cup pecans)
3 cups good quality semisweet chocolate chips

Directions:
Preheat the oven to 390˚F (over 375, not quite 400) and line baking sheets with parchment paper.  Set aside.
Using an electric mixer, cream together the butter and brown sugar until soft and fluffy.  Add the eggs one at a time, mixing well after each addition.  Add in the vanilla and mix until incorporated.  Sprinkle the dry ingredients on top and mix until fully incorporated and a thick, creamy dough is created.  Stir in the nuts and chocolate chips.  Turn the dough out onto a clean counter and knead with your hands to fully incorporate all of the delicious chunks.
Pull off lemon-sized hunks of dough and place on the lined baking sheets with plenty of space between them - keep the pieces of dough loose so they bake up charmingly craggy.
Bake for 10-12 minutes, or until the tips of the cookies have turned light brown.  Allow to cool for about 2 minutes on the baking sheet before removing them to a rack.  Consuming these treats while they're still warm is highly recommended - enjoy!

Friday, September 30, 2011

Tilapia with Tomato-Herb Pan Sauce


Thanks to my nutrition class, I was forced to acknowledge some wince-inducing nutrient imbalances, so I've been trying lately to really vary my diet and experiment with more in the kitchen.  So, onto my grocery list went fish and cherry tomatoes.

Now, the cherry tomatoes bit may seem odd to you, but here's the thing: I don't particularly love tomatoes.  Tomato sauce, yes - give me a great basil marinara and I will grin from ear to ear.  But tomatoes?
Raw ones kinda give me the skeeves.
And get cherry tomatoes out of my sight.  Pretty much completely.  They're so much worse than regular tomatoes, especially raw.  Gag me.

But for the sake of my nutrition, cherry tomatoes were purchased.  And cooked.
And consumed with delight.

I had seen Chicken with Tomato-Herb Pan Sauce all over the place - like here and here and here - and I was really intrigued despite my loathing for all things tomato.  But I looked at how they were cooked and thought, blackened and juicy with herbs and wine is good... so I faced my skeevy feelings and made the dish, just substituting tilapia filets for the chicken.

Lord Almighty, was that a fantastic idea.

The tilapia was light and flaky, complimented beautifully by the richness of the tomato pan sauce.  And herb butter may be the best culinary invention ever.  Besides frosting.
Even better, this meal came together in pretty much record time.  For something that looks, smells, and tastes this fancy, it was nothing short of magical!  And now I fully understand the blogosphere's obsession with this dish, since I'm obsessed with it too.  I'll have to try it with the original chicken sometime :)

Tilapia with Tomato-Herb Pan Sauce
Source: slightly adapted from Bon Appetit, July 2011 via Cook Like a Champion

Ingredients:
2 tbsp unsalted butter, at room temperature
1 garlic clove, minced
1/2 tsp dried oregano (or 1 1/2 tsp fresh)
1/2 tsp sweet paprika
Salt and freshly ground black pepper
3 tilapia filets 
1/4 cup all-purpose flour
2 tsp olive oil
2 cups (11-12 oz) cherry tomatoes
1/4 cup vegetable broth
splash of dry wine (white is preferable but I used red and it turned out just fine)

Directions:
In a small bowl, mix together the butter, garlic, oregano, and paprika.  Season to taste with salt and pepper and set aside.
Preheat the oven to its lowest possible temperature and measure out flour onto a plate or a sheet of wax paper.  Season the fish filets liberally with salt and pepper on both sides, then dredge lightly in flour, shaking off the excess.
Melt one tablespoon of the seasoned butter with the olive oil in a skillet over high heat.  Reduce the heat to medium-high when the butter stops foaming.  Place the fish filets in the skillet and cook for about 4 minutes on each side, until the fish is browned on the outside and white and flaky on the inside.  Transfer the fish to a clean oven-safe pan or plate and place in the oven while you make the pan sauce.
Increase the heat under the skillet to high and add the tomatoes to the pan, stirring occasionally until they begin to char and burst.  Add the remaining tablespoon of herb butter to the pan.  Crush the tomatoes slightly with your wooden spoon to help them release their juices, scraping the bottom of the pan to release the flavorful brown bits on the bottom.  Stir in the broth and wine and allow to cook down for a couple minutes.  Remove the fish from the oven, adding any juices that accumulated on the dish to the skillet.  Plate the tilapia filets and top with the tomato sauce - the combination is particularly tasty with rice and a green vegetable.  Enjoy!
 

Thursday, September 29, 2011

Skillet Cornbread


Cornbread is one of those things that people totally disagree on.

People up north think that cornbread ought to be sweet and fluffy, almost like unfrosted yellow cake that happens to, well, taste like corn.

That's called Yankee Cornbread.

Southern-style cornbread is denser and crumblier, living more up to the title of cornbread.  It's also much more savory and goes beautifully with beans, soups, stews, and chili.

And here's the part where I show my bias:
Southern cornbread is real cornbread.

Not to say that Yankee cornbread isn't delicious.  Because it is.  It's wonderful.
But it's not what I grew up on.  And therefore it must always include Yankee in its title.

My mom always sweetens her cornbread lightly with honey, bakes it up in a cast-iron skillet, and serves it with savory and spicy meals.  Skillet cornbread for me is a little taste of home, which is exactly what I wanted when I made this.

Now, this isn't the recipe I grew up with, but I altered the recipe I had to more resemble my childhood treat - I swapped out the white sugar for honey and baked it in a skillet, then served it with the super-easy-yet-super-tasty Black Bean and Salsa Soup.  It just...made me happy :)

As real cornbread always does.

Golden Yellow Skillet Cornbread
Source: adapted from the recipe on the Indian Head Cornmeal package 

Ingredients:
1 cup yellow cornmeal
1 cup white whole wheat flour
3 tbsp honey
3 tsp baking powder
1 tsp salt
1/4 cup canola oil
1 cup milk
2 egg whites, beaten

Directions:
Preheat the oven to 425˚F.  Grease a 10-10.5 inch cast iron skillet and set aside.
Combine the dry ingredients in a large bowl.  Mix oil, honey, egg whites, and milk together and add to the dry ingredients, mixing just until the batter is uniform.
Pour into the prepared skillet and smooth out the top.  Bake for 20-25 minutes - the cornbread should be lightly browned and a toothpick inserted into the center will come out clean.
Serve with beans, soup, stew, or chili, or even just with butter and honey.  Enjoy!

Friday, September 23, 2011

Black Bean and Salsa Soup


This, my friends, is my go-to I-have-zero-time-to-cook-this-week recipe.

Bonus?  It's totally healthy.

Extra huge bonus?  It's really tasty.

Thanks to my first week of rehearsals every night, I needed a quick and easy meal that would take a short time to put together, would fill me up enough to make it through long rehearsals, and would last as leftovers for a few days.  When I first found this soup over on Annie's Eats I immediately added it to my menu plan for that week.

When it only took 15 minutes to get it on the table, it became a standby.

This was the perfect dinner for my crazy week - healthy, hearty, spicy, and comforting.  Served with steamed cauliflower and Southern-style skillet cornbread (recipe coming soon!), it made for a delicious well-rounded meal.

Black Bean and Salsa Soup
Source: Annie's Eats

Ingredients:
2 15-oz cans black beans, drained and rinsed
1.5 cups vegetable broth
1 cup salsa
1 tsp cumin
Mexican cheese (for topping)

Directions:
Place the beans, broth, salsa, and cumin in the bowl of a food processor.  Pulse until the mixture is fairly smooth - I like my soup to have quite a bit of texture, so I don't process it very long, but do it according to your tastes.  Transfer the soup to a saucepan and heat over medium heat until it is hot through.  Serve immediately in bowls topped with Mexican cheese - whole grain tortillas or cornbread are also fantastic additions.  Enjoy the meal - and how quickly you made it!

Tuesday, September 20, 2011

Congo Bars


Another instance where baking for friends paid off.

Remember those three shows I'm involved in this semester?  Well, one of them is a choreography showcase, which we had auditions for this week.  All of the choreographers had to stay after auditions to cast our pieces and create a rehearsal schedule.

Translation: we were going to be there for a while and we needed food.

Our director provided a delicious and healthy dinner, but I received a request (read: demand) for dessert.  I didn't have time to make cupcakes, which I'm now famous for in our dance department - seriously, who said dancers don't eat?? - but when I saw these Congo Bars in an email update from Michelle of Brown Eyed Baker I knew I had a solution.

The bars were incredibly easy to assemble - melted butter is combined with brown sugar, then eggs and vanilla are added, followed by the addition of the dry ingredients and the chunky bits - and came together in a cinch the night before auditions.  My roommates and I did a taste test (for quality control purposes, of course!) and when I served them the following night, there were yummy groans throughout the room.

These may be the most addictive treats...ever.  They're rich, moist, and chock full of chewy toasted coconut, crunchy pecans, and melty semisweet and white chocolate chips, with a shiny crackly top like the fudgiest of brownies.  Every bite reveals a new flavor combination...which means you want to keep taking bites.  Forever.
One of my roommates asked me to hide the leftovers to ensure that Jon got to taste one.  All of us became instantly hooked.

Congo Bars have now officially been dubbed Crack Blondies in our apartment.

And I highly encourage that you get your butt to your kitchen and mix up a batch of said Crack Blondies.  You will be happy you did...just be prepared to want half the pan.
See the one I'm holding?
It was totally warmed up and smothered in cookie dough ice cream and chocolate syrup a couple hours later. 
You know you want to...
Congo Bars (a.k.a. Crack Blondies)
Source: Brown Eyed Baker, originally adapted from Baking Illustrated
Yield: however many bars you want to cut from a 9x13" pan

Ingredients:
1½ cups all-purpose flour
1 teaspoon baking powder
½ teaspoon salt
¾ cup unsalted butter, melted and cooled
1½ cups light brown sugar
2 eggs
1½ teaspoons vanilla extract
1½ cups shredded coconut, toasted (I used sweetened, but the original recipe calls for unsweetened)
1 cup pecans, coarsely chopped
½ cup semisweet chocolate chips
½ cup white chocolate chips 

Directions:
Set an oven rack in the center of the oven and preheat to 350˚F.  Coat a 9x13 pan with cooking spray and line with parchment paper, leaving overhang on each side as "handles" for later.  Set aside. 
Combine the flour, baking powder, and salt in a medium bowl.  Set aside. 
Mix together the melted butter and brown sugar in a large bowl until well combined.  Add the eggs and vanilla and stir until totally incorporated.  Sprinkle the dry ingredients on top of the butter mixture and stir to combine, being careful not to overmix - a couple of lumps will be fine.  Fold in the coconut, pecans, semisweet and white chocolate chips with a rubber spatula.  At this stage, try to resist eating what you see and smell inside your mixing bowl.

Pour the batter into the prepared pan and spread with the spatula until even.  Bake for 22-25 minutes, or until the top of the bars are shiny and cracked and feels firm to the touch.  Allow to cool completely in the pan on a cooling rack.  Lift from the pan using your parchment paper handles and cut into desired size bars.  Serve and enjoy!
Then try not to eat a second one.
Go ahead.  I dare you.

Friday, September 16, 2011

Banana Walnut Muffins

I love bananas.  My snack pretty much every day is a banana with a tablespoon of peanut butter.  When I feel the urge to bake, I usually have ripe bananas on the counter.  Banana breads, cakes, muffins, cookies, or, well, basically anything banana - you name it, I probably love it.  And want to make it.  May have already made it, in fact.

There's only one problem: Jon is allergic to bananas.
I can't eat them anywhere near him or he'll get nauseous.  And the super-ripe ones I use for baking make him feel even worse.

Long story short, these muffins were not for him.  This is my go-to muffin recipe and I made them when I wasn't going to see him for a few days.  And I was blissfully happy whenever I was eating one of these moist, sweet, sporadically crunchy, moderately healthy treats.  Particularly if it was topped with mascarpone cheese and a little bit of honey...heaven.  If you're not a walnut fan, substitute anything you want - pecans, blueberries, peanut butter or chocolate chips, shredded coconut...or add in any of the above to make these muffins even more stellar than they already are!

Banana Walnut Muffins
Source: barely adapted from For the Love of Cooking
Yield: 12 muffins

Ingredients:
1 cup all-purpose flour
3/4 cup white whole wheat flour
1 tsp baking powder
1/2 tsp salt
1 tsp baking soda
1/2 cup sugar
1/4 cup brown sugar
2 egg whites
1/2 cup vegetable oil
1/2 cup vanilla yogurt (I used nonfat)
1 tsp vanilla extract
2 large, very ripe bananas
1/2 cup of walnuts, crushed a bit

Directions:
Preheat the oven to 350˚F and make sure a rack is centered.  Spray a 12-cup muffin tin with cooking spray and set aside. 
In a medium bowl, combine the flours, baking powder, salt, baking soda, and sugars and whisk them together.  In a large bowl, mash the bananas until they are smooth, then add the egg whites, vegetable  oil, yogurt, and vanilla extract and whisk until smooth.  Gradually add the dry ingredients to the wet ingredients without overmixing - the batter should still have a few lumps in it.  Fold in the walnuts with a rubber spatula.
Divide the batter evenly among the muffin cups and bake for 20-22 minutes, or until a tester inserted into the center of a muffin comes out clean.  Transfer pan to a cooling rack until cool enough to handle.  Serve muffins slightly warm with toppings of choice - though they don't need toppings to be delicious!  Enjoy!
 

Friday, September 9, 2011

Pappa al Pomodoro

 
There are certain foods that I get major, major cravings for.

Examples:
Pizza
Bacon cheeseburgers
Chocolate cake
Ice cream
White Chocolate Wonderful and banana sandwiches
Chicken or duck fried rice (cravings especially frequent in Buffalo, where there is no really good Chinese food)
Shrimp Pad Thai
Fettucine Alfredo
Anything with pesto
SOUP

The last one is capitalized because I could eat thick, chunky, hearty soup for lunch and dinner pretty much every day of the week.
Virtually every time I went to Panera over the summer, I got their Garden Vegetable soup.  Most of those times, it was over 90 degrees outside and humid to boot.
Did I care?
Nope.  I wanted soup.

One of the first things I wanted to make when I got back to Buffalo was soup.  Maybe it's because I associate Buffalo with bone-chilling winters that only steaming hot bowls of goodness can cure, or maybe it's because I took a look at the cans of crushed tomatoes I had just bought and immediately thought of grilled cheese and tomato soup.

Add grilled cheese to my list of major cravings.

I found the base recipe for this tomato-and-bread soup on Annie's Eats - big shock, since it's one of my all-time favorite blogs - and decided to change up the veggies a bit to use what I had on hand.  It appealed to me both because it could be a total pantry meal and because it's not a pureed soup - the more chunks the better, in my book.
The result?  A thick, hearty, chunky tomato soup that put a gigantic smile on every person's lips through which it passed.  Served with a salad, it became a complete meal - and one of my new favorites!

Another plus: this makes a HUGE batch of soup - enough for me to live on for a week with extras for my roommate and fiancé.  When company season kicks up, I need to live off of leftovers for days at a time.  Large quantity of tasty leftovers = major win.

Long story short: this recipe comes highly recommended from me.  If you're as big of a soup person as I am, make this and you'll be doing your happy dance in no time.

[By the way, if you need a Dutch oven in which to make this tasty soup - which I highly recommend using - mosey on over to She's Becoming Doughmesstic's Le Creuset giveaway!  She's a great blogger and you might get awesome cookware out of it!]

Pappa al Pomodoro (Tomato and Bread Soup)
Source: adapted from Annie's Eats, originally from Barefoot Contessa: Back to Basics by Ina Garten

Ingredients:
1/4 cup olive oil
2 cups chopped yellow onion
1 large zucchini, cut into 1-inch cubes
2 tsp dried basil
4 cloves garlic, minced
3 cups cubed stale country bread, crusts removed
2-28oz cans crushed Italian tomatoes
4 cups chicken or vegetable stock (I used vegetable)
1/2 cup dry red wine
1 tbsp Kosher salt
1-1/2 tsp cracked black pepper
2 large handfuls fresh baby spinach leaves
Croutons, for serving
Shredded Parmesan cheese, for serving

Directions:
Heat the oil in a large stockpot over medium heat.  Add the onions, zucchini, dried basil, and garlic.  Cook for 10 minutes, until tender.  Add the bread cubes and cook for 5 more minutes. Add the tomatoes to the pot along with the chicken or vegetable stock, red wine, salt and pepper.  Bring the soup to a boil, lower the heat, and allow to simmer, partially covered, for 45 minutes.  Beat the soup with a wire whisk to break up the bread pieces.  Stir in the spinach leaves and allow to wilt.  Serve topped with croutons (I made my own out of the leftover bread) and shredded Parmesan cheese.  Enjoy!

Monday, September 5, 2011

Snickerdoodle Cupcakes


If you begin to notice that a week or more has passed between posts, that's because my senior year of college has begun...and has brought with it both awesome opportunities and a crazy schedule.  This semester, I'm involved in three shows.  Three.  I'm never seeing daylight again.  But I am excited :)  So apologies in advance for sporadic and intermittent posting - I promise I still love you and want to give you tasty things to make!

And on that note:
I really do love baking for friends.

In exchange for paying my share of a small cab fare on a night out, one of my girlfriends asked me to bake cupcakes to bring to the party she and her roommates were hosting the next weekend.  So, when the next Friday rolled around, I gathered up the ingredients to make an incredible-looking cake recipe from Foodie with Family into cupcakes.

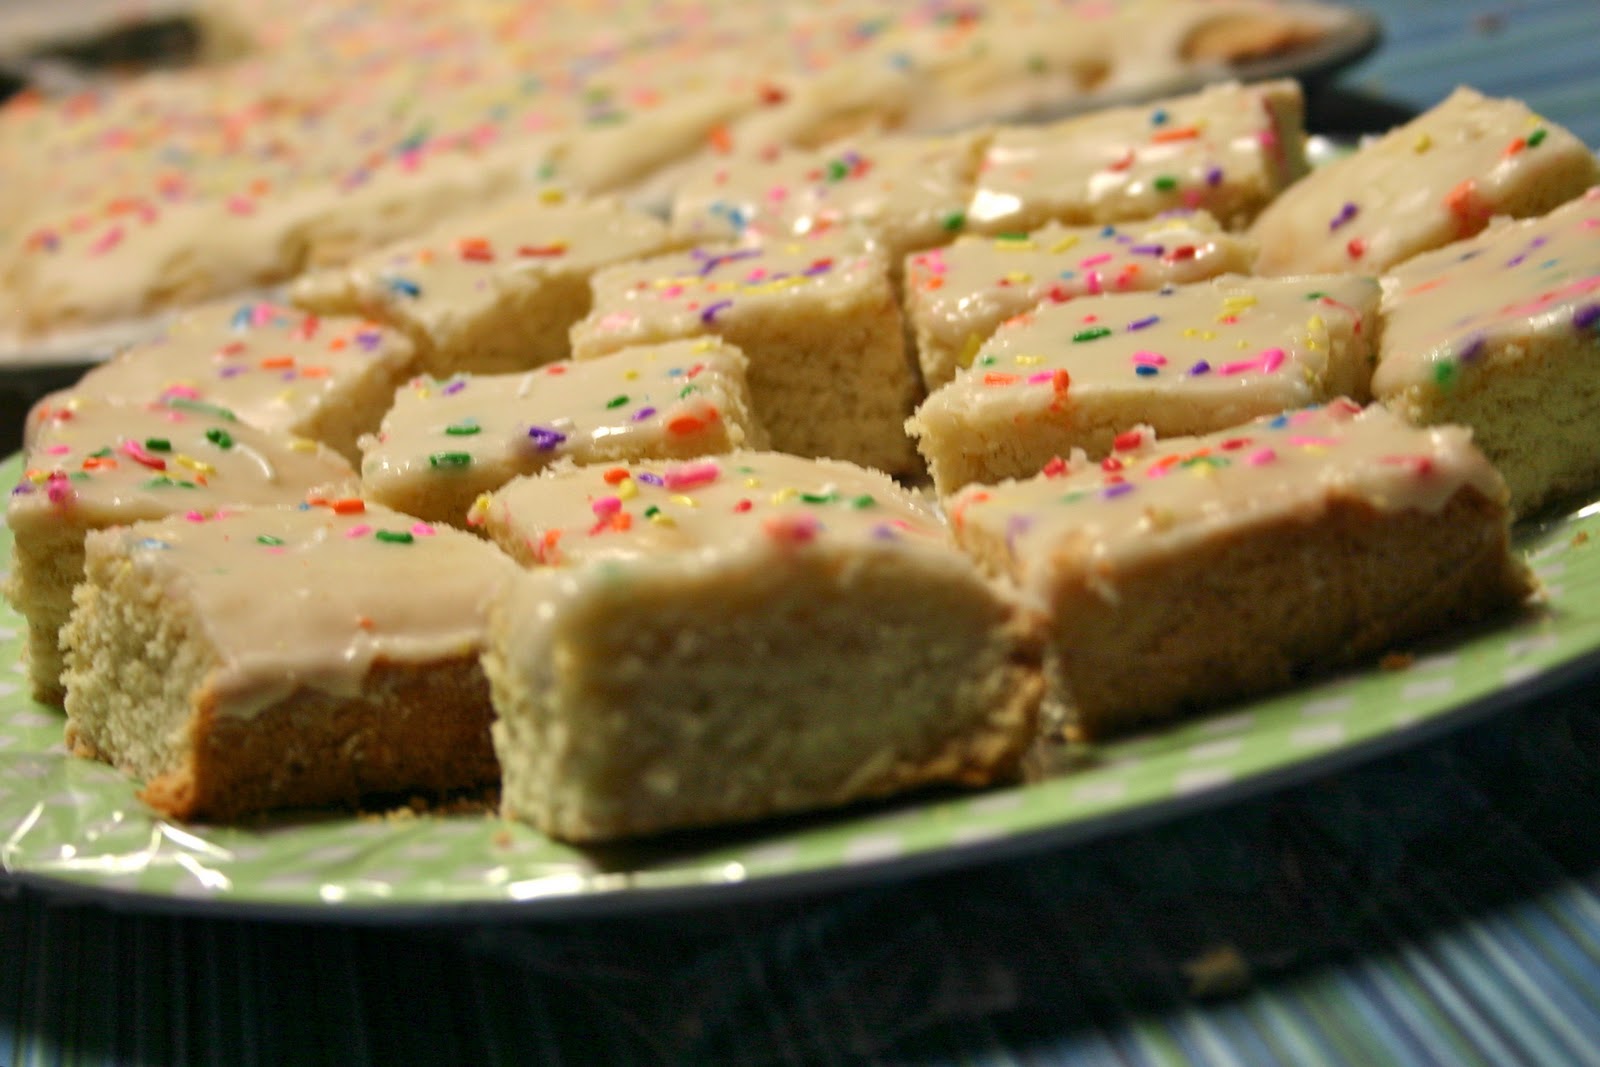
The original layer cake was a towering four-layer cinnamon-vanilla butter cake slathered with a silky-smooth brown sugar-cinnamon buttercream frosting.  The thick batter bakes up into a not-too-sweet, moist, tender cupcake with just the right amount of spice from the cinnamon. 
I figured it would be a good amount of batter for a party-sized batch of cupcakes, and was I ever right - this recipe made 32 cupcakes!  My carrier only holds 24, so I had some "quality control" cupcake samples left at home ;)

And the buttercream...ohhhh the buttercream.  I halved the recipe, as is reflected below.  And 32 cupcakes later, I still had over a cup of frosting left.  This frosting is intense, y'all - spicy, sweet, smooth, and rich as could be.  I can't wait to figure out what to do with the leftovers!

And why do I love baking for friends so much?
Because of the look on their faces after they take their first bite.
The reactions were priceless - I wish I'd had my camera! - but the general consensus was that these cupcakes were to die for.  Everyone who tasted one melted as soon as the first taste hit their tongue.  One of my friends consumed four of them at one shot!  (Granted he was...welll...intoxicated...but hey, they were good!)

I highly suggest you give these a try the next time you're getting together with a bunch of friends!  Everyone will be happy you did :)

Snickerdoodle Cupcakes
Source: lightly adapted from Foodie with Family
Yield: approximately 32 cupcakes

Ingredients:

For the cupcakes:
1-1/2 cups all-purpose flour
1-1/2 cups cake flour
1 tablespoon baking powder
1/2 teaspoon salt
1 tablespoon ground cinnamon
2 sticks butter, softened to room temperature
1 3/4 cups sugar
4 large eggs, room temperature
1 tablespoon vanilla extract
1 1/4 cups milk, warmed to room temperature (I used vanilla almond milk)

For the buttercream
2-1/4 sticks butter, softened to room temperature
1/2 cup light brown sugar, packed
1 teaspoon ground cinnamon
4-5 cups confectioner's (powdered) sugar
1 teaspoon vanilla extract
1/4 cup heavy cream, plus more if needed

Directions:
To make the cupcakes, preheat the oven to 325˚F.  Line two cupcake pans with paper liners and set aside.
In a mixing bowl, whisk together the flours, baking powder, salt, and cinnamon.  Set aside.
In the bowl of a mixer, cream together the butter and sugar until light and fluffy.  Add the eggs one at a time, beating thoroughly after each addition to combine.
Mix together the vanilla extract and milk.  Beat 1/3 of the flour mixture into the batter in the mixer bowl, then 1/3 of the milk mixture.  Continue alternating until all of both mixtures have been added and fully incorporated into a smooth batter.
Spoon 1/4 cup of batter into each cupcake liner.  There will be leftover batter - save it to bake into more cupcakes after the first batch have come out of the oven, or place into a third lined pan if you have one.  Bake for 18-20 minutes, rotating the pans halfway through the baking time.  Cool in the pans on cooling racks for 5 minutes before removing from the pans.  Cool completely before frosting.

To make the frosting, cream together the butter, brown sugar, and cinnamon with a mixer until pale and fluffy.  Add three cups of the confectioners sugar and beat, starting at low speed and increasing to high, until it is fully incorporated.  Scrape down the bowl, add the cream, and beat to incorporate.  Add the remaining cup of powdered sugar and beat low-to-high speed until fully combined.  If the frosting's too thick for your liking, add more cream 1 tablespoon at a time until it's right.  If it is too thin, add more powdered sugar.

Frost the cooled cupcakes as desired, with either an offset spatula or a piping bag and tip.  Serve and enjoy!

Tuesday, August 30, 2011

Spicy Black Bean Burgers

I've been doing this thing lately where I crave some kind of burger weekly, if not multiple times a week.  Maybe it's because it's summer, maybe because I finally started eating them with toppings in the bun, or maybe it's just because they're delicious, but my burger cravings have increased exponentially over the last few months.

This is weird for me.
Not a bad weird, but weird, since I used to be able to go for months without a burger.

Thanks to these increased cravings, I've had to figure out some good hamburger alternatives.  I try to alternate animal-based meals with plant-based meals - it's cheaper and healthier - and having multiple burger cravings a week tends to mess with that.  There are times when there's absolutely no substitute for a gigantic beef-based bacon cheeseburger, but most of the time, I do really well with turkey, bison, or a veggie burger.
And let me tell you, I've become a total veggie burger convert.  And these black bean burgers kick-started my conversion.

Black beans are chopped up with brown rice, sweet onion, jalapeño peppers, garlic, and chili powder, blended with some lime juice, then mixed with whole wheat breadcrumbs and formed into patties.  They're cooked up for less than 10 minutes in a skillet and layered on a toasted whole wheat bun with some lettuce and salsa, making me a happy happy camper.  They are spicy, tender, wholesome, and filling - always a plus for a vegetarian meal!  And it's vegan if you don't use cheese!

...but why wouldn't you use cheese?  That would be delicious...

Anyway.  If you're veggie, if you're a health nut, or if you just like spicy things, make these and be happy :)


Spicy Black Bean Burgers
Source: adapted from Cookin' Canuck's recipe on CuisineNie

Ingredients:
2 tbsp olive or canola oil, divided
1 medium onion, chopped
2 cloves garlic, minced
2 jalapeño peppers, chopped (seeds & membranes removed if you don't want heat)
1 tsp chili powder
1 15-oz can black beans, drained and rinsed
1-1/4 cups cooked brown rice
2 tsp lime juice
1/2 tsp kosher salt
1/2 tsp freshly ground black pepper
2/3 cup whole wheat breadcrumbs, more if needed

Directions:
Heat 1 tablespoon of the oil in a large skillet over medium heat.  Add the onion and saute until it softens.  Add the garlic, jalapeño, and chili powder and saute for an additional 2 minutes.
Scrape the mixture into a food processor.  Add the black beans, brown rice, lime juice, salt and pepper and pulse until the beans are chopped - not pureed.
Transfer the mixture to a bowl and mix in the breadcrumbs with a wooden spoon.  Form into 4-5 equal-sized patties with your hands, adding more breadcrumbs if necessary.  Refrigerate for at least 30 minutes on a baking sheet or plate lined with plastic wrap.
To cook the burgers, heat the remaining tablespoon of oil in a large skillet over medium heat.  Cook the patties for approximately 4 minutes on each side.  Serve on toasted whole wheat buns with your toppings of choice.  Enjoy!

Sunday, August 28, 2011

Pecan Crusted Chicken

So, remember how I told you that I was a scatterbrain and left my camera-to-computer cable in VA?
And remember how I was waiting for the package with said cable inside to arrive at my apartment?
And remember how I posted two recipes sans pretty pretty pictures?  And how that made me sad?  And led to profuse apologies?

Turns out my package could've been in the mailroom at my apartment complex for days.  I finally nabbed someone who works in the office and they had to scour the back room for it...only to find that it was there, but had never been recorded.  No sign-out slot.  No package slip.  Nuthin'.

Long story short: rawwrrrrrrr.  But we have photos again!

...but I apologize for the less-than-great photo for this.  It makes me sad, cause this was delicious.

And now, back to our regularly scheduled blog post.

I created a recipe!  With amounts and everything!

Pardon me while I take this moment to do a proud-of-myself happy dance.

Okay done.  Anyway, I'm always trying to find new ways of making chicken.  I eat it so often that I really can't afford to get bored with it!  A few days earlier, my parents and I ate dinner at Carabba's, where I had the best piece of fish I've ever had.  One of the things that made this tilapia so spectacular was the hazelnut breading, so I was inspired to try some nut-based breading solutions of my own.  This particular day, I also reeeally did not want to go grocery shopping.  For anything.  A grocery store run sounded like the exact opposite of fun to me.  Thus, the obvious choice was a pantry meal.

This was the result, and it was the best pantry meal I've ever made.  Finely chopped pecans are mixed with whole-wheat breadcrumbs to form the breading for the tender breast pieces, which are then baked quickly in a searing hot oven to seal in all the moisture.  This chicken is perfect to serve with virtually anything: with sauteed vegetables and quinoa, with pasta alfredo, or sliced over a salad - or figure out your own accompaniments!  Regardless, I hope you make this and enjoy it as much as I did!

Pecan Crusted Chicken
Source: a Dancer Bakes original!


Ingredients:
4 boneless skinless chicken breasts, butterflied and cut in half
2 cups pecans, finely chopped or coarsely ground
1-1/2 cups whole wheat bread crumbs
1 large egg
2 large egg whites
3/4 cup flour (all-purpose or whole wheat)
1-1/2 tsp kosher salt
1 tsp ground black pepper
1/2 tsp cinnamon
1/2 tsp ground ginger

Directions:
Preheat the oven to 475˚F.  Cover a baking sheet with aluminum foil and coat the foil with cooking spray.
Place the flour in a shallow dish.  Mix in salt, pepper, cinnamon, and ginger.  Set aside.
Combine egg and egg whites in a wide bowl and beat together with about 1 tbsp of water.  Set aside.
Mix together breadcrumbs and pecans in a shallow dish or on a sheet of wax paper.  Set aside.
With each piece of chicken, dredge first in the flour mixture, then dip to cover in the egg, then finally coat with the pecan breading.  Lay flat on the baking sheet and repeat till each piece of chicken has been breaded.
Bake the chicken for 15-20 minutes, or until no pink remains and each piece is firm to the touch.  Serve as desired.  Enjoy!

Friday, August 26, 2011

Sweet Potato Pecan Pancakes


My favorite season of all time is autumn.  Something about the crisp clean air, the cooler temperatures, the often mild weather, the changing colors...all of it is just calming and happy for me!  Even though summer is still upon us - it is, after all, still August for a little while longer - the warm flavors of fall called to me when I saw a pair of sweet potatoes on the counter awaiting use.

I was in a major breakfast-for-dinner mood at the time, so I instantly looked up recipes for sweet potato pancakes.  They were fantastic - hearty, filling, and filled with comforting fall flavors.  Plus, they're chock full of nutrients and low on fat and sugar!

Totally justifies having breakfast treats for dinner.  Or even just having pancakes for breakfast!

After all, sweet potatoes = vegetables.  Case closed :)
Just...ignore the toppings...they don't count.

Sweet Potato Pecan Pancakes
Source: adapted from Food Network

Ingredients:
1 cup all-purpose flour
1 cup white whole wheat flour
4 tsp baking powder
1/2 tsp baking soda
2 tbsp brown sugar
1 tsp cinnamon
2 cups buttermilk
4 tsp butter, melted
2 eggs
1 sweet potato, cooked until tender, peeled and pureed
1 cup pecan halves, chopped

Directions:
Heat a skillet or griddle over medium-high heat.  Warm the oven to 200˚ or lower and place a serving platter on a rack in the middle of the oven.
In a large bowl, lightly beat the eggs.  Add the buttermilk, followed by the dry ingredients, melted butter, and sweet potato puree.  Mix until smooth and uniform.  Fold in chopped pecans.
Lightly grease the skillet or griddle with butter or cooking spray.  Drop batter by 1/4-cupfulls onto the heated surface.  Cook until bubbles form on the surface but no longer pop, then flip over and continue to cook until golden brown.  Transfer each round of cooked pancakes to the serving platter and keep warm in the oven until the entire batch has been cooked.  Serve immediately with softened butter, cinnamon sugar, and pure maple syrup.  Enjoy!

Tuesday, August 23, 2011

Shirley Temple Cupcakes


So first of all, I officially miss all the excitement in Northern VA - there was an earthquake along the East Coast today that hit a 5.8 on the Richter scale.  Its epicenter was very close to Culpeper, VA, which is where my aunt and uncle live.  Any and all prayers will be greatly appreciated - this is definitely a new experience for my whole family, and everyone in the area.

Now, to lighten the mood, tasty treats:
I'm not a soda kind of girl.  I grew up on water, lowfat milk, and the occasional lemonade or orange juice.  But, when I reached my teenage years and went out to dinner with the girls from my dance studio, I was introduced to Shirley Temples.
And I fell in love.

Now, this is especially odd, because A) I'm not a fan of carbonation and B) I've never been a lover of cherry.  But for some reason, the combination of lemon-lime soda and grenadine over ice is just...magical!  Jon thinks so too, so we happily enable each others' addictions ;)

And if the drink is magical, these cupcakes are straight-up miraculous.
Thanks to Shanon over at The Curvy Carrot, this lovely little creation showed up on my radar a couple months back, and I instantly bookmarked the page.  I figured Jon and I would both enjoy them.

I was right!  They're lightly cherry-flavored, with a nice balance of sweet from the maraschino cherry juice and tart from the soda used in the batter.  The buttercream frosting is light, fluffy, and it's not overly sweet with just a hint of cherry peeking out.  Plus, it's pink!  Instant attraction right there.  And, thanks to the layer of color and extra flavor at the bottom of each cupcake, they truly look and taste like the beloved beverage!  These are easily the cutest cupcakes I've ever made, and some of the tastiest.  If you need more incentive, my wonderful fiancé is not a cupcake guy...and he could not stop eating these!

If you love Shirley Temples, you will adore these cupcakes.  Make them, admire their adorableness, and then enjoy them immensely :)

Shirley Temple Cupcakes
Source: adapted from The Curvy Carrot, originally from Simply Gluten Free
Yield: 24 cupcakes
 
Ingredients:
For the cupcakes - 
3 cups + 2 tbsp all-purpose flour
2 tsp baking powder
scant 1 tsp sea or kosher salt
1 cup (2 sticks) unsalted butter, at room temperature
2 cups granulated sugar
3 large eggs, at room temperature
2 large egg whites, at room temperature
1 cup lemon-lime soda
1 tsp vanilla extract (I used Tahitian - it works well with fruity flavors)
2 tbsp maraschino cherry juice, divided
2-1/2 tsp grenadine
Red food coloring

For the Buttercream - 
1 cup (2 sticks) unsalted butter, at room temperature
Pinch of salt
5 cups powdered sugar
1/2 tsp vanilla extract
2 tsp fresh lemon juice
2 tbsp maraschino cherry juice
24 maraschino cherries with stems, patted dry with paper towels

Directions:

To make the cupcakes, preheat the oven to 350˚F and prepare two 12-cup cupcake tins with paper liners.
In a large bowl, whisk together the 3 cups of flour, baking powder, and salt.  Set aside.
In the bowl of a stand mixer fitted with the paddle attachment, cream together the butter and sugar on medium-high speed until light and fluffy, approximately 2-3 minutes.
Add the eggs, one at a time, then the egg whites, beating well after each addition.
Reduce the mixer speed to low.  Combine the soda with one tablespoon of the maraschino cherry juice.  Then, alternately add half the flour mixture and half the soda mixture, mixing well and scraping down the sides of the bowl as needed.  Repeat until all of the flour mixture and soda have been added completely to the batter.  Add the vanilla extract and mix to combine.  As a warning, this batter will splash, so if you have bowl guards I would advise using them.
Pour about half of the batter into a large bowl.  Add the remaining flour and maraschino cherry juice, the grenadine, and red food coloring to your desired hue.  Spoon the red batter evenly into the bottom of each cupcake liner, then top with the remaining white batter.
Bake the cupcakes for 15-20 minutes, or until a tester inserted into the middle of each cupcake comes out clean.  Allow to cool completely in the pans before frosting.

To make the buttercream, cream the butter in the bowl of your stand mixer fitted with the paddle attachment (or paddle scraper!) until it's pale, light, and fluffy - about 2-3 minutes.
Reduce the mixer speed to low and add the salt, then gradually add the powdered sugar until it is all combined.  Thoroughly mix in the vanilla, lemon juice, and cherry juice.  Dollop or pipe onto cooled cupcakes as desired and garnish with the stemmed maraschino cherries.  Enjoy!