Showing posts with label comfort food light. Show all posts

Saturday, June 22, 2013

Happy 2nd Birthday, Dancer Bakes! {Oatmeal Banana Nut Muffins}

Pretend there's a candle in one of those muffins because the blog turns two today!!  WHOA!

It barely feels like this last year happened for me - graduation, marriage, and 6 months at sea dancing my little tush off made it fly by!  But even though I'm still in denial that it's really been two entire years since I started this little online journey, I couldn't be happier about where it's taken me.  I started my dance career, I lived in one of the most beautiful places in the entire world, I have a wonderful husband who helps and supports me in every way, and I've developed a deeper love of food than I ever imagined when I decided to start writing it all down.

This occasion really demands rich and delicious baked goods.  In lieu of rich, have healthy and delicious baked goods!

The other day, I got hit by a particularly strong urge to bake, fed in part by the appearance of a Nutella Swirl Banana Muffin recipe on my newsfeed - courtesy of Jessica over at The Novice Chef. I basically started salivating on sight.
However, I've recently tried to renew my commitment to eating a clean diet - high in fiber, vitamins, minerals, protein and healthy fats; low in sugar, saturated fat and processed chemicals.  The hardest part for me to cut out is sugar.  It's no secret that I love sweets, and I particularly like finishing a meal on a sweet note, so sugars - even natural ones - are hard for me to both limit and avoid altogether.
I couldn't shake the banana muffin craving, though, so I searched for a healthier recipe, and voila!  I found one!  Still sweet, but not a cupcake masquerading as breakfast.

These are oatmeal muffins, but not in the same sense as an oatmeal cookie.  In this recipe, the oats are ground into oat flour to form the base of the muffin.  I was a little low on oats at home, so I supplemented with a little white whole wheat flour and they still turned out great.  Also, these are basically the easiest muffins to make in the history of the world: all you do is process the oats, add all the rest of the ingredients, process until it looks like a batter, and bake!

In terms of the calorie count (if you even care), these beauties come to a whopping 135 calories per muffin!  Not bad at all.  If you're watching your sugar intake, you'll still need to balance these with low-sugar, high-veggie-and-protein meals, but eating one is nothing to feel guilty about!  Score :)

Oatmeal Banana Nut Muffins
Source: slightly adapted from this recipe by Michelle Hein
Yield: 1 dozen muffins

Ingredients:
2 cups old-fashioned oats
2 extra ripe bananas, cut into quarters
2 eggs
1/4 cup granulated sugar
2 tbsp honey
3/4 cup plain nonfat Greek yogurt
1 tsp vanilla extract
1-1/2 teaspoons baking powder
1/2 teaspoon baking soda
1 teaspoon cinnamon
1/3 cup chopped walnuts

Directions:
Preheat the oven to 400˚F.
Lightly grease a 12-cup muffin pan with cooking spray, butter, or shortening (I used Baker's Joy).
Place the oats in the bowl of a food processor and pulse until finely ground. 
Add the remaining ingredients and blend until a smooth batter is formed.
Scoop the batter into the prepared muffin tin, evenly filling all 12 cups.  Bake for 15-20 minutes, until a toothpick inserted into the center comes out clean and the tops of the muffins spring back when pressed lightly.  For me, it only took 15 minutes, so make sure to test them at the minimum baking mark - don't let them overbake and get tough!  Serve warm and enjoy - add candles if you're feeling celebratory :)

Wednesday, June 19, 2013

Spinach Artichoke Hummus

Up until about a year ago, I was convinced that I did not like hummus.
At all.
As in, "get that weirdly spiced baby food away from me."

Looking back on that version of me, I have to shake my head in shame.
What was I thinking??  Was some pickiness from my "ew, beans!" phase sticking around?

Thankfully, shortly before I started rehearsals for the ship, I discovered just how ridiculous I was being and fell head over heels in love with hummus. During rehearsals, fresh vegetables, pretzels and classic hummus-to-go packs were lunch most days.  Once aboard the vessel I called home for half a year, baby carrots, flatbread crisps and spinach artichoke hummus saved my patoot during our month of Condition Red (a story for another post that...isn't pureed).  And once I got home, I learned how ridiculously easy and cheap it was to make at home and did a happy dance.

This was Attempt Number One.
And holy yum, Batman.
This was a replication of - or dare I say, improvement upon - my favorite hummus-and-everything-else flavor to date: spinach and artichoke.  There's something about the freshness, mild fragrance, and gorgeous green color that just lights my candle!  Thanks to Ali, the genius behind Gimme Some Oven (yay blog puns!), I found the ultimate recipe.  The only change we made was to swap in lime juice for the lemon, since that's what we had on hand, and thankfully the bright lime was a great complement to all the other green stuff in there.

Jon and I have been devouring it nonstop since it came out of the food processor.
And the best part? It's only 60 calories per 2 tbsp serving!!
Translation: room for more dessert later!

...kidding.  Ish.

This recipe was definitely a big step in the clean eating direction for our little kitchen, and I couldn't have been more thrilled with the results!  Especially when paired with baked falafel...

If you're a hummus fan with a food processor, what are you waiting for??  Get hummus-ing!

Spinach Artichoke Hummus
Source: barely adapted at all from Gimme Some Oven

Ingredients:
1 (15 oz) can chickpeas, packing liquid reserved
4 cups loosely packed fresh baby spinach
1/2 cup canned artichoke hearts
2 tbsp tahini (sesame seed paste)
2 tbsp lime juice
2 tbsp olive oil
2 cloves garlic, peeled and smashed
Salt and Pepper, to taste

Directions:
Place all ingredients into the bowl of a food processor.  Using the steel blade, process until smooth.  Add a tablespoon at a time of the reserved chickpea liquid as needed until your desired consistency is reached.  Crack out the veggies and pita chips and enjoy!

To store, scoop into any air-tight container and refrigerate.  It'll last for a couple weeks easily.

Friday, June 29, 2012

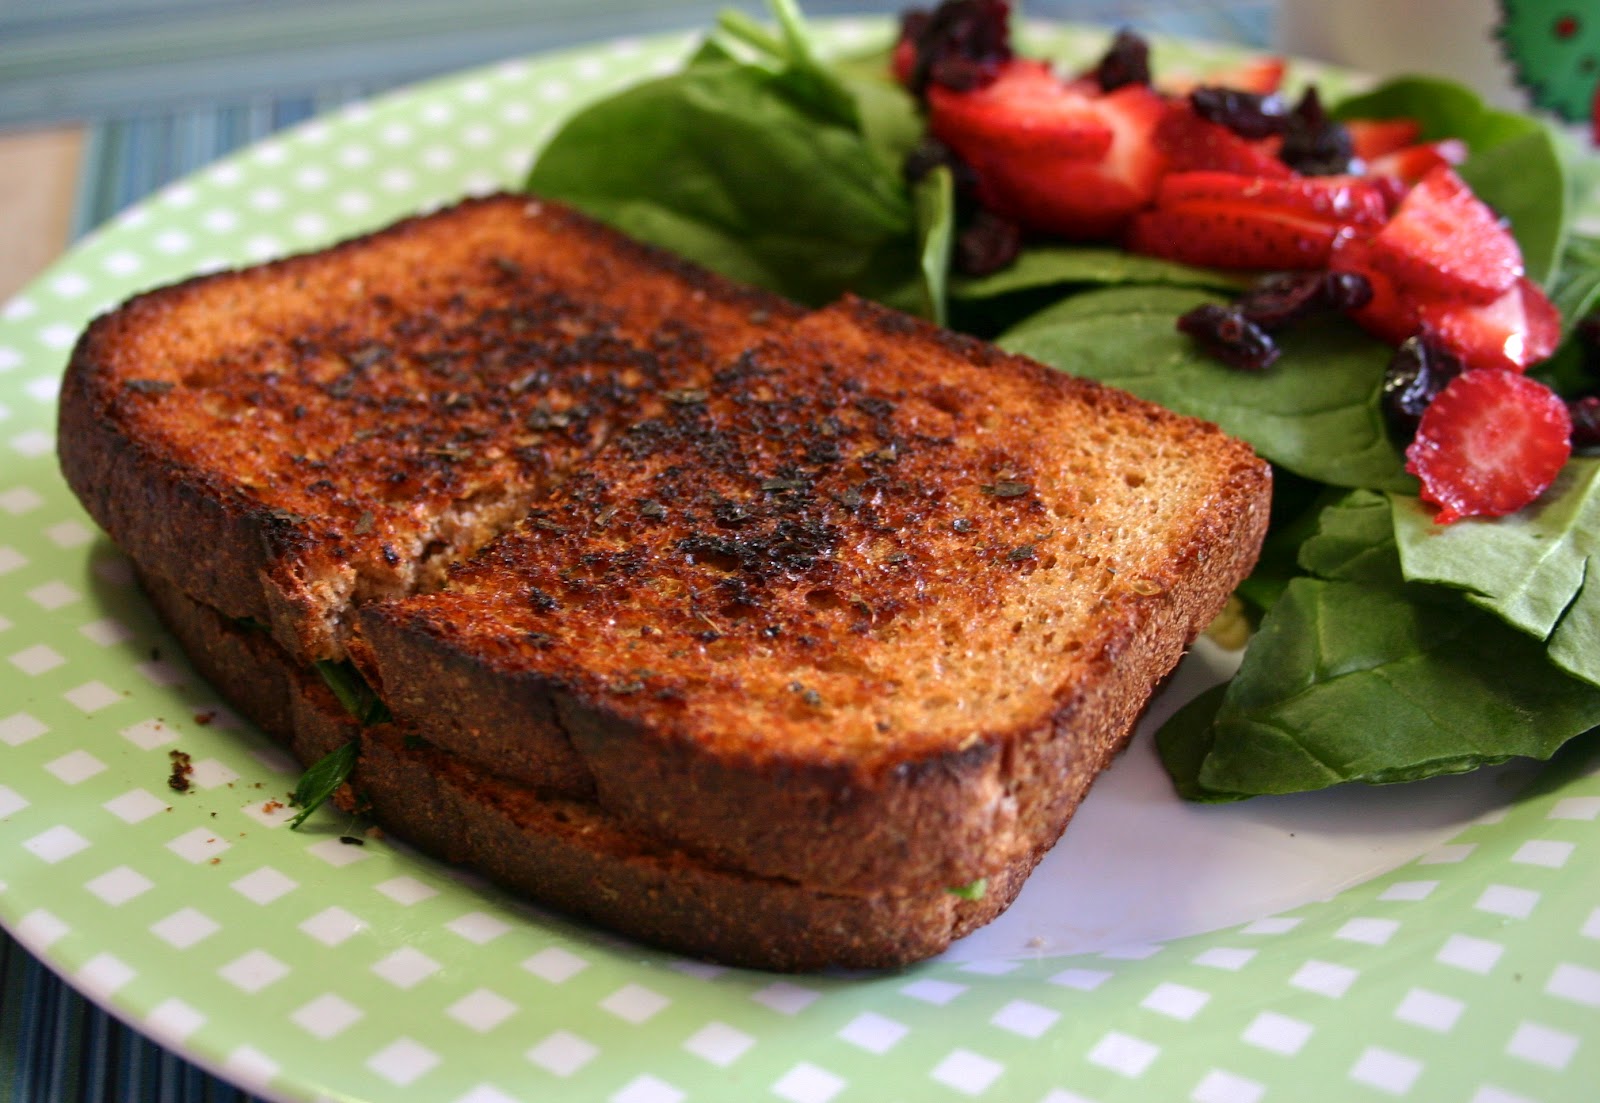
The Dancer Bakes Fancy Grilled Cheese

 It's your regular, unsuspecting grilled cheese, right?
Golden brown and crispy, promising gooey melted comforting goodness inside?

But, see, I can never just let something be.  It's a compulsion of sorts -  I just have to keep playing!

Which is why, when the sandwich gets opened up, you get this:
Gooey melted comforting goodness PLUS sauteed spinach, sundried tomatoes, and herbs, toasted with olive oil instead of butter on whole grain bread.

So...basically, if I want to eat grilled cheese, I have to load it up with veggies.  It's just how I roll.  It's comfort food "light" (if you were next to me, you'd see me doing air quotes on that one): lower in saturated fats since there's no butter, and plenty of vegetable and whole grain nutrition.  Since there's cheese, it's not totally light, but...grilled cheese kinda relies on that bit...

And did I mention yet that it's DELICIOUS??

...I haven't?

My bad.  For the record, it's DELICIOUS.

For this particular sandwich, I also used fancy cheese.
Specifically, Cabot Tomato Basil Cheddar.  Now, would this work with something different - like a Havarti, Mozzarella, even White Cheddar?  Sure!  But in my mind, this cheese took the flavors I added to the mix and enhanced them in the best way possible.  So if Cabot cheeses go on sale at your neighborhood grocery store, snatch this one up - it's well worth it!  If you have pesto on hand, by all that's holy, PLEASE add it - my mouth is watering thinking about it... And while grilled cheese is typically seen as lunch food, this one makes a sensationally tasty quick dinner alongside a salad or a cup of tomato soup!

The Dancer Bakes' Fancy Grilled Cheese
A Dancer Bakes original
Serves one
 
Ingredients:
1-1/2 tbsp olive oil, divided use
1 large handful fresh spinach leaves
Salt and pepper, to taste
2 slices whole grain bread of choice - regular sandwich or artisan
2 oz Cabot tomato basil cheddar cheese
6-7 sundried tomatoes, drained
Pinch each of:
Dried Parsley leaves
Dried Basil leaves
Dried Oregano
Dried Rosemary

Directions:
Heat a small skillet over medium heat and add 1/2 tablespoon of olive oil.  Add your spinach leaves, salt, and pepper, and saute until wilted.  Remove to a plate and set aside, briefly setting the hot skillet onto a cool burner.
While spinach is wilting, mix together the remaining olive oil and the dried herbs in a small bowl.  Using a pastry brush, brush one side of each slice of bread with the olive oil and herb mixture.  Layer the cheese, sundried tomatoes, and wilted spinach evenly on the un-oiled side of one of the pieces of bread.  Put the skillet back on the heat, place the bread oil side down in it, and top with the other slice of bread.  Cover and let cook for about 2 minutes, until the cheese starts to melt and the bottom piece of bread is crispy and golden.  Flip the sandwich, cover, and cook for another 1-2 minutes, until the whole concoction is melty, crispy, and aromatic.  Remove to a plate, allow to sit for 1-2 minutes, then slice and enjoy!

Thursday, April 5, 2012

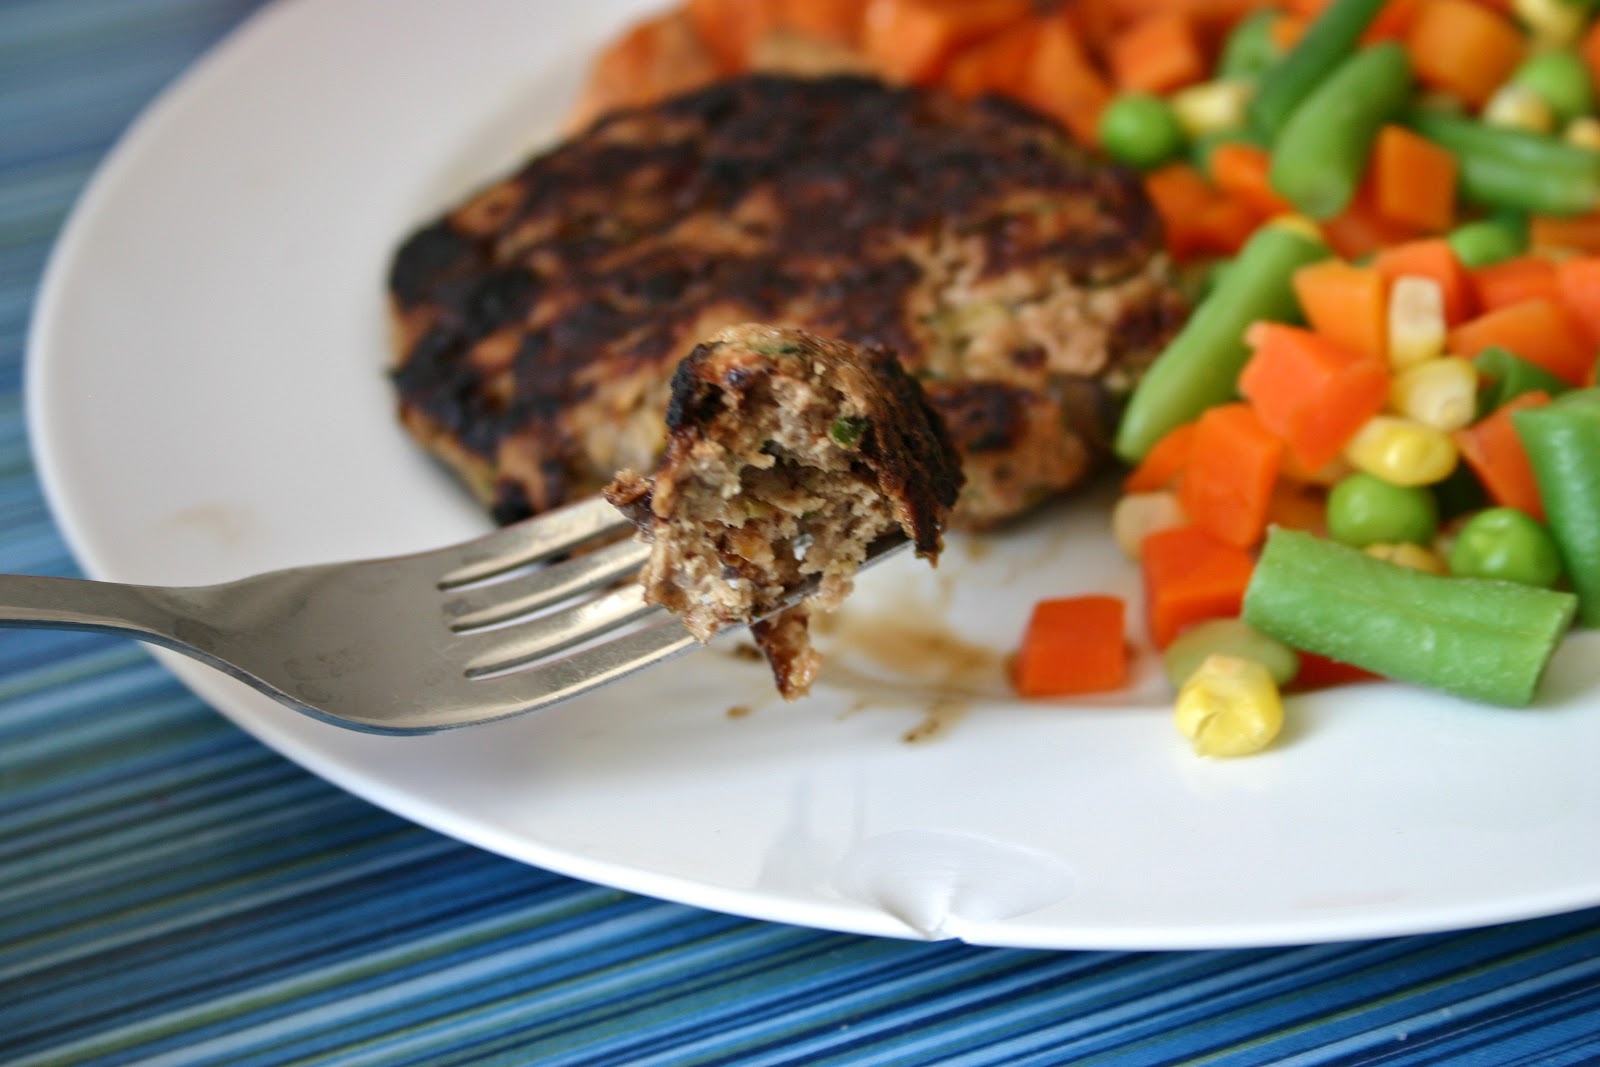
Super Moist Turkey Burgers


It was all a tease.

That one glorious week of upper-70s sunshine, cool breezes, and vitamin D absorption?
TEASE.

It's officially spring in Buffalo, which means weather in the 30s and 40s with grey skies and drizzly business.  Not the most conducive to happiness or productivity.  Or desire to exercise...woof.

When the happy weather was here, so was my summer appetite.  Which means I was totally craving burgers.  I managed to find some frozen lean ground turkey and I got super excited, because that meant turkey burgers!

Now, you might find this odd, but 95% of the time I'm hit with a burger craving, it's for a turkey or veggie patty.  I know, I know...those aren't "real" burgers.  But I save my "real" burger indulgences for one meal after a hardcore performance season, and when those come around nothing but a huge bacon cheeseburger will cut it! 
This time, though, I was feeling the turkey burger.

Between the ground turkey, my favorite tried and true burger add-ins in the pantry, and some awesome produce deals, I managed to come up with a turkey burger that exceeded my expectations of deliciousness: no bun, no toppings, and I still couldn't stop digging my fork into that patty!  Served with a side salad or mixed veggies and roasted sweet potatoes, it satisfied all my most ardent summer food cravings in a low-fat, nutrient-packed and delicious meal.

Not a tease in sight!  If only the weather would be so cooperative...


Super Moist Turkey Burgers

Ingredients:
1 lb lean ground turkey
1 tbsp olive or canola oil, divided (more if needed)
1 medium zucchini, grated
8 oz cremini mushrooms, diced
1 tbsp Worcestershire sauce
1/2-1 tsp salt (to your taste)
2 tbsp-1/4 cup whole-wheat breadcrumbs
Mrs. Dash Original Seasoning Blend

Directions:
Heat 1/2 tbsp of the oil in a skillet over medium-high heat.  Add the diced mushrooms and cook until the excess moisture begins to evaporate and the mushrooms are browned, breaking up any larger pieces as much as possible.  Add the grated zucchini to the skillet, cover, and allow to cook until all the excess liquid in the pan has evaporated - about 3-4 more minutes.  Remove the skillet from the heat.
Place the ground turkey in a medium mixing bowl and break up.  Add the Worcestershire, salt, Mrs. Dash, breadcrumbs, and the vegetable mixture, and blend well using a wooden spoon or your hands.  Form into desired size patties, making an indentation in the center of each with your thumb so that the burgers will cook up flat.  My mixture made five substantial patties.
Brush a grill pan with the remaining oil or add it to a skillet over medium heat.  Add as many burgers as will comfortably fit in the pan and allow to cook, untouched, for 6 minutes.  Flip the burgers and cook for another 6 minutes, or until a crust has formed and the internal temperature has reached 165˚F.  Remove to a plate and cook any remaining burgers in the same manner.
Serve burgers on their own or with toppings of choice - as toppings go, I recommend Havarti cheese, baby spinach, fresh tomato, basil or sundried tomato pesto, and a whole wheat bun.  Enjoy!
 

Tuesday, March 27, 2012

Blueberry Oat Banana Bread


The wedding is coming up SO SOON!!

We're talking less than two months now.  And I couldn't be more excited to finally call Jon my husband!

Of course, this means that I have less than two months to get everything done, which is a bit intimidating.  Now don't get me wrong - we're almost there!  But those last few things that remain unfinished are killers.  Like...planning the ceremony with my pastor.  And doing premarital counseling.  And making sure I have someone to do my hair.  And seating charts...oh Lord, seating charts...

SO FUN.


I also have to get dress alterations done because (feel free to hate me for this next part) I lost too much weight for the wedding gown I ordered!  I focused on eating right and toning up for shows and auditions, and in the process I dropped a dress size - woohoo!  So when I went to what I hoped would be my final gown fitting, I discovered it needed to be taken in quite a bit.  What complicates this even more?  The gown is in Virginia...and I'm in Buffalo.  So I have to fly back home in April to make sure everything's perfect.  An added expense and an added stress, but worth it!

And everything will get done!  It will.  Eventually.

Oy.


Two months till the wedding also means that I am down to my last two months to bake with bananas whenever I want, since the future husband is allergic to them.  I'm not going to give them up - uh, I kinda live off of them - but I will have to be very careful about when and where I eat and bake with them.

One day, I just wanted banana bread, a craving that was spurred by the three very ripe bananas I had sitting on the counter.  I was blog browsing, found this recipe on The Picky Eater, realized that I had every necessary ingredient on hand, got SUPER excited, and made it!  After I made the kitchen smell incredible and tortured myself by waiting till the next day to taste it, I was very happy that I gave into my craving!

This banana bread is about as guiltless as banana bread can get.  It's loaded with nutty whole wheat flour, hearty rolled oats, and tons of fruit in the form of banana puree and blueberries.  It also happens to be delicious.  I will recommend that you err on the side of too much mashed banana, though - I think I'd increase the amount I used for the future just for added flavor.  But if you're in the mood for banana bread that won't kill your calorie count for the day, bake this one up - you won't be disappointed!

Whole Wheat Blueberry Oat Banana Bread
Source: The Picky Eater

Ingredients:
1 cup buttermilk (I used buttermilk powder and water)
2 large eggs
1 cup mashed ripe banana - about 2-3 medium bananas (I say aim for 3)
2/3 cup packed brown sugar
1/3 cup canola oil
2 cups whole wheat flour
1 cup old-fashioned rolled oats
2 tsp baking powder
1 tsp ground cinnamon
1/2 tsp salt
1/4 tsp baking soda
1-1/2 cups blueberries, fresh or frozen

Directions:
Preheat the oven to 375˚F with a rack positioned in the middle.  Coat a 9x5 loaf pan with cooking spray and lightly flour.  Or use Baker's Joy and do it all at once! 
Whisk together the buttermilk, eggs, mashed banana, brown sugar, and oil in a large bowl until uniform and smooth.    In a separate bowl, combine the flour, oats, baking powder, cinnamon, salt and baking soda.  Stir the dry ingredients into the wet ingredients until just combined.  Gently fold in the blueberries.
Transfer the batter into the prepared loaf pan, smoothing out the top.  Bake for approximately one hour, until browned and a toothpick inserted into the center comes out clean.  Transfer pan to a wire rack to cool for 15 minutes, then remove the bread from the pan to the rack to cool the rest of the way.  Enjoy!


**And stay tuned - I had fun with this bread that I'll share soon :)

Tuesday, February 21, 2012

Coconut Basmati Rice Pudding

 Usually, when I decide to make a dessert, I go all-out.  Sugar, butter, eggs, chocolate, layers, filling, frosting, glaze... it's go big or go home!  My original plan for Valentine's Day was mini layer cakes à la Sprinkle Bakes (which I still want to attempt!), but once I found out that V-Day was out and a time-limited homemade anniversary dinner was in, the game plan had to change to something simpler.

Enter rice pudding.  Which just happens to be one of Jon's favorite desserts :)

I might be the world's biggest fan of brown basmati rice.  It's just so nutty and delicious, and it's got all those great health benefits since it's a whole grain!  Score.  It also makes a killer rice pudding.

Pre-cooked brown basmati rice gets a long bath in coconut milk, maple syrup, cinnamon, and vanilla.  When it comes out, its natural nuttiness combines with a smooth creaminess that essentially becomes heaven on a spoon.  And bonus?  If you have leftover rice in the fridge, you've got dessert in half an hour!

Additional bonus: this recipe, especially if served with dried fruit and nuts, is healthy and filling enough to serve as breakfast!  Pudding for breakfast for the win!!

But for dessert, if you really want to take it to the next level, layer it into a parfait with sweetened angel flake coconut and some mini chocolate chips while it's still warm.  Magic.

Coconut Basmati Rice Pudding
Source:  Kale and Cardamom

Ingredients:
2 cups cooked brown basmati rice
1 14-oz can coconut milk (I used lite)
1/8 tsp sea salt (if you did not use salt when cooking the rice)
1/4 tsp ground cinnamon
2 tbsp maple syrup
1/4 tsp pure vanilla extract
Toppings of choice (Suggested: shredded coconut, chocolate chips, chopped toasted nuts, and/or dried fruit)

Directions:
Combine rice and coconut milk in a medium saucepan and bring to a boil, stirring occasionally.  Lower the heat and add the salt (if using it), cinnamon, and maple syrup.  Allow the mixture to simmer, stirring it often, until it's thick, creamy, and pudding-like - about 20 minutes, give or take.  Remove from heat and stir in the vanilla - I suggest you use something high-quality if you have it, since the gorgeous flavor won't get cooked out :)  Serve immediately, or chill until cold, and eat with toppings of choice.  Enjoy!

Sunday, January 29, 2012

Banana Nut Steel Cut Oats

This, ladies and gents, is by far my favorite winter morning breakfast.

Unless you include pancakes or waffles or french toast.  So by "favorite" I mean "the best possible thing I can afford to eat all the time."  Which this definitely is.

If you're an oatmeal fan, then chances are you've tried steel-cut oats.  If you're not an oatmeal fan, then by all means TRY STEEL CUT OATS!

Sorry.  Didn't mean to get scary on you for a second.  But seriously - if you hate regular rolled-oats oatmeal, these could change your mind.  The oats, instead of being steamed and rolled, are steamed and then cut into small pieces with a steel blade.  Hence steel-cut oats - oh hey!  As a result, they retain more of the oat husk and have even more of those great whole-grain properties.  For those of you who aren't health nuts and don't give a rat's patoot about health values, they maintain a chewy texture - no mush here!  More good news: most steel-cut oats, especially Irish oats, are gluten-free!  Just check whatever brand you find to make sure they are, if that's a concern.  They do take a bit longer to cook, but there's a quick version of steel-cut oats too.  Which is what I use.

I have several variations of my Friday morning oatmeal, and this one is definitely my favorite so far.  I cook the oats with a combination of water, vanilla soy or almond milk, and Stevia, and I add sliced bananas, crushed or chopped walnuts, a nice sprinkle of cinnamon, and just a touch of light brown sugar to finish.  They're creamy, wholesome, sweet, and chewy with highlights of rich banana and crunchy nut - exactly what I want to eat when I see snow out my window in the morning :)

Banana Nut Steel-Cut Oats
A Dancer Bakes original!
Serves 1

Ingredients:
3/4 cup water
1/4 cup quick-cooking steel-cut oats (such as McCann's)
1 packet stevia (I use Stevia in the Raw)
1/4 cup vanilla soy or almond milk, with more as needed or desired
1 medium to large banana at desired ripeness, sliced
1/4 cup walnut pieces
1/2 tsp cinnamon
1 tbsp light brown sugar

Directions:
On the stove:
Heat the water in a small (2-3 cup) saucepan over medium-high heat till it reaches a rolling boil.  Add the oats and stevia.  Allow to cook uncovered for 5-7 minutes, stirring often, until the water has been mostly absorbed by the oats and the oatmeal has thickened.  Stir in the soy or almond milk and continue to cook until the milk is absorbed and the oatmeal is creamy.  Add the cinnamon, walnuts, and banana slices, stirring well to incorporate.  If the oats are too thick for your taste, add more of the milk and cook until your desired texture is reached.  Allow to sit for 1 minute.  Pour the oats into a bowl, sprinkle with brown sugar, and serve.

In the microwave:
Pour the oats, stevia, and water into a deep, microwave-safe bowl.  Cook on high for 2.5-3 minutes, stir, and return to the microwave for another 1-2 minutes, checking and stirring frequently.  Remove from the microwave and stir in the almond or soy milk, followed by the cinnamon, walnuts, and banana slices.  Add more milk and return to the microwave if necessary until desired consistency is reached.  Allow to sit for 1 minute.  Sprinkle with brown sugar and serve.
Microwave note: if your microwave runs hot and tends to make things boil over, consider adding 1/4 cup raisins to the oats and water before cooking them.  The dried fruit will absorb some of the excess moisture, which will keep the oats from boiling over - just remember you'll probably need more milk than the recipe calls for later!  And the oatmeal's just as delicious with raisins in the mix :)

Saturday, July 30, 2011

Chicken Parmesan, the lighter way

Honestly, what I post on this blog is not a particularly accurate representation of my diet.

I eat clean the vast majority of the time, especially when I'm at school cooking for myself.  Most of my diet consists of fruits, vegetables, lean protein, and whole grains, and I make dessert very rarely.   I feel a lot better when I eat a wholesome varied diet.
That doesn't mean that I want my food to taste like it's insanely healthy.  As a result, I'm on an eternal quest to make healthy comfort food.

A total contradiction, I know, but welcome to my life.  I am, after all, an aspiring professional dancer who loves to bake.  I have to at least try to make healthy food taste like it'll clog your arteries!

One of my favorite blow-my-diet Italian dishes is Fettucine Alfredo.  Another is gnocchi in a tomato cream sauce.  Those are things that you just can't make authentic healthy versions of.  Or even authentic-tasting.
I'm sorry, but using low-fat cream cheese to thicken your alfredo sauce is wrongCream cheese??  
Really??

Chicken Parmesan, however, was a bit more redeemable.

Instead of browning the breaded chicken in oil, seasoned Panko breadcrumbs are toasted to make them brown and, well, toasty before they're tossed with grated Parmigiana Reggiano to form the breading.  Panko is extra crispy, so you don't miss the frying, and the chicken is cooked entirely in the oven in about 20 minutes total.  Homemade marinara sauce and part-skim mozzarella get all warm and melty on top to finish a dish that satisfies you without weighing you down.  Serve it with a salad or a green vegetable - like grilled zucchini - and a whole-grain baguette, and you have a well-balanced, healthy, AND comforting meal!

And if you need a testament to it's status as healthy comfort food, just ask Jon - I served it to him and he didn't think it tasted "healthy" at all!  Officially guy-approved :)

Lightened-Up Chicken Parmesan
Source: adapted from Annie's Eats, originally from Cook's Illustrated, October 2006

Ingredients:
1 1/2 cups Italian-seasoned panko breadcrumbs
1/2 cup grated Parmesan cheese, plus extra for serving
1/2 cup all-purpose flour
salt and pepper
3 large egg whites
1 tbsp. water
vegetable cooking spray
2 large boneless, skinless chicken breasts, butterflied and cut into halves (4 pieces total)
2 cups marinara sauce, warmed
about 1/2 cup shredded part-skim mozzarella cheese
1 tbsp. minced fresh basil


Directions:
Preheat oven to 475˚F with an oven rack on the middle position.  Line a rimmed baking sheet with aluminum foil and coat the foil with vegetable cooking spray.
Toast Panko breadcrumbs in a large skillet over medium-high heat until golden brown.  Set aside to cool.
Place flour in a pie plate or on a sheet of wax paper.  Whisk together the egg whites and water in a shallow dish.  Combine cooled breadcrumbs with the grated Parmesan cheese and spread on a sheet of wax paper or a pie plate.  Season the chicken pieces with salt and pepper on both sides.  Dredge each piece in the flour, then dip in the egg whites, then cover in breadcrumbs, pressing to adhere.  Transfer the pieces to the baking sheet and place in the heated oven for 15 minutes, or until chicken is no longer pink and feels firm when pressed with a finger.  Remove the chicken from the oven.  Spoon 2 tablespoons of sauce over each piece and sprinkle with 2 tablespoons of shredded mozzarella.  Return to the oven for 5-6 more minutes, until the cheese is melted.  Sprinkle with fresh basil and serve as desired with extra sauce and Parmesan cheese.  Enjoy!