Showing posts with label chocolate. Show all posts

Monday, June 10, 2013

Oatmeal Chocolate Chip Walnut Cookies

I really need to practice making cookies.

But seriously.
I have cupcakes and layer cakes down.  Brownies? Check.  Biscuits, scones?  Super easy.  I can even do pie crust.
But cookies?  They're the first thing most kids bake!  The one thing that their moms will let them help with!  The foolproof dessert that can only get screwed up by not setting a timer!
I follow every direction, measure with extreme precision, set painstakingly exact timers...
And I CANNOT nail them!

I want to say I can blame my oven.  I probably need an oven thermometer so I can test what temperature "350˚" actually is.  And maybe I need to play with temperatures as well as times.

I'm just saying, for me, thick golden cookies that don't spread like the dickens are apparently a lot to ask for.
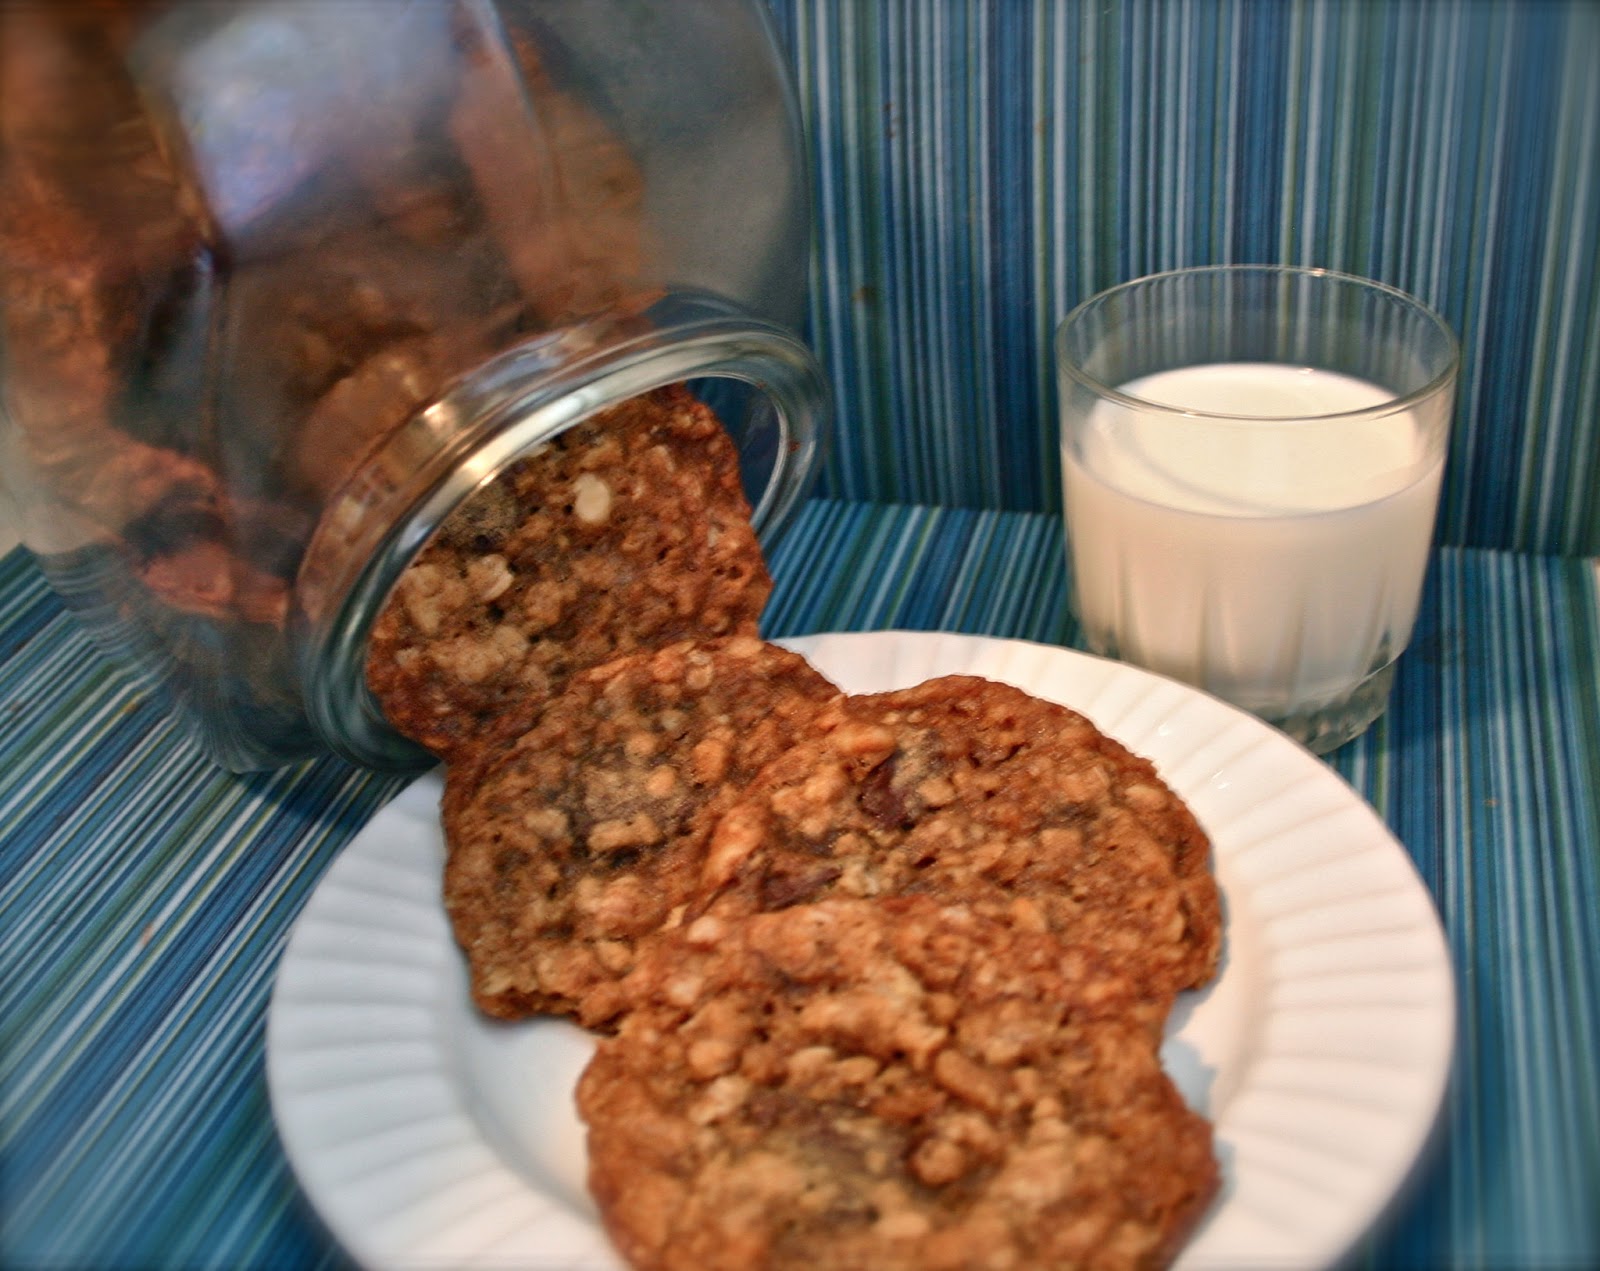
In the picture are the prettiest three cookies of nearly 3 dozen.  They just kept spreading and browning really quickly!
Grr.

At least they taste good!

Pretty will come with time.

I hope.

For now, I will accept any cookie tips and tricks that you lovely people have to offer me, and will also sit back with one of my poor dilapidated tasty cookies.

Oatmeal Chocolate Chip Walnut Cookies
adapted from these cookies

Ingredients:
1 cup (2 sticks) unsalted butter, at room temperature
2/3 cup granulated sugar
1 cup packed light brown sugar
2 large eggs, at room temperature
1 tsp vanilla extract
1 tsp unsulphured molasses
1-1/2 cups all-purpose flour
1 tsp baking soda
1 tsp sea salt
1 tsp ground cinnamon
2 cups old-fashioned rolled oats (not instant or quick)
1-1/2 cups chocolate chips
scant 1 cup coarsely chopped walnuts

Directions:
In the bowl of a stand mixer, or in a large bowl with a very sturdy hand mixer, cream together the butter and sugars until very light and fluffy - about 5 minutes.
In a separate bowl, combine the flours, baking soda, salt, and cinnamon, whisking together thoroughly until no clumps of baking soda remain.  Stir in the oats, raisins, and pecans.
Returning to the mixer, add the eggs to the butter and sugars one at a time, beating well after each addition.  Stir in the vanilla extract and the molasses.  Gradually add the flour and oat mixture on a low speed to the creamed butter mixture until well combined.
Chill the dough, covered, for a few hours or overnight - optional, but recommended.
To bake the cookies, preheat the oven to 350˚F.  Line a baking sheet with parchment paper, a silicone baking mat, or (in a pinch) foil sprayed lightly with cooking spray.  For giant cookies, (cause who doesn't like a giant cookie??) drop the dough in 1/4-cup sized* balls spaced evenly on the baking sheet.  Place in the preheated oven on a rack centered in the oven.  Midway through the baking time, rotate the baking sheet so the cookies bake evenly.  If necessary, flatten the domes of the cookies with a spatula.  Bake the cookies for 20-22 minutes, or until the tops are just starting to brown - don't overbake them!  You'll be sad.  Remove from the oven, cool completely on a wire rack, and enjoy!

Thursday, May 30, 2013

Chocolate Frosted Yellow Cake Ice Cream


Ugggghhhh, forgive the delay.

BUT.
Take that, Ben and Jerry!

Back story: Jon and I got an ice cream maker as a wedding gift.  Never have you ever seen a more thrilled couple.  Ice cream is the only dessert that Jon can't resist, and I'd been wanting to make my own fun flavors for years!  But alas, the contract was offered, life got crazy, and I left home for seven months before that beautiful piece of Cuisinart machinery could be used.

Naturally my first mission upon coming home was to use it.
Once I remembered how to use a kitchen, that is.

And can I just say...this was the first thing I made post-Hawaii that didn't involve pumpkin or cinnamon?  Going an entire calendar year without fall made me crave fall flavors as soon as I hit the mainland.

Pumpkin oatmeal, pumpkin waffles, snickerdoodle cake, and a huge batch of turkey pumpkin chili later, I was finally satisfied.
But I wanted to make something complicated.
And the ice cream maker was calling to me.

The two of us got hit by a major (and majorly random) Boston Cream Pie craving, so my adventure started with the flavors of yellow cake and chocolate ganache.  I came across a recipe for cake batter ice cream, which was always my favorite flavor at Cold Stone, and started playing with add-ins from there, eventually deciding on the yellow cake base from Country Living's Boston Cream Pie and homemade hot fudge sauce from the best cookbook of all time: How to Cook Everything.

I made the custard, which took about twice as long as I expected.  I baked the cake, which turned out beautifully.  I made the fudge, which took too long cause I kept stirring when I wasn't supposed to (lesson learned).  And finally, all of the pieces were ready to become ice cream.  I assembled the machine, added the custard, and turned it on.

...And nothing happened.

Turns out you really ought to read directions for machines before you use them.  I hadn't let the bowl freeze completely.  Woops.
It worked much better the next morning.

And voila!  2 quarts of gourmet, completely from scratch ice cream!
...which I realized after my first bowl was a rip-off of Perry's Piece of Cake.
Guess my idea wasn't that unique, but making it was way more satisfying than just buying a carton.
Plus, I still have leftover cake!

We're never buying ice cream again.

Just...pardon the iPhone Instagram photo.  I try not to eat ice cream in the middle of the afternoon, and natural light isn't exactly abundant at...night.

Chocolate Frosted Yellow Cake Ice Cream
Yield: approx. 2 quarts

Components:
1 recipe cake batter ice cream
1 recipe Boston Creme Pie base, baked in one 8" layer
1 recipe hot fudge (recipe below)

Instructions:
Cook the cake batter custard until thick enough to coat the back of a spoon - this could take several minutes longer than you expect, so have patience! - and chill for at least two hours, up to overnight.
Bake the cake and allow it to cool completely before cutting half of it into 1/2" to 1" chunks.  Save the rest for sundaes or just plain snacking.
Cook and cool the hot fudge.
Freeze the custard base according to instructions in your ice cream maker.  Once the base is mostly solid, add the cake chunks while the machine continues to churn.  Turn off the machine and transfer the ice cream into a large freezer-safe container.  Drizzle thick ribbons of the cooled fudge on top and swirl in gently with a rubber spatula.  Transfer the ice cream into the freezer for at least another two hours, then scoop and enjoy!

Homemade Hot Fudge Sauce
From How to Cook Everything by Mark Bittman
Ingredients:
4 oz semisweet or bittersweet chocolate
4 tbsp unsalted butter 
1/4 cup sugar
1/4 cup water
Pinch salt
1/3 cup corn syrup
1 tsp vanilla extract

Instructions:
Combine the chocolate, butter, sugar, salt, and water in a small saucepan over low heat until smooth.  Add the corn syrup, bring to a boil, and allow to cook for 5-10 minutes - WITHOUT STIRRING (don't be like me!) - until the sauce is thick and shiny.  Remove from heat and stir in the vanilla.  Serve hot over ice cream or allow to cool to room temperature for use inside the ice cream!

Monday, July 30, 2012

Cocoa Glazed Banana Bundt Cake

Et voila, the first cake I baked in our new apartment!

This gorgeous thing was the product of a very domestic day alone - my wonderful husband was at work for two days straight in Pittsburgh, so my kitchen and I got reacquainted in a very intense way.  After the cake came out of the oven, those insane sprinkly pancakes found themselves on the stovetop, and broccoli fritters made it to the dinner table a few hours later.

First of all: SO. MANY. DISHES.
Second of all: SO. MUCH. DELICIOUS.

This cake is chock full of scrumptious, moist, banana flavor and the quick-and-easy glaze tastes like hot fudge.  The baking method for the cake is easily one of the most interesting I've ever encountered: the cake stays in the oven for nearly two hours at a low temperature, then immediately makes its way into the freezer for an additional hour.  The resulting cake is insanely moist and flavorful, and the outside doesn't get super dark like many banana cakes are wont to do in a hot oven.  Though it took time to bake, I was absolutely thrilled with the quick prep (especially with my new KitchenAid 6-quart pro!!) and the delectable result.  Thank goodness I found some people to help me consume it, or this delicious cake would have become 10 new delicious pounds around my waist!

I highly recommend this recipe.  If muffins or banana bread sound boring the next time you have overripe bananas, go for cake!

Banana Bundt Cake
Source: adapted slightly from My Baking Addiction

Ingredients:
1 1/2 cups mashed ripe bananas
2 cups white whole wheat flour

1 cup all-purpose flour
1-1/2 teaspoons baking soda
1/4 teaspoon salt
3/4 cup unsalted butter, at room temperature
2 cups granulated sugar
3 large eggs
2 teaspoons pure vanilla extract
1 1/2 cups buttermilk


Directions:
Place a rack at the center of the oven and preheat to 275˚F.  Thoroughly grease and flour a 12-cup nonstick bundt pan, or use a baking spray with flour to coat it.

In a small bowl, mash the bananas.
In a medium bowl, mix together the flours, baking soda, and salt.


In the bowl of a stand mixer fitted with the paddle attachment, or in a large bowl with a hand mixer, cream together the butter and the sugar until pale, light and fluffy, about 3 minutes.  Add the eggs one at a time, beating well until fully incorporated, then stir in the vanilla.  Alternately add the buttermilk and the flour mixtures to the bowl of the mixer, mixing until combined and smooth.  Stir in the mashed bananas.


Transfer the batter to the prepared bundt pan.  Bake in the preheated oven for about 1 hour 40 minutes, until a toothpick inserted into the middle comes out clean.  
Immediately transfer the pan to the freezer for about 1 hour.  Remove the pan from the freezer to a rack for at least 3 hours.


When ready to serve, invert the cake onto a serving plate or cake stand and prepare the glaze.


Simple Cocoa Glaze

Ingredients:
1/2 cup powdered sugar
3 tbsp unsweetened cocoa powder
1 tsp pure vanilla extract (I used Mexican vanilla)
2-3 tbsp half and half or whole milk


Directions:
Combine powdered sugar and cocoa powder in a bowl and whisk together thoroughly.  Switch to a spoon and add vanilla.  Gradually add the milk or half and half until a thick but pourable glaze is formed.  Spoon over the top of the cake and allow the glaze to drip down the sides.  Give it an hour or so to set slightly, then slice and serve.  Enjoy!

Saturday, January 28, 2012

Gluten-Free Kahlua Almond Brownies


So I'm not really into the whole gluten-free-living thing.  I love bread and cake.  As in LOVE.  And anyone who has Celiac will tell you that the GF alternatives to the real thing are just...not the same.

That being said.

This recipe is now my go-to for brownies.

I baked up a pan of these for a gluten intolerant friend's birthday.  The first sign of success: the batter was un-freakin-believable.  They made the kitchen smell like chocolate heaven as they baked and cooled (the cooling part took WAY too long for me.  I'm impatient).  After cutting the brownies, I gave scraps to my roommates and I shared another scrap with Jon.

The roommates declared them the best things I've ever baked.  Jon made deeply satisfied yummy noises.

I declared them too dangerous to keep in the house - never have I been more grateful that something I baked was a birthday treat!

So of course, I baked another pan to photograph and blog.  Really, everything I do is for you.

These brownies are fudge with flour.  For real.  They are fall-apart tender and gooey all at once.  The Kahlua and sea salt add little surprise top notes to the deep dark chocolate base, with the almonds (or any nut really - I want to try hazelnuts as the original recipe suggested) adding a mild crunch.  They're so rich that a small square, enjoyed slowly, doesn't make you feel deprived at all.

That doesn't, of course, stop you from wanting to eat the.whole.pan.  All at once.

I think these could easily be made with regular all-purpose flour instead of almond or brown rice without sacrificing the awesomeness of the recipe, so if you don't want to spend the money on the fancy flours, don't - give them a try and tell me how it goes!  I still have the remains of a bag of brown rice flour on my shelf, so I'll be content with this one gluten free treat for a while :)

Gluten Free Kahlua Almond Brownies
Source: lightly adapted from She's Becoming Doughmesstic

Ingredients:
10 tbsp salted butter, melted
1 cup granulated sugar
2 tbsp brown sugar
3/4 cup high quality unsweetened cocoa powder
1/4 tsp sea salt
1 tbsp Kahlua
1 tbsp vanilla (preferably Mexican - it pairs beautifully with chocolate)
2 large eggs
1/2 cup almond or brown rice flour
1/2 cup chocolate chips (I used semisweet)
1/3 cup slivered almonds (or nut of choice - give hazelnuts a shot!)


Directions:
Preheat the oven to 325˚F (I had more success at 350˚).  Line an 8x8" pan with foil or parchment, leaving an overhang on two sides, and spray the lining well with nonstick spray.


Melt the butter in the microwave or in a saucepan on the stove. As the butter melts, mix the sugars, cocoa powder, sea salt, Kahlua, and vanilla together in the bowl of a mixer.  Add the hot melted butter immediately and mix well to combine.  Allow the mixture to cool for approximately 5 minutes - you don't want the eggs to cook when you add them!


After 5 minutes, add the eggs one at a time, beating well to combine after each addition.  Add the flour and beat the mixture vigorously for 2 minutes - the batter should be thick and fluffy.  Stir in the chocolate chips and almonds.


Pour the batter into the prepared pan and bake for 30-32 minutes - they'll still be a bit gooey, but they'll firm up as they cool.  Leave them in the pan on a rack to cool for about 30-60 minutes, then place in the refrigerator for another 30-60 minutes - this will facilitate cutting.  Lift the brownies out of the pan using the foil or parchment overhang, cut into squares, and enjoy!

Tuesday, October 4, 2011

The Chocolate Chip Cookie Experiment: Part 1

I am a cake girl all the way.  If it's soft, sweet, and frosted, chances are I'll devour it like there's no tomorrow.

However.

Most people who read blogs or, well, live in New York City know about Levain Bakery and their fresh, gooey, quarter-pound cookies.  I had heard so much tell of them that when I had a day off from the Parsons Dance Company summer intensive I had to venture up to 74th and Amsterdam and give those suckers a try for myself.

Two words: life changing.

Chocolate chip cookies are now on my craving radar.
But really only those chocolate chip cookies - huge, thick, craggy, crisp on the outside and gooey on the inside, with hunks of chocolate and walnut tucked into every buttery bite.

So, I've now begun a quest to make such cookies for myself and anyone who will help me devour them.

This, my first try, was not all too far off from the cookies I love so much.  Not quite there yet, but pretty darn close!!
These gargantuan cookies didn't bake up as thick and gooey as my beloved Levain goodies, but they're buttery, rich, and chock full of big bites of chocolate and nut - I was low on walnuts so I supplemented with pecans: no complaints here!  These spread quite a bit for me, so I'll have to see if I can manipulate the recipe to keep them together - suggestions are welcome - or if the crappy rack placements in my oven are to blame...I can't wait to have a nice stove... Regardless, these beauties stayed soft and chewy, and are officially friend, roommate, and fiancĂ© approved!

I'm glad to have found a go-to cookie recipe for now - any suggestions regarding what I could do to make them even better are welcome!

"Call Me Le Vain" Copycat Cookies
Source: verrrry slightly adapted from Cheeky Kitchen
Yield: a baker's dozen of big-as-your-face cookies

Ingredients:
1 cup (2 sticks) unsalted butter, at room temperature
1-1/2 cups packed brown sugar
2 eggs
2-1/2 cups unbleached all-purpose flour
1 tbsp baking powder
1 tsp baking soda
pinch of salt
1-1/2 tsp vanilla extract
1 tbsp cornstarch
2 cups nearly crushed walnuts (or 1 cup walnuts and 1 cup pecans)
3 cups good quality semisweet chocolate chips

Directions:
Preheat the oven to 390˚F (over 375, not quite 400) and line baking sheets with parchment paper.  Set aside.
Using an electric mixer, cream together the butter and brown sugar until soft and fluffy.  Add the eggs one at a time, mixing well after each addition.  Add in the vanilla and mix until incorporated.  Sprinkle the dry ingredients on top and mix until fully incorporated and a thick, creamy dough is created.  Stir in the nuts and chocolate chips.  Turn the dough out onto a clean counter and knead with your hands to fully incorporate all of the delicious chunks.
Pull off lemon-sized hunks of dough and place on the lined baking sheets with plenty of space between them - keep the pieces of dough loose so they bake up charmingly craggy.
Bake for 10-12 minutes, or until the tips of the cookies have turned light brown.  Allow to cool for about 2 minutes on the baking sheet before removing them to a rack.  Consuming these treats while they're still warm is highly recommended - enjoy!

Tuesday, September 20, 2011

Congo Bars


Another instance where baking for friends paid off.

Remember those three shows I'm involved in this semester?  Well, one of them is a choreography showcase, which we had auditions for this week.  All of the choreographers had to stay after auditions to cast our pieces and create a rehearsal schedule.

Translation: we were going to be there for a while and we needed food.

Our director provided a delicious and healthy dinner, but I received a request (read: demand) for dessert.  I didn't have time to make cupcakes, which I'm now famous for in our dance department - seriously, who said dancers don't eat?? - but when I saw these Congo Bars in an email update from Michelle of Brown Eyed Baker I knew I had a solution.

The bars were incredibly easy to assemble - melted butter is combined with brown sugar, then eggs and vanilla are added, followed by the addition of the dry ingredients and the chunky bits - and came together in a cinch the night before auditions.  My roommates and I did a taste test (for quality control purposes, of course!) and when I served them the following night, there were yummy groans throughout the room.

These may be the most addictive treats...ever.  They're rich, moist, and chock full of chewy toasted coconut, crunchy pecans, and melty semisweet and white chocolate chips, with a shiny crackly top like the fudgiest of brownies.  Every bite reveals a new flavor combination...which means you want to keep taking bites.  Forever.
One of my roommates asked me to hide the leftovers to ensure that Jon got to taste one.  All of us became instantly hooked.

Congo Bars have now officially been dubbed Crack Blondies in our apartment.

And I highly encourage that you get your butt to your kitchen and mix up a batch of said Crack Blondies.  You will be happy you did...just be prepared to want half the pan.
See the one I'm holding?
It was totally warmed up and smothered in cookie dough ice cream and chocolate syrup a couple hours later. 
You know you want to...
Congo Bars (a.k.a. Crack Blondies)
Source: Brown Eyed Baker, originally adapted from Baking Illustrated
Yield: however many bars you want to cut from a 9x13" pan

Ingredients:
1½ cups all-purpose flour
1 teaspoon baking powder
½ teaspoon salt
¾ cup unsalted butter, melted and cooled
1½ cups light brown sugar
2 eggs
1½ teaspoons vanilla extract
1½ cups shredded coconut, toasted (I used sweetened, but the original recipe calls for unsweetened)
1 cup pecans, coarsely chopped
½ cup semisweet chocolate chips
½ cup white chocolate chips 

Directions:
Set an oven rack in the center of the oven and preheat to 350˚F.  Coat a 9x13 pan with cooking spray and line with parchment paper, leaving overhang on each side as "handles" for later.  Set aside. 
Combine the flour, baking powder, and salt in a medium bowl.  Set aside. 
Mix together the melted butter and brown sugar in a large bowl until well combined.  Add the eggs and vanilla and stir until totally incorporated.  Sprinkle the dry ingredients on top of the butter mixture and stir to combine, being careful not to overmix - a couple of lumps will be fine.  Fold in the coconut, pecans, semisweet and white chocolate chips with a rubber spatula.  At this stage, try to resist eating what you see and smell inside your mixing bowl.

Pour the batter into the prepared pan and spread with the spatula until even.  Bake for 22-25 minutes, or until the top of the bars are shiny and cracked and feels firm to the touch.  Allow to cool completely in the pan on a cooling rack.  Lift from the pan using your parchment paper handles and cut into desired size bars.  Serve and enjoy!
Then try not to eat a second one.
Go ahead.  I dare you.

Friday, August 12, 2011

"Derby" Chocolate Bourbon Pecan Pie


While I wish I was posting a Peanut Butter Pie for Jennie today in honor of her husband, this will have to do.  Please join me in sending prayers for her and her family her way, and take a look around the blogosphere to see everyone who's honoring Mikey's memory today.
This, ladies and gents, is my first pie.  My very first pie that I made all by myself.
You can picture my proud-and-accomplished face here.

This pie was my contribution to a "Throwdown" between me and my friend Jim - who hopefully will be guest-posting his chicken thigh recipe soon!  This basically just meant that he cooked dinner, I made dessert, and our friends and family consumed and greatly enjoyed them!  This Throwdown was also followed by the most epic game of Apples to Apples I've ever played.  I think everyone won :)


One of our favorite desserts at a restaurant near our place in WV is called a Kentucky Derby - it's a cross between a chocolate chip cookie and a pecan pie, served warm with whipped cream and hot fudge.  It's insanely delicious.
When I found a version of the Derby on She's Becoming Doughmesstic (one of my favorite blogs, and another VA girl!), naturally, it was the first pie I wanted to try to make.  I mean, warm chocolate pecan cookie pie?  What's not to love?

Of course, we had to kick up the decadence too - we topped the gooey pie with vanilla bean ice cream, homemade hot fudge (recipe coming soon!), caramel syrup, and freshly whipped cream.  It was positively dreamy.  I can see this recipe being made and enjoyed over and over again in the future.

Those slices disappeared SO quickly.
And now I want more pie.
"Derby" Chocolate Bourbon Pecan Pie
Source: crust from How to Cook Everything, filling adapted from She's Becoming Doughmesstic

For the deep-dish pie crust:
1-1/2 cups all-purpose flour
3/4 tsp salt
1-1/2 tsp sugar
10 tbsp cold unsalted butter, cut into small pieces
1/4 cup ice water, plus more if necessary

Directions:
In a large bowl, mix together the flour, salt, and sugar until combined.  With a pastry blender, cut in the butter in two stages - 6 tbsp until some pieces the size of peas remain, then the remaining 4 tbsp - until the mixture looks like cornmeal.  Add the ice water and mix with your hands until you can form the dough into a ball, adding another tablespoon or two of water if necessary.  If you overdo it and the dough becomes sodden, just add a bit more flour.  Form the dough into a disk, wrap in plastic wrap, and freeze for 10 minutes or refrigerate for at least 30 before rolling it out.
To roll out, place the dough on a floured surface and sprinkle the top of the dough with flour.  Use a rolling pin to roll with light pressure out from the center into a circle, using ragged edges to repair any tears.  Once the diameter of the dough is about 2 inches greater than that of your pie plate, fold the dough in half, gently transfer halfway onto the pie plate, and unfold to settle into the plate.  Trim the edges of the dough to 1 inch over the edge, fold it underneath itself around the edge of the plate, and flute the crust with your preferred method.  Freeze for 10 minutes or refrigerate for 30 before filling.

For the filling:
1 cup plus 2 tbsp sugar
1/2 cup all-purpose flour
2 eggs, beaten
1/2 cup (1 stick) butter, melted
1 cup pecans, chopped (I used 1/2 cup coarsely chopped and 1/2 cup finely chopped)
1/3 cup bittersweet chocolate chips
1/2 cup semisweet chocolate chips
1/3 cup milk chocolate chips
1 tbsp vanilla (I use Nielsen Massey Madagascar Bourbon Vanilla)
2 tbsp Kentucky bourbon

Center a rack in the oven and preheat the oven to 350˚F
Combine sugar and flour in a large bowl, then add the beaten eggs - the mixture will be thick and pale yellow.  Pour over melted butter and stir to combine.  Add the remaining ingredients and stir to incorporate fully.  Pour into the refrigerated or frozen pie shell and bake for 40-45 minutes, until a nice crust forms on top and it appears set.  A table knife should come out clean when inserted into the filling.  Allow to set up until cool enough to slice and serve with any desired toppings - vanilla bean ice cream, whipped cream, and hot fudge encouraged!  Enjoy!

Tuesday, August 9, 2011

Sweet Cream Biscuits and Chocolate Gravy


Most decadent breakfast ever.
As in allowing it to be a breakfast should be illegal.
Deliciously illegal...
 I wasn't born south enough of the Mason-Dixon line to have grown up with this tradition.
Now that I've discovered it, it makes me kind of sad.  Although I'm probably thinner for it.  Hm.
But I kept reading about it and decided I just had to experience it for myself.

Best and worst decision ever.
Best: it's incredible.  Rich, fluffy layers of sweet biscuit - traditionally a southern buttermilk biscuit, which I made and loved, but I then tried Dorie Greenspan's easy-to-make Sweet Cream Biscuits and got my socks knocked off - which just get better when slathered with salted butter and drenched in a chocolate concoction that nearly reaches the decadence of hot fudge.

Worst: I couldn't stop eating them!!!
Which kept me full till dinner, but still - not the sort of thing one in my profession should fill up on regularly.

Which, of course, explains why we made another batch of biscuits and paired them with the leftover gravy the next weekend.
I succumbed to the deliciousness.  Someone please stop me from making more till February?
 This may or may not have been my third one.  In one sitting.
Help.
 Sweet Cream Biscuits
Source: Baking: From My Home to Yours by Dorie Greenspan
Yield: about 8 2-1/2-inch biscuits

Ingredients:
2 cups all-purpose flour
1 tbsp baking powder
2 tsp granulated sugar
1/2 tsp salt
1 to 1-1/4 cups cold heavy cream

Directions:
Center a rack in the oven and preheat the oven to 425˚F.
Whisk together the flour, baking powder, sugar, and salt in a bowl with a fork.  Pour about 1 cup of the cream over the dry ingredients and begin to toss them together with the fork.  If necessary, add more cream a spoonful at a time until you have a nice soft dough.  Reach into the bowl with your hands and knead the dough gently just enough to bring everything together.
Turn the dough out onto a lightly floured work surface - I always use a pastry cloth.  Dust the top of the dough lightly with flour and then pat it out to about 1/2-inch thickness.  (Don't turn into me and be a total perfectionist - totally even dough is not that serious ;)  Using a floured biscuit cutter (or clean old can or the relatively sharp edge of a glass) cut out as many biscuits as you can and gently transfer them to an unlined non-stick baking sheet or a baking sheet lined with parchment paper or a silicone mat.  Try to cut them very close together to maximize output from the first go-round.  Gather together the scraps, working them as little as possible to get them to 1/2-inch thickness, and cut out as many additional biscuits as you can. 
Once all possible biscuits have been cut out and transferred to the baking sheet, bake them for 14-18 minutes, or until they're tall, puffed, and golden brown.  Transfer them to a serving biscuit and enjoy as soon as possible!
 

Chocolate Gravy
Source:  Sprinkle Bakes
Yield: about 2 cups

Ingredients:
4 tbsp unsweetened cocoa powder
2 tbsp flour
1 cup granulated sugar
1-1/2 cups whole milk
4 tbsp butter, cut into small pieces
1 tsp pure vanilla extract

Directions:
Whisk the dry ingredients together in a medium saucepan.  Pour in the milk and whisk vigorously to combine.  (There's your justification for eating this - whisking workout!  Just repeat it like a mantra until you believe it.  Or get on the treadmill or something.)  Heat the mixture over medium-high heat until it begins to bubble.  Turn the heat down to medium and stir constantly until the mixture thickens to gravy-like consistency - don't obsess too much about this part since it will thicken up a bit more as it cools slightly.  Remove the pan from the heat and add the butter and vanilla.
Allow the gravy to cool slightly, then transfer to a gravy boat.  Serve warm with biscuits and/or any other breakfast foods you want to dip in it :)  Enjoy!

Monday, August 1, 2011

Hot Fudge Pudding Cake

UPDATE: Come join the fun at the My Baking Addiction and GoodLife Eats Holiday Recipe Swap sponsored by Scharffen Berger!  I entered this recipe in the chocolate recipe swap - there's potentially winnings!  And this would be a great dish to pull out of the oven at a family gathering :)

Get-togethers with friends are really the best occasions to bake.
I gather with people I love, laugh, and enjoy our time together.  I see the looks on their faces as they sample my latest creation.  The dessert is shared and loved by all.  And I walk away with very few leftovers to tempt me in the days to come!
It's a total win-win situation.

Friday night, I gathered with the same group of folks who helped me consume those chocolate peanut butter cupcakes I made a few weeks back.  The friend hosting the gathering offered the use of his kitchen, ingredients, and convection oven - who was I to say no?  So I looked for a recipe that would be delicious, boy food, and relatively quick and easy to throw together.  And I came up with this!

I had bookmarked this recipe from Tracy over at Sugarcrafter probably close to a year ago and for some reason never made it.  But when I found it among my bookmarks I knew it would be perfect.  Rich, chocolatey, meant to be gooey, and only required to cool for 15 minutes before serving?
SOLD.

And I wasn't the only one sold on it.
It started like this:

 Progressed to this:

And then to this:

So it's safe to say the dessert was well received.

This has officially entered my repetoire of easy last-minute desserts.  It's a fabulous, simple, crowd-pleasing pantry recipe.
Unless you don't like chocolate.  In which case, I pity you.  And...sorry.  Just eat the ice cream?

Hot Fudge Pudding Cake
Source: adapted from Sugarcrafter , originally adapted from Hershey's 

Ingredients:
1 cup all-purpose flour
1-1/4 cups granulated sugar
1/2 cup Hershey's Special Dark cocoa, divided
2 tsp baking powder
1/8 tsp salt
1/8 tsp cinnamon
1/2 cup milk
1/3 cup butter, melted
1 tsp pure vanilla extract
1/2 cup (packed) light brown sugar
1-1/4 cups hot water

Directions:
Preheat the oven to 350˚F (convect at 325˚F).
Whisk together the flour, baking powder, salt, cinnamon, half the sugar, and half the cocoa powder.  Stir in the milk, butter, and vanilla, whisking until totally smooth.  Pour into an ungreased 9-inch square baking pan.  Mix the remaining sugar and cocoa powder together with the brown sugar and sprinkle the mixture evenly over the top of the mixture in the pan.  Pour the hot water over all.  Do not stir.  (That last bit was stated emphatically.  Stirring = bad.)
Bake for 35-40 minutes (or convect for 25-30 minutes) or until almost set.  Remove from the oven, place on a cooling rack, and allow to cool for 15 minutes before serving directly from the pan - with a spoon - and topping with whipped cream or vanilla ice cream.  Enjoy!

Tuesday, July 12, 2011

Chocolate Peanut Butter Cupcakes

See this cupcake carrier?
Best Christmas present ever.  This thing holds 24 cupcakes and transports them safely from my kitchen to someone else's.  On Friday night, this carried 22 dark chocolate cupcakes with peanut butter frosting to a guy friend's house for a mostly-guys get-together.
And it carried six home.
Conclusion: chocolate peanut butter cupcakes = boy food.
Secondary conclusion: chocolate peanut butter cupcakes = insanely delicious.

Now for the surprise: the cupcakes are vegan.  No butter, no eggs - the leavening comes from a baking soda and vinegar reaction!  The frosting...not so much.
But vegan boy food.  Except the frosting, but still.
I also snuck whole wheat into them.  I'm a mischievous one :)

You should really make these.  Especially if you have boys to feed.

Chocolate Peanut Butter Cupcakes
Adapted from Joy the Baker, cupcakes originally from Organic and Chic

Ingredients:
For the cupcakes - 
1 1/4 cups all-purpose flour
1 cup white whole wheat flour
2 cups granulated sugar
1 cup unsweetened dark cocoa (recommended: Hershey's Special Dark)
2 tsp baking soda
1/2 tsp salt
1 tbsp vanilla extract
2/3 cup canola oil or extra-light olive oil
2 tsp white vinegar
2 cups cold water

For the frosting -
1 cup (2 sticks) unsalted butter, at room temperature
1 cup creamy peanut butter
3-4 cups confectioners' sugar
1 tbsp milk or vanilla soy milk

Directions:
To make the cupcakes, preheat the oven to 350˚F and line two cupcake pans with paper liners.  In a large bowl, sift together the dry ingredients.  Set aside.  In a medium bowl, whisk together the vanilla, oil, vinegar, and water.  Slowly whisk the wet ingredients into the dry, being careful not to overmix.  The resulting batter will be quite wet.  That's good :)
Fill the cupcake liners 2/3 full.  Bake for 20-24 minutes or until a toothpick inserted into the center of a cupcake comes out clean.  (Mine were done in 21 minutes) Allow to cool in the pans for 10 minutes before removing and allowing to cool to room temperature on racks.
To make the frosting, cream the butter and peanut butter together in the bowl of a stand mixer fitted with the paddle attachment until smooth and creamy (I'm sure a hand mixer would work fine too).  Scrape down the bowl, then gradually add 3 cups of confectioners' sugar and beat on low for 1 minute.  Add the milk or soy milk and beat on medium-high speed for 1 minute.  If you want your frosting even thicker, add an additional cup of powdered sugar.
Frost the cooled cupcakes generously with the peanut butter frosting.  Decorate with chopped Reese's cups, if desired (though they don't need it!).  Enjoy!