Friday, November 25, 2011

Sweet Potato Harvest Salad


I'm sitting on the couch at our house in the West Virginia mountains, watching Sing Off videos on YouTube with my dad, and nursing a food baby of epic proportions inside my fleecy penguin footie pajamas.  Based on this description of myself, it occurs to me that now might be a good time to post a salad...

It's holiday detox time, folks.  Starting tomorrow morning, it's back to exercise and healthy eating. 

With pie still involved, though.  Can't say no to pie...

If you find yourself in a sugar coma but still hungering after fall flavors, give this salad a try.  Roasted sweet potatoes, Gala apple chunks, dried dates, and pecans combine to lend a sense of comfort to the low-calorie dish.  Add some grilled chicken - or better yet, leftover turkey! - and you've got a balanced and complete meal!

Sweet Potato Harvest Salad
Source: a Dancer Bakes original
Serves one
 
Ingredients:
1 1/2 cups Romaine lettuce, washed and torn
1 cup baby spinach leaves
1/3 recipe roasted sweet potatoes (below)
1/2 small or medium Gala apple, coarsely chopped
1/4 cup dried dates
1/4 cup pecans, coarsely chopped
1 tbsp extra virgin olive oil
Black pepper, to taste
1/2 cup shredded chicken or turkey (optional)

Directions:
Toss first six ingredients together.  Drizzle with olive oil and sprinkle with black pepper to taste.  Top with the chicken or turkey, if desired.  Serving with a leftover roll from Thanksgiving dinner is highly encouraged :)  Enjoy!

Roasted Sweet Potatoes
 
Ingredients:
1 medium sweet potato, peeled and cut into 1/2-inch cubes
1 tbsp olive oil
Ground cinnamon
Ground ginger
Salt
Black pepper

Directions:
Preheat the oven to 400˚F with a rack on the middle position.
Place cubed sweet potatoes into a bowl.  Drizzle with olive oil and sprinkle with desired amounts of salt, pepper, cinnamon, and ginger; toss together to combine.  Spread into an even layer on a nonstick baking sheet lined with foil and sprayed lightly with cooking spray.  Roast in the oven for 20-30 minutes, until the potatoes are tender and your kitchen smells divine.  Enjoy hot or allow to cool before using them in the Harvest Salad.

Monday, November 21, 2011

Pumpkin Cake Squares

I'm back!

And it feels amazing.  I've missed this so much.

The second of this semester's three shows ran this past weekend, and what an experience that was.  After what seemed like the world's longest rehearsal process, we finally opened a world-premiere musical revue of David Shire's music to a packed house and enthusiastic praise.  Furthermore, David Shire and his wife Didi Conn, also known as Frenchie in the film version of Grease, came all the way from New York City to see the premiere!  Performing for and meeting them was unforgettable, especially seeing how touched David was to see what our directors did with his music.  The looks on their faces made the insanity of the last two and a half months worth it :)

And Didi is officially the cutest person alive.  Seriously.

If you feel so inclined, you can read more about the whole experience in Playbill.  And look at my picture.  Sorry, I'll stop now.

The hardest day of tech week is always Sunday: the "10-out-of-12".  As actors, we spend 10 hours of a 12-hour block working onstage.  I'd worked them as a technician before, and they're always rough.  So, since we had the previous day off from rehearsal (or at least from the musical - I was rehearsing for another show that morning), I decided to bake something for the cast to make the long day a little easier.

Let's just say they were grateful.

The cake squares are personal servings of fall flavor.  The cool, creamy, vanilla mascarpone frosting adds the perfect sweet contrast to the moist and spicy pumpkin cake.  If you don't keep mascarpone on hand like I do (yes, I'm crazy) then go ahead and substitute cream cheese, but I think the mascarpone is beyond worth it.  It's a fantastic fall snack, or it could be a great last-minute addition to your Thanksgiving dessert table - it only takes 15 minutes to get it into the oven!  I guarantee any friend or relative would be grateful to help you eat it.

Pumpkin Cake Squares with Mascarpone Frosting
Source: adapted from Brown Eyed Baker, originally from How To: Simplify
Yield: 1 9x13" pan

For the pumpkin cake squares:
Ingredients:
1 cup all-purpose flour
1 cup whole wheat flour
2 teaspoons ground cinnamon
1/2 teaspoon ground ginger
1/8 teaspoon ground cloves
2 teaspoons baking powder
1 teaspoon baking soda
1 teaspoon salt
1 15oz can pumpkin puree (not pumpkin pie filling)
1-2/3 cups granulated sugar
1 cup vegetable oil (I used canola)
2 eggs
1/2 cup egg whites (about 4 large, but I used the stuff from a carton!)

Directions:
Preheat the oven to 350˚F with a rack on the middle position.  Grease a 9x13" pan and set aside.
In a medium mixing bowl, whisk together the flours, baking powder, baking soda, salt, and spices.  Set aside.
In a large bowl, combine the pumpkin, sugar, oil, eggs, and egg whites until smooth and uniform.  Pour the dry ingredients on top of the pumpkin mixture and gently stir or whisk to combine until smooth.
Transfer the batter to the greased pan and smooth the top, making sure the batter is distributed evenly.  Bake in the preheated oven for 30-40 minutes, or until a thin knife inserted into the center of the cake comes out clean.  Transfer to a rack to cool completely before frosting.

For the Vanilla Mascarpone frosting:
Ingredients:
8 oz mascarpone cheese, softened
1/2 cup (1 stick) unsalted butter, softened
3 cups powdered sugar
1 teaspoon vanilla extract (I recommend Nielsen Massey Tahitian Pure Vanilla)
approximately 1 tbsp half-and-half (I used fat free)

Directions:
In the bowl of a stand mixer fitted with the paddle attachment, or in a large bowl with a hand mixer, cream together the butter and mascarpone on medium speed until smooth and fluffy.  Decrease the mixer speed to low and add the powdered sugar one cup at a time until fully incorporated and smooth.  Add the vanilla extract and the half-and-half.  Increase the speed of the mixer to medium and whip until desired consistency is reached, adding more half-and-half one teaspoon at a time if necessary.  Spread evenly onto the cooled cake.  Slice into squares and enjoy!

Wednesday, November 9, 2011

A Brief Hiatus.

Hey everyone,

As you may have noticed, I've been maintaining radio silence on the blog.  Why, you ask?

Well, you see, my schedule finally got the best of me.  I've had nonstop musical rehearsals for weeks now, and the show opens a week from today, which means the rehearsal hours are only getting longer.  As a result, I haven't cooked meals for myself in close to three weeks, and I've eaten the things that I have made too quickly to take pictures of them.  Gotta love being pressed for time.

This hiatus makes me sad.  Incredibly sad, because there are few things in this world that make me happier than making food and sharing it with others, including you!  Over Thanksgiving, I hope to have the chance to share some of our family feast with you, or at least write up the posts for the few recipes I've already photographed.  In the meantime, take a look around the blog, discover a recipe you haven't tried yet, and make it. 

Would you do that for me?
:)

Thursday, October 27, 2011

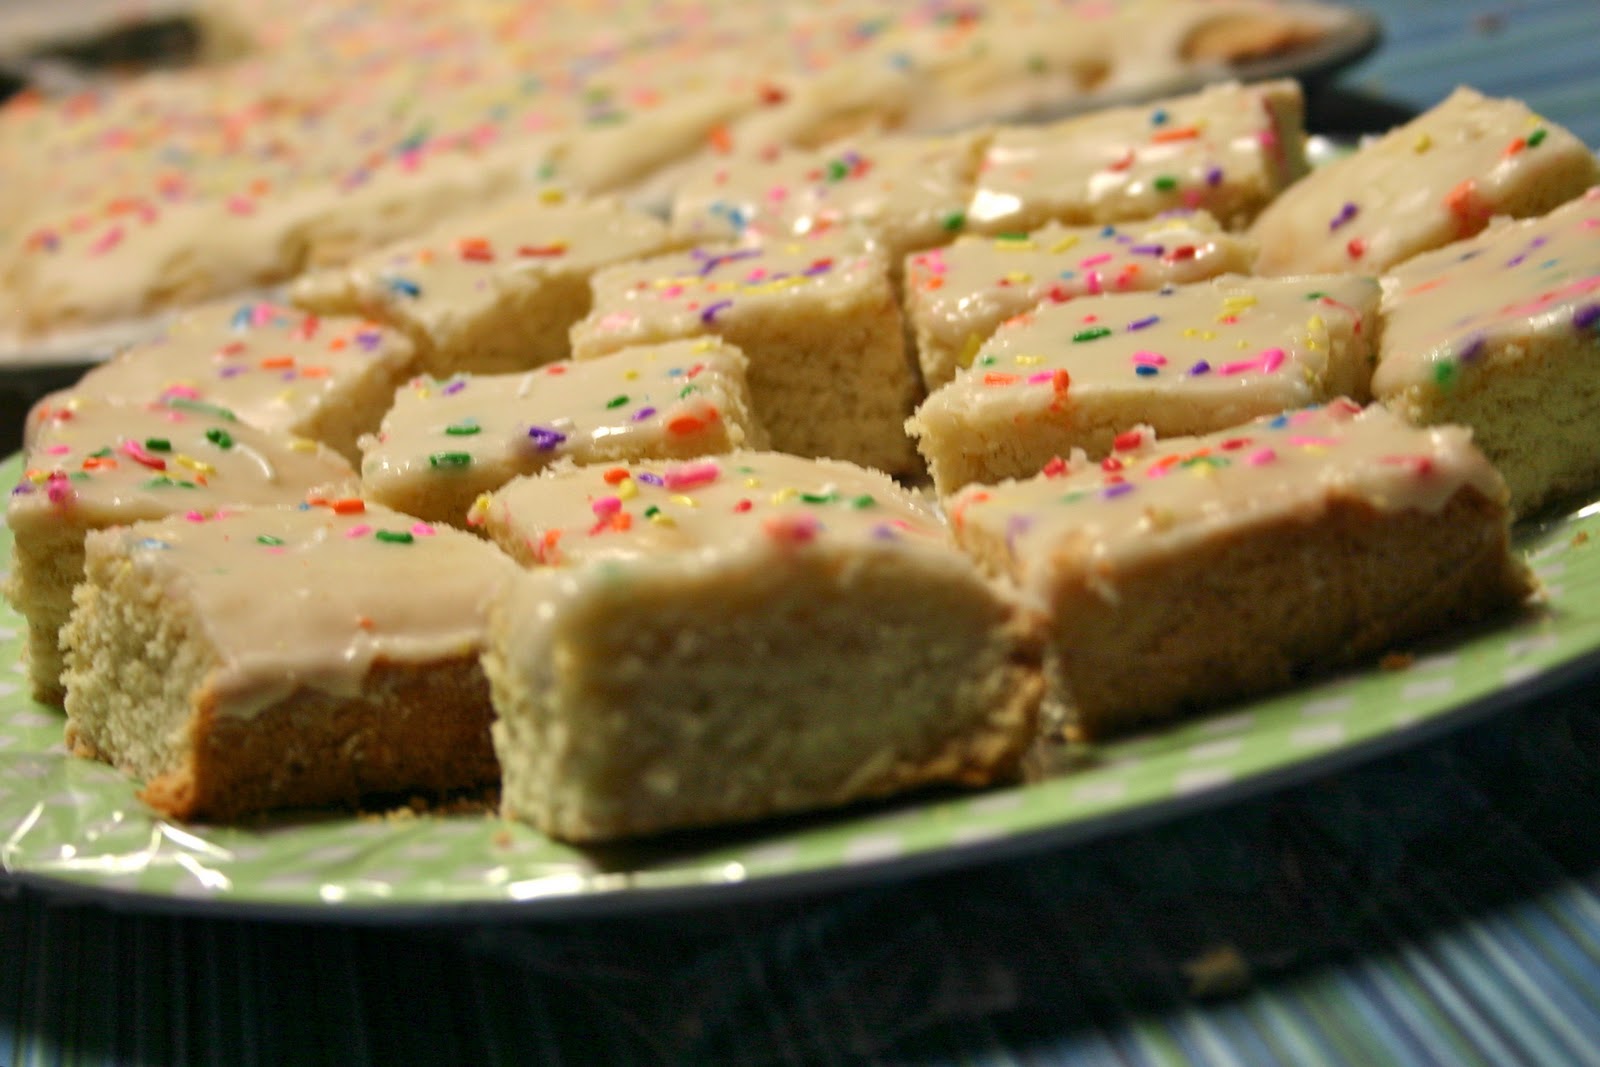
Vanilla Glazed Sugar Cookie Bars

Sometimes, life just needs sprinkles.

This was one of those times.  I had exactly one cup of butter left in my entire apartment, I had leftover glaze in my fridge from the Bundt cake I made a couple weeks earlier, and I just wanted to make something simple and sprinkle-y to share with the dancers before we went into tech for the concert.  I found this recipe and declared it a winner.


The original recipe calls for a frosting, which I ordinarily would've made without batting an eyelash...duh.  Of course, ordinarily I would've made cupcakes instead of cookies...I guess it wasn't an ordinary day.  Anyway, considering the complete lack of butter and the presence of tasty glaze, I gave up on the frosting.  And the glaze was perfect!  It added just enough sweetness to the bars to make them thoroughly addictive without being cloying.

Plus, glaze = perfect sprinkle adhesive.  Truth.

These sugar cookie bars came together so quickly, made my kitchen smell incredible...and I may or may not have had three of them while I was making a plate for the dancers.
Hey - I cut them small!  Three is...a totally justifiable number...

I'll just...give you the recipe now...

Vanilla Glazed Sugar Cookie Bars
Source: lightly adapted from Annie's Eats ; original recipe from The Repressed Pastry Chef

Ingredients:
1 cup (2 sticks) unsalted butter, at room temperature
2 cups sugar
4 large eggs
2 tsp vanilla extract
1 vanilla bean, split lengthwise
5 cups all-purpose flour
1 tsp salt
1/2 tsp baking soda
1 recipe vanilla glaze, found here
Multicolored sprinkles (optional but highly encouraged) 

Directions:
Preheat the oven to 350˚F with a rack placed at the center position.  Grease a 13x18" rimmed baking sheet and set aside. [Side note: I used the medium baking sheet from my set of three - I eyeballed it and it looked right.]
Whisk together the flour, salt, and baking soda in a medium bowl.  Set aside.
In a large bowl with a mixer, cream together the butter and sugar on medium speed till pale and fluffy, about 2 minutes.  Add the eggs one at a time, beating well after each addition and scraping down the sides of the bowl as needed.  Scrape the seeds from the vanilla bean and add the seeds and extract to the butter mixture, beating until well incorporated.  Switch to low speed and add the dry ingredients, mixing just until incorporated.
Transfer the cookie dough to the prepared baking sheet and press it into an even layer.  Bake in the preheated oven for 10-15 minutes, until light golden brown in color and a toothpick inserted into the center comes out clean.  Allow to cool to room temperature in the pan on a rack.
Once the bars are at room temperature, poke holes all over the surface with the tines of a fork or a toothpick.  Pour the vanilla glaze over the bars and spread as evenly as possible.  If using sprinkles (which you should!) add them to the top of the bars now so they set with the glaze.   Allow the glaze to set and harden before slicing into 1.5-2" square bars and serving.  Enjoy!

Tuesday, October 25, 2011

Vanilla Bean Bundt Cake

One show down, two to go!
My first show of the semester - the university company's dance concert - ran this weekend, and it was truly a fantastic run.  I'm so grateful to be in a company with the talented dancers I share the stage with.  And getting to do a CRAZY duet with my best friend was even better!  I am pretty glad the show's over, though - now that I'm in heavy rehearsals for the musical and I've started the choreographic process for the student showcase, it's nice to have one less thing on my mind!

As a general rule, during show season, I try to cut back on desserts.  Teeny tiny costumes don't mix well with food babies or love handles, so generally dessert is the first thing to go.

That effort was completely unsuccessful.
Completely.

This particular cake was one of many downfalls.  I took this to a potluck, hoping that I wouldn't come home with much leftover...and then had to bring a third of the cake back and set it alongside the rest of the batches of giant chocolate chip cookies and pumpkin scones.

I think I gained 3 pounds that weekend.  And I would not have gained said three pounds had every single recipe not been delicious.

This is the kind of cake that lends itself to very easy snacking.  It's a sturdy cake that you can hold in your hand while taking bite after delicious bite until it's all gone...and you feel the urge to grab another piece.  It's chock full of moisture, thanks to the yogurt, and every bite bursts with sweet vanilla.  And the glaze?  Oh, the glaze...it was the perfect saccharine compliment to the mildly sweet cake, adding little sparks of sugary goodness here and there.  I could not get enough of that glaze.

Neither could Jon, cause he kept taking huge bites with all the glaze on them when we split a piece.  Which led to splitting another piece.

Approach this cake with caution, folks.  It's almost too delicious.

Vanilla Bean Bundt Cake with Vanilla Glaze
Source: adapted from Epicurious and The Pioneer Woman via Sweetapolita

Ingredients:
For the cake:
3 cups all-purpose flour (preferably unbleached)
1 tsp baking powder
1/2 tsp baking soda
1/2 tsp salt
2-1/4 sticks unsalted butter, at room temperature
1-3/4 cups granulated sugar
1 vanilla bean, split lengthwise
1 tbsp high-quality vanilla extract
4 large eggs
1/2 cup low-fat vanilla yogurt
1/2 cup milk

For the glaze:
1/2 cup milk (use what you have on hand, but whole would be better)
1 tbsp pure vanilla extract
Approximately 1 cup powdered sugar, more as needed

Directions:
Place a rack in the middle of the oven and preheat to 350˚F.  Grease and flour a 10-15 cup Bundt pan and set aside.
Whisk together the flour, baking powder and soda, and salt.  Beat the butter and sugar together in a large bowl with a mixer at medium speed until pale, creamy, and fluffy.  And beautiful.  Scrape the seeds from the vanilla bean and add them, along with the vanilla extract, to the butter mixture, beating until well incorporated.  Add the eggs one at a time, beating well after each addition. 
Mix the yogurt and milk together, then add alternately with the flour to the butter mixture, beginning and ending with the flour.  Only mix until just combined. 
Pour the batter into the prepared pan and smooth the top.  Gently tap it on the counter to get rid of air bubbles.  Bake in the preheated oven for about 1 hour, until a toothpick or thin knife inserted into the center comes out clean.  Cool in the pan on a rack for an hour, then invert the cake onto the cooling rack and cool to room temperature.
To make the glaze, mix together the milk and the vanilla extract.  Measure out the powdered sugar and gradually add the vanilla milk until the desired consistency is reached - it should feel too thick at first, but still be pourable.  Pour over the top of the cooled cake and allow to set.  Don't be stingy - use as much glaze as you want!  It'll make you happy.  Enjoy!

Monday, October 17, 2011

Pasta with Pumpkin Cream Sauce


And now, Part 2 of my pumpkin obsession: Pumpkin Pasta!

This may sound as weird to you as it did to me.  Because the idea of it majorly intrigued me in the "will it or won't it be good?" sense.

I can tell you now: it will be good.
At least, it was for me and the hubby-to-be.

Pumpkin is a vegetable.  And I think we forget that when we dig into a pumpkin donut or devour another slice of pumpkin pie (which I will leave up to you lovely folks - pumpkin pie is not my thing.)  So using it in a savory context does actually make sense.
Delicious, creamy sense.

The sauce is a lightened-up cream sauce, with plenty of pumpkin and some sage to complement it.  Not to mention Parmesan cheese, which makes everything in the world better.  It is delightfully creamy and a gorgeous orange color; when tossed with whole-wheat pasta and served with a salad, it makes a light yet hearty and delicious meal!  This will definitely get made again in my kitchen...as soon as I find more pumpkin.  Which could be a while.

Pasta with Pumpkin Cream Sauce
Source:  Runs with Spatulas

Ingredients:
1 pound whole wheat pasta, such as spaghetti, fettuccine, or linguine
1 medium vidalia onion, minced
3 medium cloves garlic, minced
2 sprigs fresh sage leaves, finely chopped
1 tbsp olive oil
3/4 cup pumpkin puree
3/4 cup low-sodium chicken or vegetable broth
1/2 cup fat-free half and half
Kosher salt and freshly cracked black pepper
1/4 cup grated Parmesan cheese

Directions:
Bring a large pot of water to a boil over medium-high heat. Add salt, pour in the pasta and cook according to the directions on the box.

Heat the olive oil in a large saucepan over medium heat. Add the onion and garlic; cook for about 3 minutes, stirring, until they have softened. Stir in the pumpkin puree, broth, half & half, and half of the fresh sage. Reduce the heat to medium-low and cook for about 10 minutes, stirring frequently, until the sauce is slightly thickened. If you chopped your onion into bigger pieces (like I did...oops), now would be the time to blend it smooth in a blender, food processor, or with an immersion blender.  The smoother the sauce, the happier you will be!  If you blended it, transfer it back to the saucepan.  Season with salt and pepper to taste; keep warm on the lowest heat setting. 

Drain the pasta and add to the sauce, then add 2 tablespoons of the cheese and mix well. Serve and sprinkle with the remaining 2 tablespoons of cheese and the remaining sage.  This pairs excellently with a Caesar salad and a glass of white wine :) Enjoy!

Thursday, October 13, 2011

Black Bean and Sweet Potato Chili [Holiday Recipe Exchange]

 Since I may have helped you pack on a couple pounds with my last few recipes, here's one that should help take them off again: vegetarian chili!

Thanks to my insane schedule (school + three shows + wedding planning + attempts to eat and sleep), I'm always on the hunt for one-pot meals that keep me going off of leftovers for long periods of time.  I also love sweet potatoes (if you couldn't tell from the pancakes) and I'm always looking for new ways to use them.  The idea of combining black beans - another favorite - and sweet potatoes in a simple, healthy, long-lasting vegan chili sounded right up my alley!  Thus, this chili.

I started with a recipe and modified it as I went based on what I had in the apartment, then served it topped with a Mexican cheese blend.  Considering it was something I totally threw together, I was happy with how it turned out!  The only thing that would've made it better is corn...or cornbread :)
Come join the fun at the My Baking Addiction and GoodLife Eats Holiday Recipe Exchange sponsored by Le Creuset!  You could win a fantastic French Oven with which to make some chili of your own :)

Black Bean Sweet Potato Chili
Source: inspired by and heavily adapted from GoodLife {Eats}

Ingredients:
1 yellow onion, chopped
3 cloves garlic, minced
1 jalapeño pepper, diced and deseeded if desired
1 tbsp olive oil
1 1/4 tsp ground cumin
1 tbsp chili powder
2 tsp paprika
1/2 tsp dried oregano
1/2 tsp black pepper
1 29-oz can crushed tomatoes
8 oz vegetable broth
1 sweet potato, peeled and cut into 1/2-inch cubes
3 15.5-oz cans of black beans, drained but not rinsed
3/4 cup cooked brown rice
2 bay leaves
1 1/4 tsp cornstarch
Mexican cheese blend (for topping)


Directions:
Heat the olive oil in a large pot over medium high heat. Add the diced onion and saute for 5 minutes, until tender and golden. Add the garlic and the jalapeño pepper and saute for another minute, until fragrant. Add the cumin and chili powder and saute for about another 2 minutes.
Lower heat to medium-low and stir in the crushed tomatoes and broth, reserve 1/4 cup of broth for later use.  Scrape the bottom of the pot to remove any browned bits stuck there and add that tasty flavor back in. Add the remaining ingredients except the cornstarch and toppings.
In a small bowl whisk together the reserved 1/4 cup of broth and the cornstarch until smooth. Pour the cornstarch slurry into the chili pot. Stir until well mixed. Bring chili to a boil for about 2 minutes and then lower heat to low. Simmer over low heat uncovered (or covered with a splatter shield) for one hour, then cover the pot with a lid and simmer for another 30 minutes.
Ladle into bowls and serve topped with the Mexican cheese blend.  Enjoy!